
Heavenly Homemade Pumpkin Scones: Your Fall Must-Have Inspired by Starbucks
Introduction
Every fall, the leaves change, the air gets crisp, and all I can think about is the joy of sipping a warm beverage while indulging in a pastry that speaks to the season. Enter my obsession: Simple Starbucks Pumpkin Scones. I’ve enjoyed these delightful treats many times while chatting with friends at our favorite coffee shop. But as much as they hold a special place in my heart, I wanted to recreate that comforting goodness at home.
What makes these scones stand out is not just their aromatic blend of warm spices and sweet pumpkin but the texture—fluffy on the inside and perfectly crisp on the outside. Unlike some recipes that can be overly sweet or dense, my version strikes a harmonious balance, channeling those cozy coffee shop vibes right in your kitchen.
They’ve become a staple in our family, heating up memories of laughter, chilly mornings, and cozy afternoons. I can’t wait to share this recipe with you! By the end of this post, you’ll learn how to make these delightful pumpkin scones effortlessly, ensuring that every bite feels like a warm hug.
What Are Simple Starbucks Pumpkin Scones?
The Simple Starbucks Pumpkin Scones have carved out a cozy niche in the seasonal rotation of beloved pastries. Originating from Starbucks’ annual fall menu, these scones are a miraculous blend of pumpkin, earthy spices like cinnamon and nutmeg, all enveloped in flaky pastry goodness.
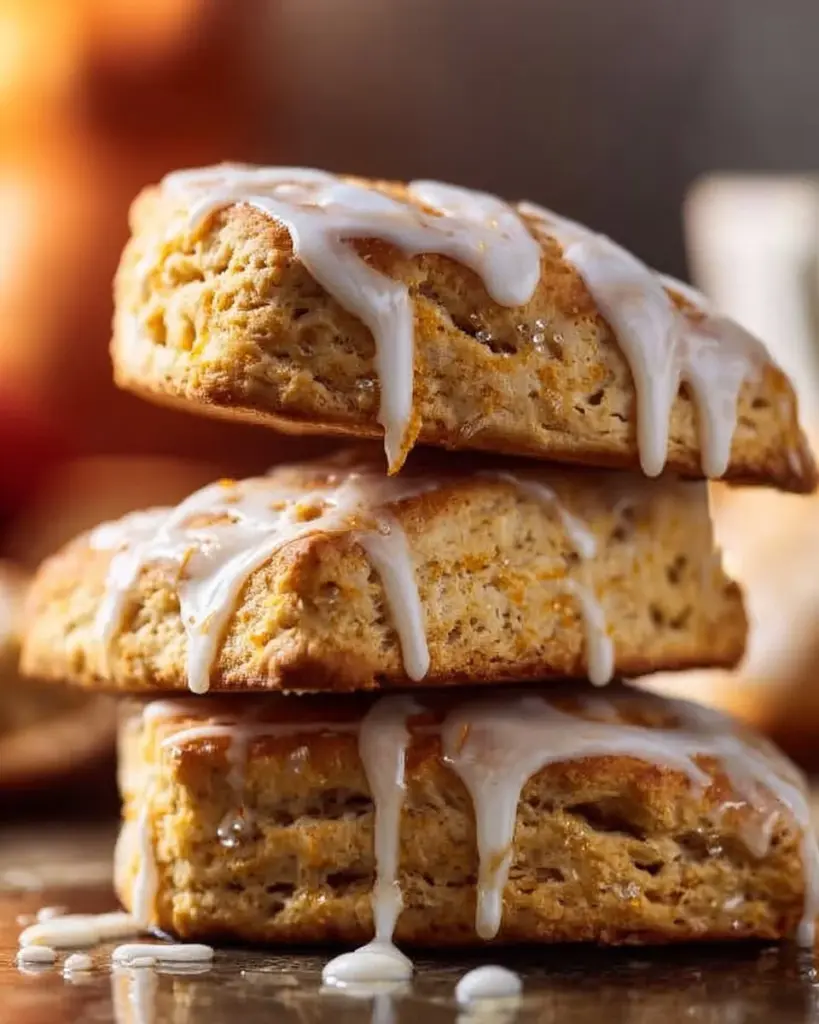
When you take a bite, you’re met with a symphony of flavors—a sweet yet subtly spiced experience that makes you feel like you’re sinking into autumn itself. The outside is golden-brown and crunch, while the inside is soft, creating a delightful contrast. Perfect for breakfast, coffee breaks, or even dessert, these scones embody everything we love about the season.
Why You’ll Love This Recipe
A Taste of Home: Instead of settling for store-bought pastries with questionable ingredients, why not whip up a batch of these homemade scones? You’ll know exactly what’s going into them, and trust me—they taste even better than the original!
Budget-Friendly: Making these scones at home is wallet-savvy. Each batch costs a fraction of what you’d pay for a single scone at Starbucks. Plus, you get more servings to enjoy!
Customization: One of the best parts about baking at home is the ability to make it your own. Want to add a sprinkle of chocolate chips, or maybe some nuts? Go for it! You can easily adjust the flavors to match your family’s preferences.
Simplicity: This recipe is perfect for bakers at any level. With just a few simple steps, you can whip up these delicious scones in no time. There’s nothing overly complicated; you’ll find yourself looking like a pro!
Time-Saving: From start to finish, you can have these scones ready in about 30 minutes, making them an excellent option for spontaneous gatherings or cozy breakfasts.
Ingredients Section
To create these delightful scones, you’ll need the following ingredients:
Dry Ingredients:
- 2 1/4 cups all-purpose flour (I love using King Arthur Flour for its consistency)
- 1/3 cup packed brown sugar (dark brown sugar for a richer flavor)
- 2 tbsp white sugar
- 1 tsp ground cinnamon
- 1/4 tsp ground cloves
- 1/4 tsp ground ginger
- 1/4 tsp ground nutmeg
- 1 tsp baking soda
- 1/2 tsp baking powder
- 1/4 tsp salt
Wet Ingredients:
- 1/2 cup unsalted butter, cold and diced (I recommend Kerrygold for its creamy quality)
- 1/2 cup chilled pumpkin puree
- 1/4 cup cold milk
- 1 cold egg
- 1 tsp vanilla extract
Glaze:
- 1 cup powdered sugar
- 2–3 tbsp heavy cream (I use land o’ lakes for the richness)
- 1 tbsp powdered sugar (for the spiced glaze)
- 1/4 tsp pumpkin puree
- 1/4 tsp pumpkin pie spice
Prep Note: Ensure your butter is cold! This is key for achieving that wonderful flaky texture in your scones. If you can, also chill your mixing bowls.
Step-by-Step Instructions
Prepare Your Oven: Preheat your oven to 400°F (200°C) and line a baking sheet with parchment paper or a silicone mat—this makes for easy cleanup!
Mix Wet Ingredients: In a medium bowl, whisk together the chilled pumpkin puree, cold milk, cold egg, and vanilla extract until smooth. For optimal scone texture, store this mixture in the fridge while you work on the dry ingredients.
Combine Dry Ingredients: In a large bowl, mix the flour, brown sugar, white sugar, spices, baking soda, baking powder, and salt. Ensure all ingredients are well combined.
Incorporate Butter: Cut the cold, diced unsalted butter into the flour mixture using a pastry cutter or your fingertips until it resembles coarse crumbs. Keep the butter cold; this is vital for crispy scones!
Form the Dough: Make a well in the center of the dry mix and pour in your chilled pumpkin mixture from Step 2. Gently fold with a rubber spatula until just combined—do not over-mix; a few floury bits add to the texture!
Shape and Cut: Turn the dough onto a lightly floured surface. Gently fold it over itself 2-3 times only until most of the flour is incorporated. Shape the dough into an 8×5 inch rectangle, about 1 inch thick, and cut into 6 squares.
Bake: Place the squares on the prepared baking sheet and pop it into the oven. Bake for 17–18 minutes until they’re risen and golden. Let the scones cool on the baking sheet for 10 minutes.
Make the Glaze: In the meantime, whisk powdered sugar and 2 tablespoons of heavy cream in a medium bowl until smooth. Adjust the consistency to your liking.
Spiced Glaze: In a small bowl, mix 1 tbsp of your glaze with powdered sugar, pumpkin puree, and pumpkin pie spice. Pour this into a ziplock bag for piping.
Glaze the Scones: Once the scones have cooled, generously spread about 1.5-2 tablespoons of the vanilla glaze over each, letting it drip down the sides. Use the spiced glaze for a decorative drizzle.
Enjoy: Allow the glazes to set for about 15–20 minutes, then gather your loved ones and enjoy every crumb!
Expert Tips & Tricks
Storage: Keep these scones fresh by storing them in an airtight container at room temperature for a couple of days or in the fridge for up to a week. They can also be frozen for up to a month!
Make-Ahead: Prep the dough a night before, wrap it well, and refrigerate. In the morning, simply shape and bake.
Troubleshooting: If your scones don’t rise, it might be due to old baking powder. Always check the expiration dates on your leavening agents!
Test for Freshness: Scones are best enjoyed fresh, but if you have leftover dough, form extra scones before freezing and bake straight from the freezer—just add a couple of extra minutes to the baking time.
Serving Suggestions
These pumpkin scones shine both on their own and alongside a cozy cup of tea or coffee. Consider pairing them with:
- A drizzle of honey or maple syrup for an extra sweet touch.
- A dollop of whipped cream for a dessert twist.
- Fresh fruit like strawberries or apple slices for a refreshing contrast.
For presentation, arrange the scones on a rustic wooden board, adding decorative leaves for a true autumn vibe. They’re perfect for brunch gatherings or cozy evenings at home.
Variations & Substitutions
- Flavors: Try adding chocolate chips, chopped nuts, or even cranberries for a fruity twist.
- Dietary Needs: Pumpkin scones can easily cater to dietary restrictions, too! Use gluten-free flour for a gluten-free version and substitute almond or soy milk for dairy-free options.
- Seasonal Flavors: Have fun with the seasons! Adding orange zest or dried fruits can change the vibe entirely.
Nutrition & Storage Info
- Prep time: 10 minutes
- Cook time: 18 minutes
- Total time: 30 minutes
- Yield: About 6 scones
- Estimated Calories: Approximately 240 calories per scone
- Storage: Room temperature for 2 days, fridge up to 1 week, freezer up to 1 month.
FAQ Section
Can I use canned pumpkin?
- Absolutely! Canned pumpkin puree works perfectly for this recipe. Just ensure it’s not pumpkin pie filling.
Why are my scones dense?
- Overmixing the dough is often the culprit. Mix just enough to combine for the best texture.
What can I use instead of all-purpose flour?
- Consider using whole wheat flour or a gluten-free blend. Just note that it may alter the texture slightly.
Can I add chocolate chips?
- Yes! Chocolate chips pair wonderfully with the spices. Add about 1/2 cup for a sweet touch.
How do I store leftovers?
- Place leftover scones in an airtight container at room temperature or in the fridge. They freeze well too!
What if I don’t have heavy cream?
- Whole milk or even half-and-half can replace heavy cream for the glaze, though it may not be as thick.
How do I know when they’re done baking?
- The scones should be lightly golden and firm to the touch. If they spring back when poked, they’re done!
Can I incorporate fresh pumpkin?
- Yes! Make sure to cook and puree the fresh pumpkin until smooth before adding it to the wet ingredients.
Are these scones suitable for freezing?
- Definitely! Freeze the unbaked shaped dough, and bake them directly from frozen when the craving strikes.
How long do they last in the freezer?
- They can last up to a month when properly wrapped and stored.
Conclusion
These Simple Starbucks Pumpkin Scones are more than just a tasty treat; they’re a connection to memories, warmth, and the magic of fall. Whether you’re enjoying them for breakfast or at afternoon tea, I promise they’ll bring joy with every bite.
If you give this recipe a try, I’d love to hear your thoughts or any variations you create! Feel free to drop a comment below, and don’t forget to check out my other beloved recipes for the season—you might find something else to spark your kitchen creativity!
Happy baking! 🍂🧡
PrintHeavenly Homemade Pumpkin Scones

Delightful pumpkin scones featuring warm spices, perfect for fall gatherings and cozy mornings.
- Prep Time: 10 minutes
- Cook Time: 18 minutes
- Total Time: 30 minutes
- Yield: 6 servings 1x
- Category: Baked Goods
- Method: Baking
- Cuisine: American
- Diet: Vegetarian
Ingredients
- 2 1/4 cups all-purpose flour
- 1/3 cup packed dark brown sugar
- 2 tbsp white sugar
- 1 tsp ground cinnamon
- 1/4 tsp ground cloves
- 1/4 tsp ground ginger
- 1/4 tsp ground nutmeg
- 1 tsp baking soda
- 1/2 tsp baking powder
- 1/4 tsp salt
- 1/2 cup unsalted butter, cold and diced
- 1/2 cup chilled pumpkin puree
- 1/4 cup cold milk
- 1 cold egg
- 1 tsp vanilla extract
- 1 cup powdered sugar
- 2–3 tbsp heavy cream
- 1 tbsp powdered sugar (for spiced glaze)
- 1/4 tsp pumpkin puree
- 1/4 tsp pumpkin pie spice
Instructions
- Preheat your oven to 400°F (200°C) and line a baking sheet with parchment paper.
- In a medium bowl, whisk together the pumpkin puree, milk, egg, and vanilla extract. Chill the mixture while preparing dry ingredients.
- In a large bowl, mix flour, brown sugar, white sugar, spices, baking soda, baking powder, and salt until combined.
- Cut the cold butter into the flour mixture until it resembles coarse crumbs.
- Make a well in the center of the dry mix, pour in the chilled pumpkin mixture, and gently fold until just combined.
- Turn the dough onto a floured surface, fold it over 2–3 times, shape it into an 8×5 inch rectangle, and cut into 6 squares.
- Place on the baking sheet and bake for 17–18 minutes until golden. Cool on the sheet for 10 minutes.
- Whisk powdered sugar and heavy cream for the glaze. Adjust the consistency as desired.
- Mix 1 tbsp of glaze with powdered sugar, pumpkin puree, and pumpkin pie spice for the spiced glaze.
- Once cooled, glaze the scones generously and let set for 15–20 minutes before serving.
Notes
Store in an airtight container for up to 2 days at room temperature or in the fridge for a week. Freeze for up to a month.
Nutrition
- Serving Size: 1 scone
- Calories: 240
- Sugar: 10g
- Sodium: 200mg
- Fat: 10g
- Saturated Fat: 6g
- Unsaturated Fat: 4g
- Trans Fat: 0g
- Carbohydrates: 35g
- Fiber: 2g
- Protein: 3g
- Cholesterol: 30mg


