
The Ultimate Easy Canned Apple Pie Filling Recipe: A Family Tradition with a Twist
Growing up, the kitchen was the heart of our home, especially when fall rolled around. The aroma of warm cinnamon and sugar wafting through the air signaled that my mom was gearing up for a family favorite: homemade apple pie. One of my most cherished memories is of her teaching me how to make the Easy Canned Apple Pie Filling Recipe we all loved. It was more than just a delicious dessert; it was a bonding experience, a sprinkle of love added to every jar, reminiscing about family gatherings filled with laughter and my grandmother’s stories.
This recipe isn’t just about filling a pie; it captures the essence of home, comfort, and the shared joy of cooking. What sets this easy canned apple pie filling apart from store-bought versions is its freshness and the ability to customize it to your liking—whether you fancy a squeeze of lemon zest, a hint of nutmeg, or a pinch of sugar. Today, I’ll walk you through this simple yet profound recipe that can transform your pies and become a part of your family’s story, just like it did for mine. Together, we will create a comforting filling that will have everyone asking for seconds—and maybe even the secret to your ultimate apple pie.
What Are Easy Canned Apple Pie Filling Recipes?
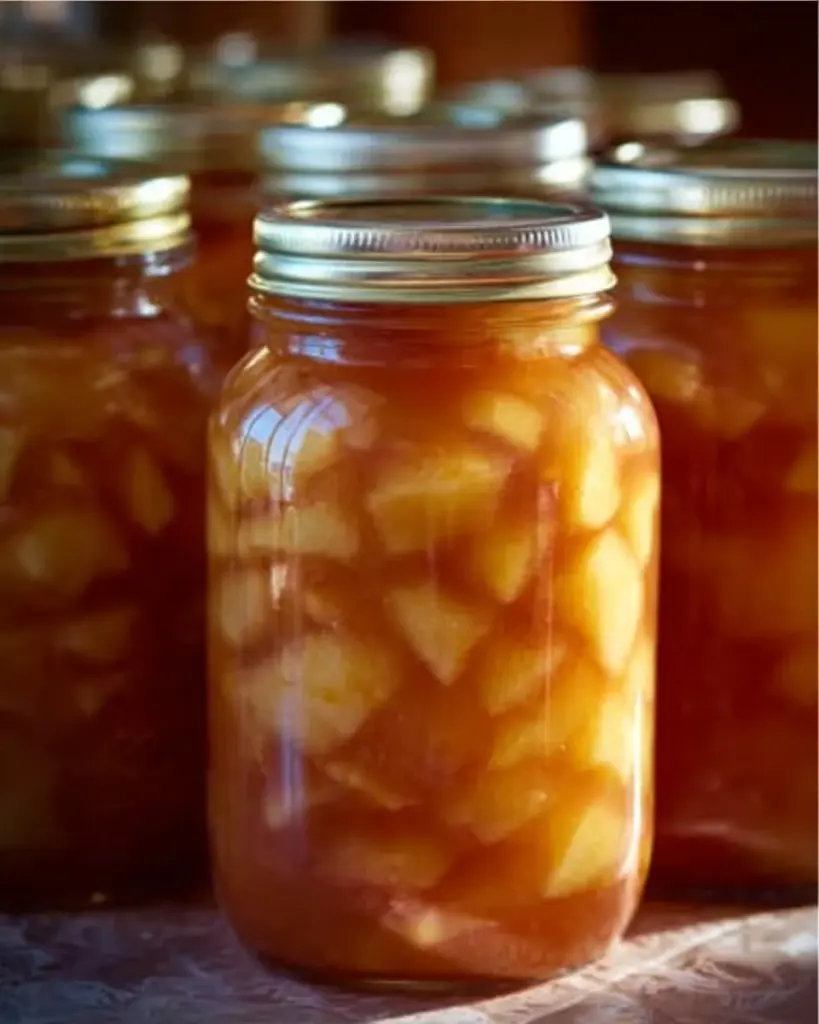
The Easy Canned Apple Pie Filling Recipe is a twist on a classic that allows you to capture apple goodness and seal it in jars, making it accessible all year round. Originating from traditional preserving methods, this recipe brings together the tartness of freshly harvested apples, the warmth of spices, and just the right amount of sweetness. Each bite is a harmonious blend of tender apples cooked just enough to retain their structure while bathing in a glorious, sweet, spiced syrup.
What makes this filling unique is its versatility; you can use it not only for pies but also for crumbles, pancakes, or even as a topping for yogurt and ice cream! This recipe is perfect for when you have an abundance of apples or simply want to fill your pantry with a taste of autumn whenever the need arises. Trust me—once you experience the joy and flavor of this homemade filling, you’ll never look back.
Why You’ll Love This Recipe
Homemade Goodness: When you make your own apple pie filling, you’re controlling the ingredients. Unlike store-bought versions filled with preservatives, this recipe uses fresh apples, allowing you to taste the natural flavors that really shine through.
Cost-Effective: Making your own filling is much cheaper than buying pre-made versions, especially when apples are in season. You’ll save money and fill your home with delightful aromas for a fraction of the cost!
Endless Customization: Want more spice? Add a dash of cardamom! Prefer it sweeter? Adjust the sugar to your liking. You can easily adapt this filling to suit your taste preferences or dietary needs, whether you’re gluten-free or low-sugar.
Convenience and Efficiency: Once you have a jar or two (or several!) stored away, you can whip up a stunning apple pie in no time. The filling keeps well, making it the perfect go-to for unscheduled gatherings or emergencies.
Easy to Make: This isn’t a complicated recipe. Even if you’re new to canning, I promise that following my step-by-step instructions will leave you feeling like a pro right from the first batch!
Ingredients
Here’s what you’ll need for the Easy Canned Apple Pie Filling Recipe. When sourcing your ingredients, remember that quality matters!
Main Ingredients
- Apples (6-8 medium): Use a mix of Granny Smith for tartness and Honeycrisp for sweetness. Fresh, crisp apples work best.
- Sugar (1 cup): I prefer using organic cane sugar for a cleaner taste, but brown sugar gives an amazing caramel-like flavor.
- All-Purpose Flour (1/4 cup): This acts as a thickener. For a gluten-free option, you can use cornstarch or arrowroot powder.
- Cinnamon (2 tsp): Always go for ground cinnamon for the best flavor, but feel free to experiment with other spices.
- Nutmeg (1/4 tsp): A dash of nutmeg elevates the flavor profile.
- Lemon Juice (2 tbsp): Fresh lemon juice brightens the flavor and prevents apples from browning.
- Butter (2 tbsp): Use unsalted, but make sure it’s at room temperature for easy blending.
Notes on Preparation
- Apples should be peeled and sliced thinly to ensure even cooking.
- Room temperature butter helps it mix smoothly with the sugar to form a syrup-like consistency.
Step-By-Step Instructions
Follow these detailed steps to create your Easy Canned Apple Pie Filling:
Prepare the apples: Peel, core, and slice your apples into thick wedges. You should have around 8 cups of sliced apples.
Cook the apples: In a large pot over medium heat, combine 8 cups of sliced apples, 1 cup of sugar, 2 tbsp of lemon juice, 2 tsp of cinnamon, 1/4 tsp of nutmeg, and your choice of thickener. Stir well to coat the apples, and cook for about 8-10 minutes. Keep stirring until the juices start to release and the mixture thickens.
Chef’s Tip: Make sure the apples remain somewhat firm during cooking. You want them to hold their shape when the pie is baked.
Prepare the jars: While your apples are cooking, prepare your canning jars by sterilizing them in boiling water for 10 minutes. Dry them with a clean towel.
Fill the jars: Once the mixture is thickened, remove it from heat and stir in the 2 tbsp of room temperature butter. Using a ladle, carefully fill the hot jars with the apple mixture, leaving about 1/2 inch of headspace.
Common Mistake: Don’t overfill the jars—this can cause sealing issues!
Seal and process: Wipe the rims of the jars clean and place the lids and rings on securely. Process jars in a water bath for 25 minutes to ensure a good seal.
Cool and store: Let the jars cool on a clean towel for 24 hours. Check that the lids have sealed correctly—if the lid pops when pressed, it hasn’t sealed well. Store any unsealed jars in the refrigerator and consume within a week.
Expert Tips & Tricks
Storage Recommendations: Store sealed jars in a cool, dark place, like your pantry. They should last up to a year!
Make-ahead Instructions: This filling can be made up to a month in advance. The flavors deepen over time, making it even more delicious!
Troubleshooting Common Problems: If your filling is too runny, you can return it to the pot, add a little more thickener, and cook it a bit longer. If it’s too thick, add a splash of water or juice while reheating.
Experiment with Flavors: Try adding other spices like cloves or ginger for a unique twist that complements your apple pie.
Ensure Quality Canning Supplies: Invest in good-quality mason jars and lids to ensure a perfect seal every time.
Serving Suggestions
This Easy Canned Apple Pie Filling is incredibly versatile! Here are a few ideas to serve it up:
- Homemade Pies: Obviously, the go-to use! Layer it in a pie crust, add a crumbly topping, and bake until golden brown.
- Pancakes & Waffles: Use it as a warm topping drizzled over your pancakes, waffles, or even French toast for a delightful Sunday breakfast.
- Ice Cream Toppings: Warm the filling and scoop it over vanilla ice cream for a cozy dessert to share with friends.
- Yogurt Parfaits: Layer it with yogurt and granola for a tasty breakfast or snack option.
Variations & Substitutions
Flavor Combinations: Substitute some apples with pear for a delightful twist, or add dried cranberries for a burst of tartness.
Dietary Restrictions: For a low-sugar version, substitute sugar with stevia or monk fruit. Adjust the amount based on sweetness preference.
Seasonal Variations: In autumn, try adding pumpkin spice to get a festive fall flavor. In winter, a touch of peppermint extract could also add a unique twist.
Nutrition & Storage Info
- Prep Time: 15 minutes
- Cook Time: 25 minutes
- Total Time: 40 minutes
- Yield: About 6-8 pint jars (depending on how packed your apples are)
- Estimated Calories per Serving: Approximately 150 calories for each serving (1/2 cup)
- Storage Instructions: Sealed jars can be stored in a cool, dark place. Unsealed jars should be kept in the fridge and consumed within 1 week.
- Shelf Life: If processed correctly, sealed jars last up to one year; however, the taste is best enjoyed within 6 months.
FAQ Section
Can I use frozen apples for this recipe?
- While fresh apples yield the best texture, you can use frozen, just ensure they are thawed and drained well before cooking.
What types of apples work best for canning?
- A mix of tart apples like Granny Smith and sweeter options like Fuji or Honeycrisp offer a balanced flavor and texture.
How do I know if my jars have sealed properly?
- After cooling, press the center of each lid. If it doesn’t pop back, it’s sealed. If it pops, refrigerate that jar and consume within a week.
Can I can this filling without processing it?
- For safety and longevity, it’s recommended to water bath can it; otherwise, it should be refrigerated and consumed quickly.
Is it possible to modify the sugar content?
- Absolutely! Adjust according to your taste preferences, or use sugar substitutes for a healthier option.
Do I need to peel the apples?
- Yes, peeling is essential to get that classic smooth texture when filling pies.
What if my filling is too thick or too thin?
- Adjust with more thickener for thin filling; add a splash of water to thin out a too-thick mixture.
Can I use this filling for other desserts?
- Yes! It’s perfect for crumbles, dumplings, pancakes, or even as a topping for cheesecake.
How do I avoid browning apples before cooking?
- Toss your sliced apples with lemon juice right after cutting to keep them from oxidizing.
How can I make this filling dairy-free?
- Simply omit the butter; it won’t alter the overall flavor much, as the filling is mostly flavored by the spices and apples.
Conclusion
In wrapping up, I hope this Easy Canned Apple Pie Filling Recipe resonates with you as much as it does with me. It’s more than just a recipe; it’s a way to create memories, flavor your gatherings, and enjoy the essence of fall all year round. So gather those apples, channel your inner baker, and try this recipe—you won’t be disappointed! I’d love to hear your feedback or any twists you create along the way. And don’t forget to check out my other delicious recipes for more culinary adventures! Happy baking!
Easy Canned Apple Pie Filling
A simple and customizable apple pie filling recipe that captures the essence of fall and can be preserved for year-round enjoyment.
- Prep Time: 15 minutes
- Cook Time: 25 minutes
- Total Time: 40 minutes
- Yield: 6-8 pint jars 1x
- Category: Dessert
- Method: Canning
- Cuisine: American
- Diet: Vegetarian
Ingredients
- 6–8 medium Apples (a mix of Granny Smith and Honeycrisp)
- 1 cup Sugar (organic cane sugar preferred)
- 1/4 cup All-Purpose Flour (or cornstarch for gluten-free)
- 2 tsp Cinnamon
- 1/4 tsp Nutmeg
- 2 tbsp Lemon Juice
- 2 tbsp Butter (unsalted, at room temperature)
Instructions
- Prepare the apples: Peel, core, and slice your apples into thick wedges, approximately 8 cups of sliced apples.
- Cook the apples: In a large pot, combine apples, sugar, lemon juice, cinnamon, nutmeg, and flour. Cook over medium heat for 8-10 minutes until thickened.
- Prepare the jars: Sterilize the canning jars in boiling water for 10 minutes.
- Fill the jars: Stir in butter into the thickened mixture and ladle the filling into hot jars, leaving 1/2 inch of headspace.
- Seal and process: Clean the jar rims, seal, and process in a water bath for 25 minutes.
- Cool and store: Let the jars cool for 24 hours and check seals. Store sealed jars in a cool, dark place.
Notes
Store sealed jars for up to a year. Experiment with spices and flavors for unique twists.
Nutrition
- Serving Size: 1/2 cup
- Calories: 150
- Sugar: 30g
- Sodium: 10mg
- Fat: 6g
- Saturated Fat: 4g
- Unsaturated Fat: 2g
- Trans Fat: 0g
- Carbohydrates: 36g
- Fiber: 2g
- Protein: 1g
- Cholesterol: 15mg


