
Table of Contents
Table of Contents
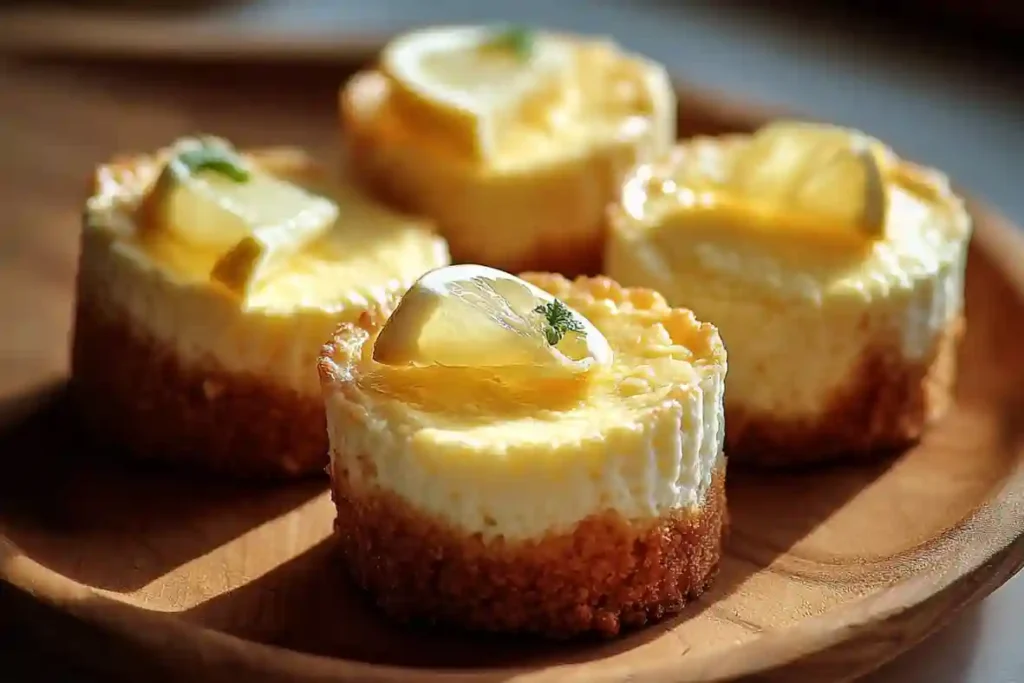
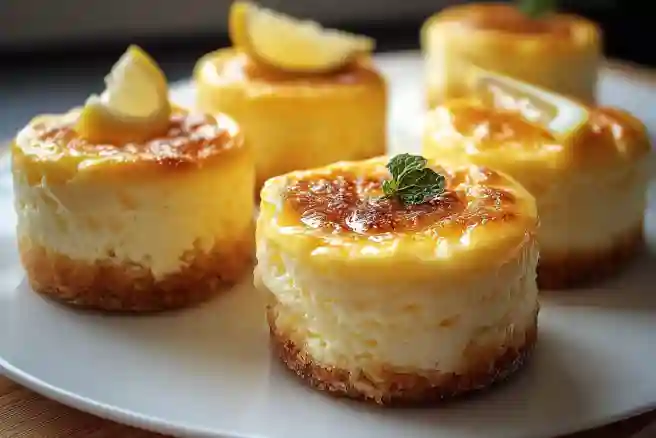
Indulge your sweet tooth with these delicious Mini Lemon Cheesecakes! Perfectly sized for a delightful bite, these mini desserts capture the fresh, zesty flavor of lemons paired with the creamy texture of traditional cheesecake. This recipe is ideal for family gatherings, potlucks, or just a sweet treat after dinner. Let’s explore why you’ll fall in love with these little wonders.
Why You’ll Love Mini Lemon Cheesecakes
Perfect for Families: Quick and Delicious
Mini Lemon Cheesecakes are not only quick to prep, but they’re also an absolute hit with families. Their manageable size makes them a favorite among both kids and adults. The bright lemon flavor is refreshing compared to heavier desserts, making them a go-to choice for summer parties or casual weeknight treats.
Nutritional Benefits and Simple Ingredients
While these cheesecakes are undeniably indulgent, they can also be made with healthier substitutions if desired. The ingredients are simple and commonly found in most kitchens, making them an accessible treat. Using fresh lemons adds not just flavor but also plenty of Vitamin C, promoting a healthy immune system.
Flexibility: Adaptable and Budget-Friendly
The beauty of Mini Lemon Cheesecakes lies in their versatility. The recipe can easily be adapted to suit personal preferences, dietary restrictions, or seasonal flavors. Want a gluten-free version? Swap out the graham cracker crust for ground nuts or a gluten-free crumb. This dessert suits every budget and dietary need!
Essential Ingredients for the Recipe
PrintMini Lemon Cheesecakes: A Delightful Treat for Every Occasion
Bright and creamy individual lemon cheesecakes with a buttery graham cracker crust and tangy lemon topping. These no-bake mini desserts are perfect for parties and spring gatherings!
- Prep Time: 25 mins
- Cook Time: 0 mins
- Total Time: 4 hours 25 mins (includes chilling)
- Yield: 12 mini cheesecakes 1x
- Category: Dessert
- Method: No-Bake
- Cuisine: American
- Diet: Vegetarian
Ingredients
- For the Crust:
- 1 ½ cups graham cracker crumbs
- 5 tbsp melted butter
- 2 tbsp granulated sugar
- For the Filling:
- 16 oz (2 packages) cream cheese, softened
- ¾ cup powdered sugar
- 1 tbsp lemon zest
- 3 tbsp fresh lemon juice
- 1 tsp vanilla extract
- 1 cup heavy whipping cream, cold
- For the Topping:
- ½ cup lemon curd
- Fresh berries (for garnish)
- Mint leaves (for garnish)
Instructions
- Make Crusts: Mix graham crumbs, melted butter, and sugar. Press 2 tbsp into each liner of a 12-cup muffin tin. Chill 15 minutes.
- Make Filling: Beat cream cheese until smooth. Add powdered sugar, lemon zest, lemon juice, and vanilla. Beat until creamy.
- In separate bowl, whip heavy cream to stiff peaks. Gently fold into cream cheese mixture.
- Divide filling among cups (about ¼ cup each). Smooth tops with spoon.
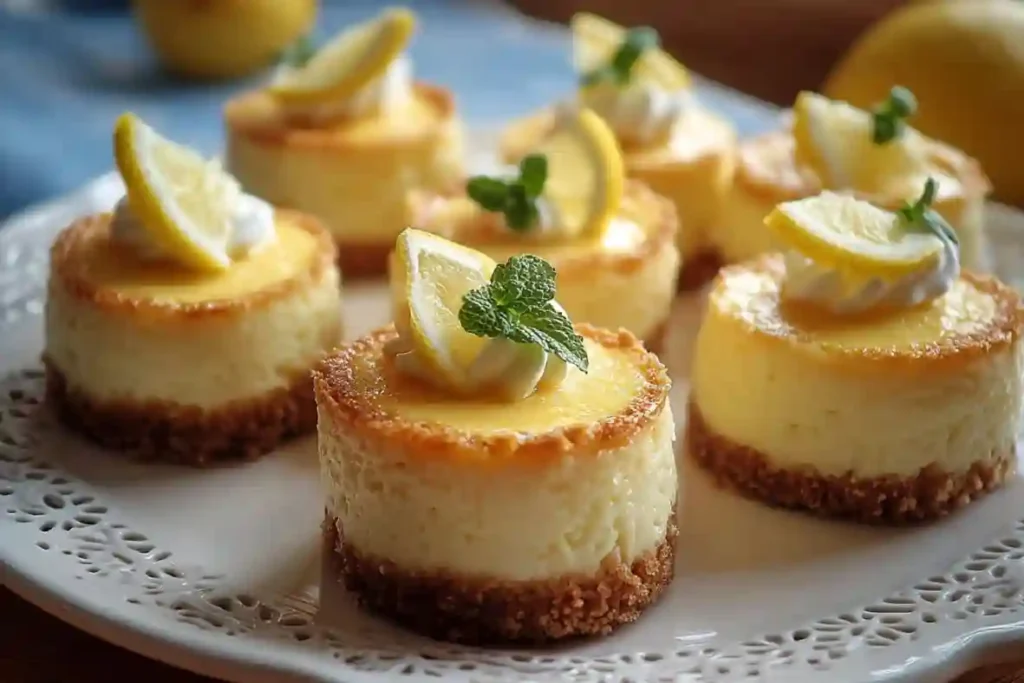
- Chill 4 hours or overnight. Before serving, top each with 2 tsp lemon curd and garnish with berries.
Notes
- Use a piping bag for neater filling distribution
- For gluten-free version: Use gluten-free graham crackers
- Make ahead: Stores well in fridge for 3 days
- For firmer texture: Add ½ tsp unflavored gelatin to filling
- Lemon variation: Add 1 tbsp limoncello to filling for adult version
Nutrition
- Serving Size: 1 mini cheesecake
- Calories: 280 kcal
- Sugar: 20g
- Sodium: 190mg
- Fat: 20g
- Saturated Fat: 12g
- Unsaturated Fat: 6g
- Trans Fat: 0.5g
- Carbohydrates: 23g
- Fiber: 0.5g
- Protein: 3g
- Cholesterol: 65mg
Graham Cracker Crumbs: The Base of Your Cheesecake
Graham cracker crumbs serve as the perfect base for your cheesecake with their slightly sweet and crunchy texture. If you’d like to alter this, consider using digestive biscuits or a mixture of crushed nuts for an alternative crust. Each option will bring a distinct flavor profile.
Cream Cheese: The Creamy Star
Cream cheese is essential to achieving that smooth, rich filling that everyone loves in a cheesecake. For a lower-fat version, you can substitute Neufchâtel cheese or Greek yogurt for a tangy twist. Just be sure to whip it until creamy for the best texture.
Fresh Lemons: The Zing!
Lemon juice and zest are what genuinely make this dessert shine. Fresh lemons offer a vibrant flavor and aroma; however, bottled lemon juice can be used as a substitute in a pinch. Remember, the zest adds an extra layer of flavor that shouldn’t be skipped!
Ingredient Preparation
Step 1 – Prepare the Crust
Begin by combining the graham cracker crumbs, 2 tablespoons of sugar, and melted butter in a bowl. Mix until everything is well-blended and resembles wet sand. This step is crucial for creating a sturdy crust that holds each cheesecake together.
Step 2 – Prepare the Cream Cheese Filling
In a separate bowl, beat the softened cream cheese with 1/2 cup of sugar until smooth and creamy. Add in the eggs, one at a time, ensuring they are fully incorporated. This mixing process builds air into the mixture, resulting in a lighter cheesecake.
Step 3 – Finalize the Mixture
Once your filling is smooth, gently fold in the sour cream, flour, lemon juice, lemon zest, and vanilla extract. This combination will yield a perfectly balanced tartness that defines Mini Lemon Cheesecakes. Make sure to mix just until everything is combined to avoid overworking the batter.
Step-by-Step Cooking Instructions
Step 1 – Initial Preparation
Preheat your oven to 325°F (160°C). Line a muffin tin with cupcake liners for easy removal. This ensures a clean presentation when it’s time to serve your cheesecakes!
Step 2 – Ingredient Assembly
Distribute your graham cracker mixture evenly among the muffin cups, pressing down firmly to create a solid base. Next, carefully pour the cream cheese filling over the crust, filling each cup about 3/4 complete to allow for slight rising during baking.
Step 3 – Baking and Finishing Touches
Bake for approximately 20-25 minutes, or until the edges are set but the centers are still slightly jiggly. The cheesecakes will firm up as they cool. Let them cool completely in the pan before moving them to a wire rack. Add a dollop of whipped cream or lemon curd on top once they’ve cooled for that extra touch!
Tips for an Even Tastier Version
Adding Extra Ingredients
Consider adding a swipe of blueberry compote or raspberry puree on top of your cheesecakes for a colorful twist. Topping them with a sprinkle of fresh herbs like mint can also add a refreshing flare.
Techniques to Enhance Flavor
Incorporate a splash of limoncello into the filling for an adult twist! This Italian lemon liqueur can elevate flavor profiles and bring a sophisticated edge to your homemade treats.
Adjustments for Preferences
If you’re serving individuals with dietary restrictions, consider using coconut cream instead of cream cheese for a dairy-free option or experimenting with sugar alternatives for a lower-calorie version.
Recipe Variations and Adaptations
Vegetarian Option
This recipe is naturally vegetarian, so you can enjoy these delicious cheesecakes without worrying about the inclusion of meat. Use plant-based cream cheese if you want to cater to vegan friends.
Gluten-Free or Low-Carb Option
For a gluten-free alternative, substitute traditional graham crackers with almond flour or gluten-free cookie crumbs. For a low-carb version, explore using a no-carb sweetener with an almond flour crust.
Other Adaptations
Feel free to mix it up by incorporating seasonal fruits. Think strawberries in spring or pumpkin spice during the fall to keep this recipe fresh and exciting throughout the year.
Serving Suggestions
Salad or Soup Ideas
Start your meal off with a refreshing spinach salad tossed in a light vinaigrette or creamy tomato soup for a cozy autumn evening. These lighter courses will complement the rich flavors of your Mini Lemon Cheesecakes beautifully.
Hearty Sides
Pair your cheesecakes with hearty sides, such as homemade bread or roasted vegetables, which can help balance out the sweetness of the desserts and provide a well-rounded meal.
Drink Recommendations
To keep the flavors harmonized, serve your cheesecakes with refreshing iced tea, a crisp white wine, or lemon-infused mocktails. This trio of drink choices will elevate the entire dining experience.
Storage and Reheating Tips
How to Store Leftovers
If you have leftovers (though we doubt it!), store your Mini Lemon Cheesecakes in an airtight container in the fridge. They’ll stay fresh for up to five days.
Reheating Techniques
To enjoy them warm, reheat in a microwave for about 15-20 seconds. Alternatively, pop them into the oven at 325°F for about 10 minutes. Keep an eye on them so they don’t overcook!
Portioning Tips
Try portioning your leftovers by freezing individual servings. This makes for a perfect treat whenever you’re craving something sweet!
Nutritional Information and Benefits
Nutritional Values per Serving
Each Mini Lemon Cheesecake is approximately 180 calories, offering 3g of protein and 2g of fiber. They are relatively moderate for a dessert, especially considering their delightful flavor.
Ingredient Benefits
Lemons are known for their high vitamin C content, while cream cheese can be a good source of calcium. Enjoy these cheesecakes, knowing they also provide some nutritional value alongside their indulgent taste.
Recommended Portions
Two or three mini cheesecakes make a perfect serving for dessert, providing just the right balance of sweetness without feeling overindulgent.
Common Mistakes to Avoid
Issue 1 – Overmixing the Batter
Be cautious about overmixing your cream cheese filling. Mix until just combined to maintain a light and fluffy texture.
Issue 2 – Not Cooling Properly
Allow the cheesecakes to cool completely before serving. This step is essential to set the filling and enhance the flavors. A quick chill in the fridge post-baking works wonders.
Issue 3 – Skipping Quality Ingredients
Using fresh lemons and high-quality cream cheese will significantly enhance the taste of your mini cheesecakes. Don’t skimp on these key ingredients for the best result!
Inspiring Conclusion
Mini Lemon Cheesecakes are a special dessert that combines the zesty charm of lemons with the creamy goodness of cheesecake. They are perfect for any gathering, big or small, and encourage creativity and experimentation in the kitchen! So grab your ingredients, gather the family, and dive into the joyous experience of baking together. Don’t forget to share your results and celebrate the sweetness of life!
Strawberry Cream Cheese Pie: A Delightful Dessert for All Occasions
FAQ (Frequently Asked Questions)
- Can I prepare this recipe ahead of time? Absolutely! You can make these Mini Lemon Cheesecakes a day ahead and store them in the refrigerator until serving.
- What are the best substitutes for cream cheese? You can use Greek yogurt for a tangy touch or vegan cream cheese for a dairy-free option.
- How do I know when the cheesecakes are done? They should be set around the edges but slightly jiggly in the middle. They will firm up as they cool.
- Can I use bottled lemon juice? While fresh lemon juice is always preferable for the best flavor, bottled lemon juice can be used as a substitute in a pinch.
- How long do leftovers last? Appropriately stored in the fridge, they can last up to five days.
- Is there a way to freeze these cheesecakes? Yes! They freeze well. Just wrap them individually and store them in an airtight container.
- Can I add other flavors to this recipe? Certainly! Consider adding berries, chocolate, or even flavored extracts for a fun twist.
- What toppings do you recommend? Whipped cream, lemon zest, or lemon curd are fantastic choices to elevate your dessert.
- Can I make these in different sizes? Yes! You can adjust the baking time if you make larger or smaller versions.
- What’s the best way to remove them from the pan? Allow them to cool completely before carefully peeling away the liners. Use a small spatula to help if needed.


