
Table of Contents
Table of Contents
As the leaves turn golden and the air becomes crisp, there’s a magical nostalgia that fills my kitchen every October. It’s that time of year when the scent of freshly baked cookies beckons, triggering memories of childhood Halloween celebrations filled with laughter and creativity. One of my all-time favorites to whip up are Spider Web Sugar Cookies—not only do they taste heavenly, but they also add a whimsical touch to any Halloween gathering.
These sugar cookies hold a special place in my heart, not just for their delightful taste and crisp texture but for the intricate spider web designs that transform them into true works of art. Whether it’s a bake-off with family or simply a cozy night in, decorating these cookies has become a cherished ritual in my home. The beauty of this recipe lies in its perfect balance of sweetness and the versatility it offers. Unlike other recipes that might lean too heavily on one flavor, my Spider Web Sugar Cookies are tender, buttery, and just the right amount of sweet.
Stick around, and I promise you’ll learn how to create these charming cookies step by step, along with tips to make your own beautiful spider web designs. Get ready to impress your friends and family with a treat that’s both delicious and delightfully spooky!
What Are Spider Web Sugar Cookies?
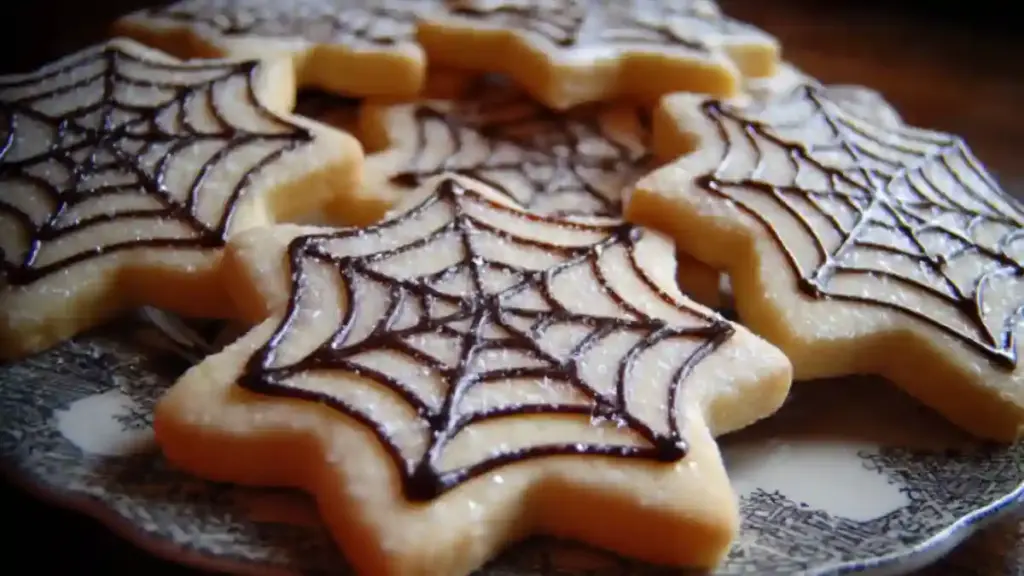
Spider Web Sugar Cookies are a delightful fusion of classic sugar cookie goodness with the whimsical charm of Halloween. This treat has its roots deep in classic baking traditions but has been given a playful seasonal twist. Originating from festive celebrations across many cultures, these cookies embody the spirit of creativity in the kitchen—especially during the spookiest time of year!
These cookies are soft yet sturdy, with a light crunch around the edges and a melt-in-your-mouth texture in the center. Their delicate sweetness serves as a blank canvas for the striking black icing that forms the spider web design—a signature look that elevates them from ordinary to extraordinary. They’re perfect for Halloween parties, cookie exchanges, or as a fun family baking project on a crisp October day.
Consider making them when you want to indulge in both the taste of nostalgia and the experience of decorating while creating lasting memories with loved ones. They are a canvas for creativity, making every batch uniquely yours!
Why You’ll Love This Recipe
You might wonder what sets my Spider Web Sugar Cookies apart from the rest. Well, here are compelling reasons to make this recipe your go-to this Halloween season:
Flavorful and Festive: Unlike store-bought cookies, which can be overly sweet and artificial, these sugar cookies deliver a delightful balance of buttery richness and sweetness. The flavors of pure vanilla extract shine through, making each bite a treat for the senses.
Cost-Effective: Why spend a fortune on store-bought treats when you can whip up a batch at home with just a handful of basic ingredients? This recipe is not only budget-friendly but also yields a generous amount of cookies, perfect for sharing.
Customize to Your Heart’s Content: One of the best parts about baking at home is the creative liberty it allows. Whether you want to make them gluten-free or swap in almond extract for a nutty twist, the possibilities are endless. Add sprinkles, edible glitter, or even flavored icing—the choice is yours!
Enjoy the Baking Process: Baking these cookies is an enjoyable experience that the whole family can partake in. Kids will love helping with the dough and decorating! Plus, the chilling and decorating process builds anticipation and excitement.
Beginner-Friendly: Don’t worry if you’re not a baking pro; this recipe is straightforward and perfect for bakers of all skill levels. With the detailed instructions I provide, you’ll be crafting delicious cookies in no time.
With each step described clearly, making these delightful cookies will be as fun as eating them!
Ingredients
To make these treats unforgettable, using quality ingredients is essential. Here’s what you’ll need, listed in order of use:
3 cups (360g) All-Purpose Flour: For that perfect texture. I recommend using a brand like King Arthur or Gold Medal for consistent results.
1/2 teaspoon Baking Powder: This gives your cookies just the right lift.
1/4 teaspoon Salt: Enhances the sweetness and balances flavors.
1 cup (226g) Unsalted Butter, softened to room temperature: Use high-quality butter, like Plugra, for a rich taste. Make sure it’s at room temperature for easy blending.
1 cup (200g) Granulated Sugar: Sweetens the dough beautifully.
1 large Egg, at room temperature: Vital for binding your dough together.
2 teaspoons Pure Vanilla Extract: Don’t skimp here! Pure vanilla adds a depth of flavor that imitation extracts just can’t match.
4 cups (480g) Powdered Sugar, sifted: Essential for the royal icing that gives these cookies their signature appearance.
3 tablespoons Meringue Powder: Helps to firm up the icing, so it dries perfectly.
6 to 9 tablespoons Lukewarm Water: The key to achieving the right consistency in your icing.
1 teaspoon Pure Vanilla Extract or Almond Extract: Another layer of flavor for your icing. You can’t go wrong with either!
Black Gel Food Coloring: Create that striking spider web design with this vivid color. Wilton is my favorite brand for gel food coloring.
Prep Notes:
Make sure your butter is at room temperature for easy mixing, and always sift your powdered sugar to avoid lumps in your icing.
Step-by-Step Instructions
Part 1: Craft the Cookie Dough
In a medium bowl, whisk together 3 cups flour, 1/2 teaspoon baking powder, and 1/4 teaspoon salt; set aside.
In a large mixing bowl, beat together 1 cup softened unsalted butter and 1 cup granulated sugar with an electric mixer until fluffy—about 3-4 minutes.
Add in 1 large egg and 2 teaspoons vanilla extract, and beat until well combined.
Gradually add the dry mixture to the wet ingredients, mixing until just combined. Be careful not to over-mix.
Wrap the dough in plastic wrap and chill for at least 1 hour. This helps prevent the cookies from spreading during baking.
Part 2: Bake Cookies
Preheat your oven to 375°F (190°C). Line a baking sheet with parchment paper.
Roll out the chilled dough on a lightly floured surface to about 1/4 inch thick. Use a cookie cutter to cut out shapes—classic circles work great, but feel free to get creative!
Place the cookie shapes on the prepared baking sheet, leaving space between them. Bake for 9-11 minutes, or until the edges are lightly golden.
Allow the cookies to cool on the baking sheet for a few minutes before transferring them to a wire rack to cool completely.
Part 3: Make Royal Icing
In a mixing bowl, combine 4 cups sifted powdered sugar and 3 tablespoons meringue powder.
Slowly add 6 to 9 tablespoons lukewarm water, stirring until the mixture reaches stiff peaks. You may need to adjust the water slightly for the right consistency.
Add a few drops of black gel food coloring until you reach the desired shade for your spider webs.
Part 4: Decorate
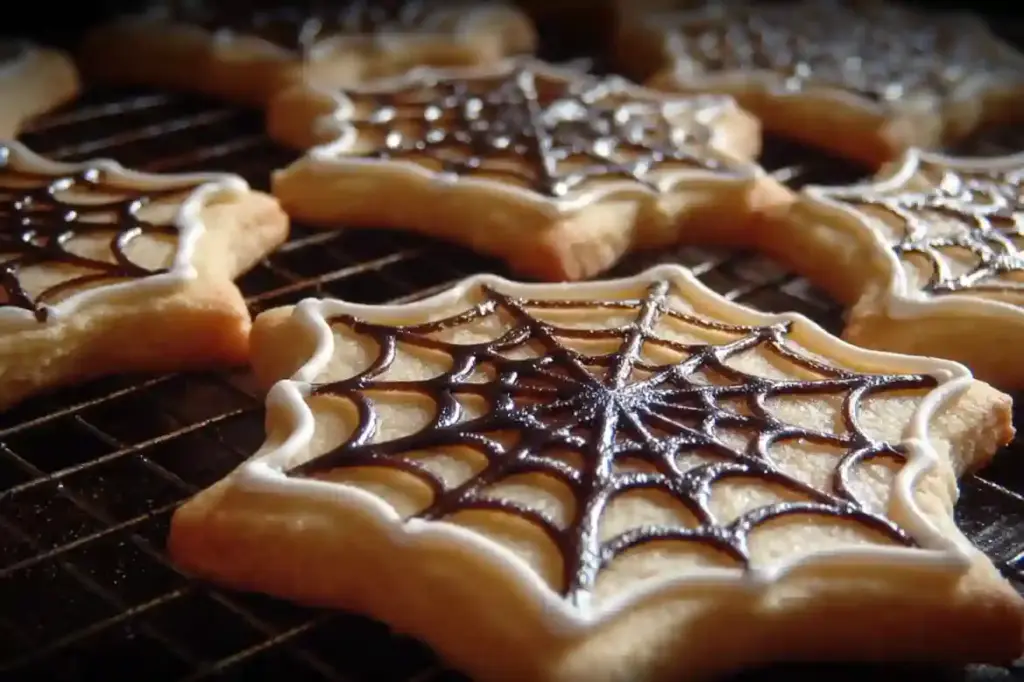
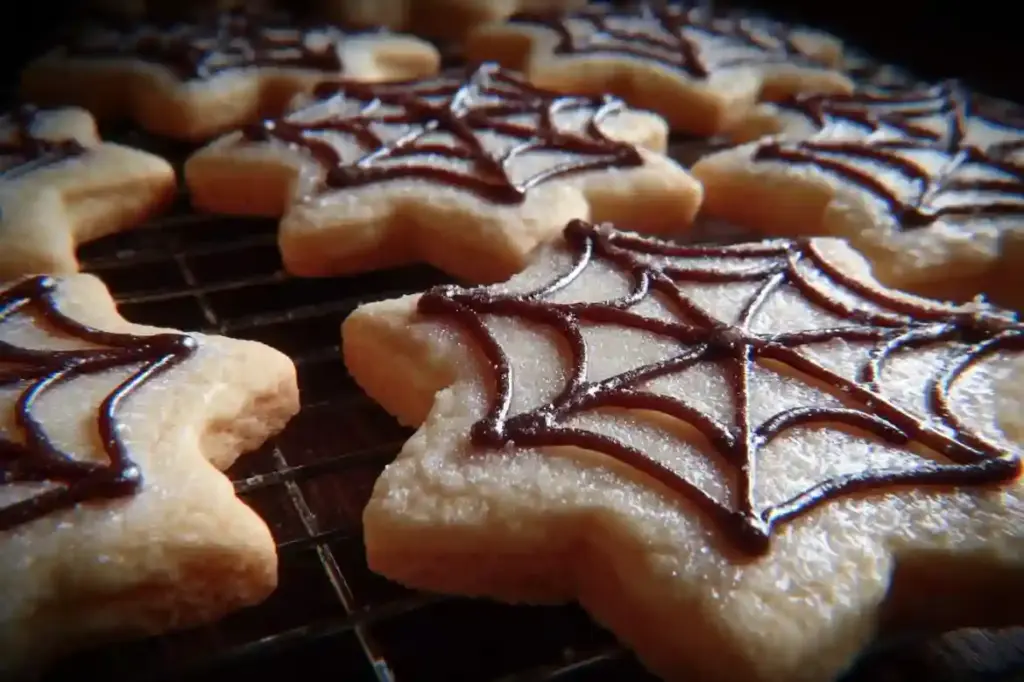
Using a piping bag fitted with a fine tip, flood the cooled cookies with white icing and let it set for about 30 minutes.
Once the base icing is dry, use your black icing to pipe lines, creating a spider web design. Don’t stress about perfection—embrace the creative chaos!
Allow the decorated cookies to dry completely before storing them in an airtight container.
Chef’s Tips:
- Chill the dough: This is crucial for preventing spread; don’t skip this step!
- Use a light hand while decorating: Less pressure means more control over your icing.
Common Mistakes to Avoid:
- Mixing too much can lead to tough cookies—mix just until combined.
- Make sure your cookies are fully cool before decorating; warm cookies cause the icing to melt.
Expert Tips & Tricks
Storage Recommendations: Keep your cookies in an airtight container at room temperature for up to a week. If you’re storing decorated cookies, add a layer of parchment paper between them to avoid smudging.
Make-ahead Instructions: You can prepare the cookie dough and ice it a few days ahead. Just ensure they’re well-wrapped to prevent them from drying out.
Troubleshooting Common Problems: If your icing is too runny, mix in more powdered sugar until it thickens. If it’s too stiff, add a drop or two of water.
For Extra Flavor: Try adding a pinch of cinnamon or nutmeg to the dough for a hint of spice that complements the sweetness.
Practice Makes Perfect: If you’re new to icing, practice on a few extra cookies or even parchment paper to get your piping technique down.
Serving Suggestions
These enchanting Spider Web Sugar Cookies make a perfect addition to any Halloween spread. Serve them alongside a punch bowl filled with “witches’ brew,” or pair them with rich hot cocoa topped with marshmallows for a cozy treat. I love displaying them on a decorative platter with candles, creating a festive backdrop that will surely impress your guests!
These cookies are also lovely as homemade favors for Halloween parties, wrapped in clear bags tied with a colorful ribbon.
Variations & Substitutions
Feeling adventurous? Here are some fun ways to switch up the flavors and designs of your spider web cookies:
Flavor Combinations: Try infusing orange zest or almond extract for a seasonal twist. Pumpkin spice might also be a hit if you’re feeling festive!
Dietary Restrictions: Substitute gluten-free flour for a gluten-free version of these cookies. For vegan cookies, use a plant-based butter substitute and replace the egg with flaxseed meal.
Seasonal Variations: Why not turn them into adaptable holiday cookies? Use red and green icing for Christmas or pastel colors for Easter.
Nutrition & Storage Info
- Prep Time: 1 hour (plus chilling time)
- Cook Time: 9-11 minutes
- Total Time: 1 hour 15 minutes (not including cooling/decorating time)
- Yield: Approximately 24 cookies
- Estimated Calories per Serving: About 120 calories (varies based on size)
- Storage Instructions: Store at room temperature in an airtight container for up to one week. Freeze undecorated cookies for up to 3 months.
FAQ Section
Can I make the dough ahead of time?
Absolutely! You can refrigerate the dough for up to 3 days before rolling and baking.What can I substitute for meringue powder?
If you don’t have meringue powder, you can use egg whites instead, but be cautious about food safety.Can I use other colorings for the spider web?
Certainly! You can use any gel food coloring to create different designs for various occasions.How do I adjust the icing consistency?
If your royal icing is too runny, add powdered sugar; if too thick, add a little water.Can I skip the chilling step?
I highly advise against it! Chilling helps maintain the cookie shape and texture during baking.How do I prevent my cookies from spreading?
Ensure your butter is properly softened (not melted) and chill your dough well before baking.Can I freeze the decorated cookies?
Yes, freeze undecorated cookies first, then decorate after thawing for the best appearance.Can I make mini versions of these cookies?
Absolutely! Just adjust your baking time accordingly to avoid overbaking.How long will the cookies stay fresh?
Properly stored, they should stay fresh for about a week.Can I add sprinkles or toppings?
Yes! Feel free to customize them with fun toppings before the icing sets.
Conclusion
These Spider Web Sugar Cookies are not just a treat; they’re a way to forge memories and embrace the joy of baking during the spookiest season of the year. With their delicious flavor and captivating design, they are sure to be a hit at your Halloween gatherings. I encourage you to give this recipe a try and share your creations—I’d love to hear how they turn out!
For more delightful baking adventures, check out my blog for related recipes, from pumpkin spice treats to cozy hot cocoa, to keep the spirit of fall alive in your kitchen!
Potato Chip Chocolate Chip Cookies
Happy baking!
PrintSpider Web Sugar Cookies
Enchanting sugar cookies decorated with intricate black spider web designs, perfect for Halloween. These buttery, tender cookies are made with royal icing for a festive and spooky treat that’s both delicious and visually striking.
- Prep Time: 1 hour (plus chilling)
- Cook Time: 10 minutes
- Total Time: 1 hour 15 minutes (plus decorating)
- Yield: 24 cookies 1x
- Category: Dessert
- Method: Baking
- Cuisine: American
- Diet: Vegetarian
Ingredients
- 3 cups (360g) all-purpose flour
- 1/2 teaspoon baking powder
- 1/4 teaspoon salt
- 1 cup (226g) unsalted butter, softened
- 1 cup (200g) granulated sugar
- 1 large egg, room temperature
- 2 teaspoons pure vanilla extract
- 4 cups (480g) powdered sugar, sifted
- 3 tablespoons meringue powder
- 6–9 tablespoons lukewarm water
- 1 teaspoon vanilla or almond extract (for icing)
- Black gel food coloring
Instructions
- Whisk together flour, baking powder, and salt in a medium bowl; set aside.
- Beat butter and granulated sugar until fluffy (3-4 minutes). Add egg and vanilla; mix until combined.
- Gradually add dry ingredients to wet ingredients, mixing until just combined.
- Wrap dough in plastic wrap and chill for at least 1 hour.
- Preheat oven to 375°F (190°C). Roll dough to 1/4-inch thickness and cut into shapes.
- Bake for 9-11 minutes until edges are lightly golden. Cool completely on wire rack.
- For icing: Combine powdered sugar and meringue powder. Gradually add water until stiff peaks form. Add vanilla/extract and black food coloring.
- Flood cooled cookies with white icing base. Let set 30 minutes.
- Pipe black spider web designs with fine tip. Let dry completely before storing.
Notes
- Chill dough thoroughly to prevent spreading during baking.
- Use gel food coloring for vibrant colors that won’t thin the icing.
- Let base icing dry completely before adding spider web designs.
- Store decorated cookies in single layers with parchment between them.
- Undecorated cookies can be frozen for up to 3 months.
Nutrition
- Serving Size: 1 cookie
- Calories: 120
- Sugar: 15g
- Sodium: 25mg
- Fat: 4g
- Saturated Fat: 2.5g
- Unsaturated Fat: 1g
- Trans Fat: 0g
- Carbohydrates: 20g
- Fiber: 0g
- Protein: 1g
- Cholesterol: 15mg


