
Table of Contents
Table of Contents
There’s something undeniably special about the holiday season that makes everything feel a little more magical. As a child, I remember the first snowfall of winter, my family gathered in the kitchen, baking up a storm with nothing but love in the air. One of our favorite treats to whip up were Candy Cane Marshmallows. The sweet, fluffy delight, with its swirls of holiday red, brought warmth and happiness during the coldest months. As I grew older, those cozy memories became more precious, and I knew I had to recreate that magic in my own kitchen.
What sets my Candy Cane Marshmallows apart from the rest is not only their stunning visual appeal but also their incredible flavor and texture. Each bite is pure nostalgia—a perfect blend of soft, fluffy marshmallow infused with refreshing peppermint. This recipe cuts out the preservatives and artificial flavors found in store-bought versions, delivering a homemade experience that is deeply satisfying and incredibly memorable.
Join me in making these delightful confections! You’ll learn how to transform a few simple ingredients into a treat that will bring smiles to your loved ones’ faces this holiday season.
What Are Candy Cane Marshmallows?
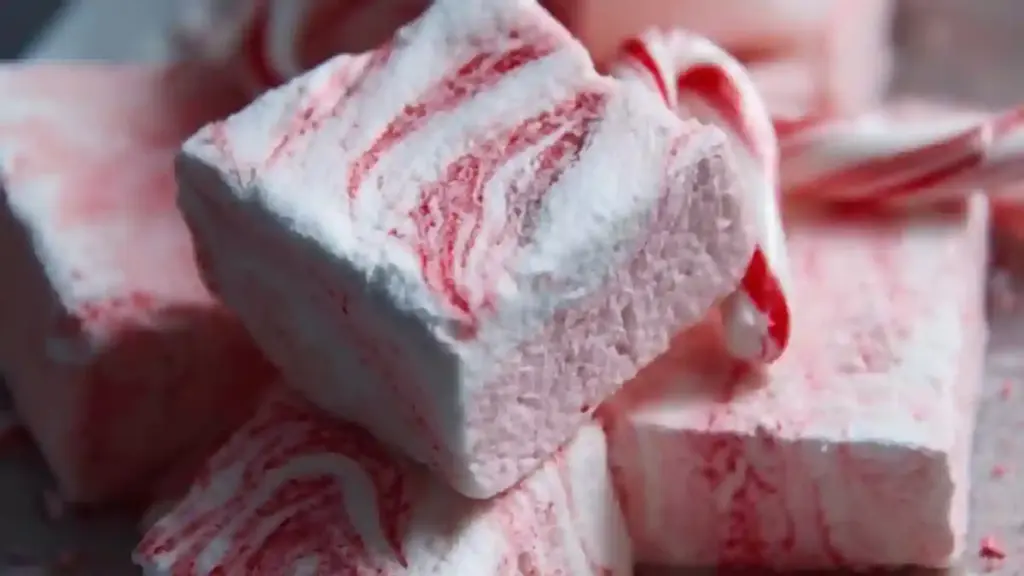
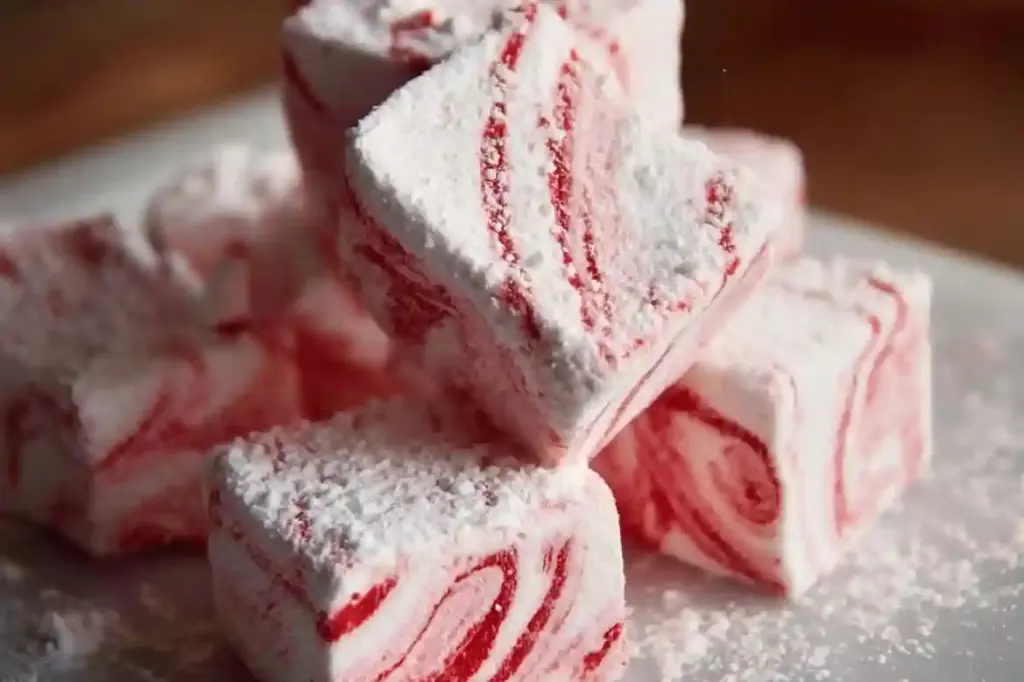
Candy Cane Marshmallows are the marshmallow treats you never knew your holiday baking needed. These fluffy squares are not just any marshmallows; they are soft, pillowy bites infused with refreshing peppermint essence and adorned with delightful swirls of red, making them both tasty and visually captivating.
Originating from the wonderland of marshmallow nostalgia, these treats fit perfectly into the festive spirit, evoking memories of cozy nights by the fire with hot cocoa in hand. They offer a unique contrast between the sweetness of sugar and the cool, minty taste of peppermint, creating a truly indulgent experience.
So, when should you make them? These Candy Cane Marshmallows are ideal for holiday parties, as stocking stuffers, or simply to enjoy on a snug winter evening. Trust me; they will become a family favorite in no time!
Why You’ll Love This Recipe
Homemade Goodness: These Candy Cane Marshmallows are crafted from scratch, ensuring you have full control over the ingredients. No weird additives, just pure deliciousness!
Cost-Effective: While gourmet marshmallows can cost a fortune at specialty stores, making them at home is significantly less expensive. You can create a large batch for a fraction of the price!
Customization Options: Feel free to play with flavors! Want a chocolate twist? Add cocoa powder. Prefer a citrus zing? A dash of orange extract would do. The possibilities are endless!
Satisfying to Make: Although the process might seem elaborate, it’s actually quite simple. If you’ve ever whipped egg whites, you can handle this! And the satisfaction of creating your own confections is unparalleled.
Perfect Gift: Wrap these marshmallows in a festive box, and you’ve got a thoughtful gift that shows your friends and family you care.
In comparison to store-bought versions, these homemade delights are a delightful step above—not just for their freshness but also for the love and memories baked into every batch!
Ingredients Section
Before we dive into the recipe, let’s gather our ingredients! Here’s what you’ll need:
- 1 ⅓ cups water (divided)
- 3 envelopes unflavored powdered gelatin (about 7 ½ teaspoons)
- 1 ½ cups granulated sugar (I love using pure cane sugar; it really makes a difference!)
- 1 cup light corn syrup (You can substitute with golden syrup for a deeper flavor)
- 1 teaspoon peppermint extract (Use high-quality extract; I recommend Nielsen-Massey)
- ¼ teaspoon kosher salt
- 1-2 teaspoons red food coloring (Get the gel kind; it’s more vibrant)
- ⅓ cup powdered sugar or cornstarch for rolling (This prevents sticking; I prefer cornstarch)
Prep Notes: Make sure your ingredients are at room temperature to yield the best results.
Step-by-Step Instructions
It’s time to transform those ingredients into sweets! Follow these detailed steps to make your Candy Cane Marshmallows:
Prepare Your Pan: Begin by greasing a 9×9-inch baking pan with cooking spray. Set aside.
Bloom the Gelatin: In the bowl of a stand mixer, add ⅔ cup of cold water. Sprinkle the gelatin over the water and allow it to bloom for about 5 minutes.
Heat the Sugar: In a medium saucepan over medium-high heat, combine the granulated sugar, light corn syrup, and the remaining ⅔ cup of water. Stir the mixture until the sugar is dissolved. Once dissolved, bring it to a boil, swirling the pan occasionally. Continue boiling until the mixture reaches 240°F on a candy thermometer, about 10-12 minutes.
Combine Mixtures: Remove the syrup from heat immediately. With the stand mixer on low speed, carefully pour the hot sugar mixture into the bloomed gelatin. Add in the peppermint extract and kosher salt.
Whip to Perfection: Gradually increase the speed to high and whip until the mixture is stiff and white, roughly 10-12 minutes. Dip a whisk into the mixture: if stiff peaks form and take a few seconds to settle back in, you’re good to go!
Spread the Marshmallow: Working quickly, pour the fluffy marshmallow into your prepared baking pan. Use a spatula to spread it evenly.
Add Color: While the marshmallow is still warm, drop droplets of red food coloring on top and use a toothpick or skewer to create swirls throughout the marshmallow.
Set: Allow the marshmallows to firm up for at least 4 hours at room temperature, or 2 hours in the fridge.
Cut and Dust: Once set, dust your work surface with powdered sugar or cornstarch. Run a butter knife around the edges of the pan and turn the marshmallow onto the work surface. You may need to pry it out gently at a corner. Cut into at least 16 squares with a sharp knife. You can spray the knife with cooking spray to prevent sticking.
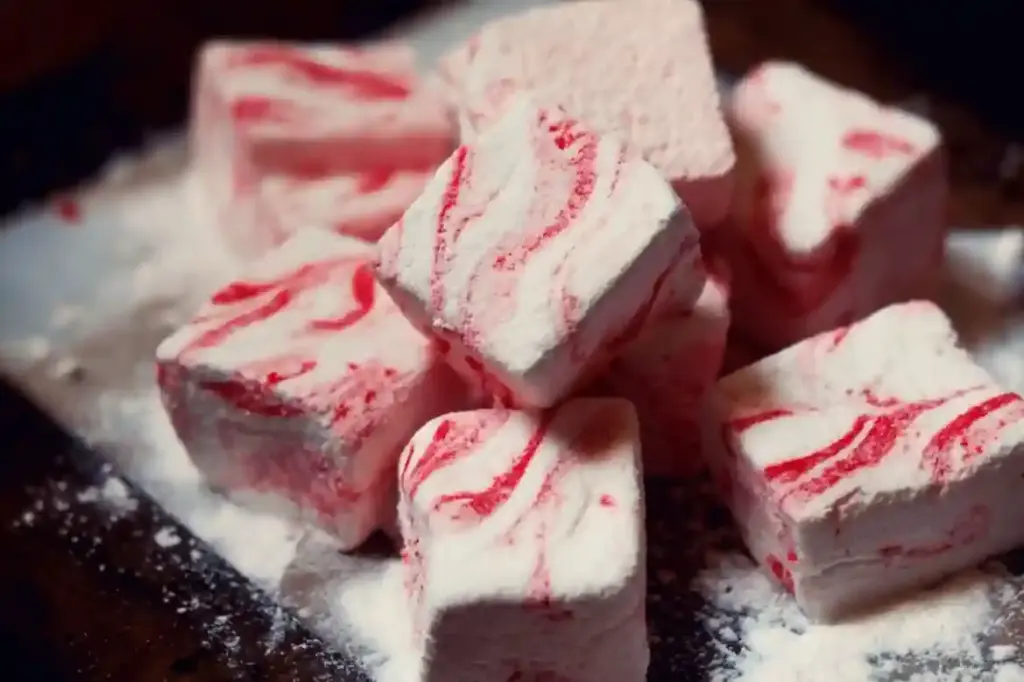
Roll and Enjoy: Roll each marshmallow in powdered sugar or cornstarch to coat all sides, then serve!
Chef’s Tips
- Timing is Key: Make sure you whip the marshmallow mixture long enough to achieve stiff peaks. Otherwise, your marshmallows won’t hold their shape.
- Visual Cues: Watch for the syrup to become luminous and glossy before pouring it into the gelatin!
- Avoiding Sticks: If you find your marshmallows are sticky after cutting, simply roll them in more powdered sugar or cornstarch.
Expert Tips & Tricks
Storage Recommendations: Store your Candy Cane Marshmallows in an airtight container at room temperature. They can last up to two weeks, but they won’t last long—trust me!
Make-Ahead Instructions: Feel free to make these marshmallows a week in advance. They’re great for holiday parties, and they only get better with time.
Troubleshooting Problems: If your marshmallows are too soft or gooey, it could be that you didn’t whip them long enough. Make sure you reach those stiff peaks!
Adding More Flavor: Want to amp up the peppermint flavor? Simply increase the peppermint extract by half a teaspoon for extra zing!
Ideal Conditions for Whipping: For the best texture, avoid overly humid days, as moisture can affect the fluffiness of your marshmallows.
Keeping It Fresh: To prevent your marshmallows from drying out, always keep them sealed in an airtight container.
Serving Suggestions
These Candy Cane Marshmallows are a delightful treat on their own, but pairing them with hot chocolate elevates the experience to a whole new level! For a fun presentation, consider stacking them on skewers to create a festive treat platter or serve them alongside gingerbread cookies. They also make an impressive centerpiece for holiday gatherings and potlucks—everyone loves reaching for these sweet fluffy bites!
Variations & Substitutions
Flavor Swaps: Don’t feel confined to peppermint! Try out flavors like vanilla, orange, or even chocolate by adding flavored extracts.
Dietary Adaptations: For a vegan version, you can use agar-agar as a substitute for gelatin. Keep in mind this might change the texture slightly but will still yield delicious results!
Seasonal Variations: Around Valentine’s Day, you can replace the peppermint extract with strawberry extract and switch the colors to pink. For Easter, add a hint of lemon extract and pastel colors!
Nutrition & Storage Info
- Prep Time: 20 minutes
- Cook Time: 15 minutes
- Total Time: 4 hours (including set time)
- Yield: 16 marshmallow pieces
- Estimated Calories per Serving: Approximately 70 calories
- Storage Instructions: Store at room temperature in an airtight container. These marshmallows last up to two weeks.
FAQ Section
Can I use flavored gelatin instead of unflavored?
No, unflavored gelatin is essential for the proper texture.What can I substitute for light corn syrup?
You can substitute with golden syrup or brown rice syrup.Do I need a candy thermometer?
Yes, it’s crucial to ensure your sugar syrup reaches the correct temperature for best results.Can I freeze marshmallows?
Yes! Freeze in a single layer and then store in an airtight container.How can I store leftover marshmallows?
Keep them in an airtight container with a sprinkle of powdered sugar or cornstarch to prevent sticking.Why do my marshmallows not seem fluffy?
You may not have whipped the mixture long enough; ensure it has reached stiff peaks.Can I make them in a different shape?
Absolutely! Pour the mixture into any mold you like for festive shapes.Are they kid-friendly?
Yes! These marshmallows are perfect for kids and add a fun and festive touch to snack time.What can I pair them with?
They are amazing with hot cocoa, but you can also use them in s’mores or for topping desserts.Why are my marshmallows sticky?
They could be humid or you might need to roll them again in powdered sugar or cornstarch.
Conclusion
These Candy Cane Marshmallows aren’t just a treat—they’re a delightful piece of holiday magic! Easy to make and even easier to enjoy, they carry the warmth of family traditions and create sweet memories with every fluffy bite.
I can’t wait for you to try this recipe! Let me know in the comments how yours turned out, and if you made any delicious variations. For more sweet treats, don’t forget to check out my other festive recipes on the blog.
Parmesan & Paprika Cocktail Stars
Edible Christmas Tree Focaccia
Christmas Peanut Butter Blossom Cookies
Happy baking!
PrintDelightful Candy Cane Marshmallows
A homemade twist on holiday classic marshmallows infused with refreshing peppermint and adorned with festive red swirls.
- Prep Time: 20 minutes
- Cook Time: 15 minutes
- Total Time: 240 minutes
- Yield: 16 marshmallow pieces 1x
- Category: Sweets
- Method: Candy making
- Cuisine: American
- Diet: Vegetarian
Ingredients
- 1 ⅓ cups water (divided)
- 3 envelopes unflavored powdered gelatin (about 7 ½ teaspoons)
- 1 ½ cups granulated sugar
- 1 cup light corn syrup
- 1 teaspoon peppermint extract
- ¼ teaspoon kosher salt
- 1–2 teaspoons red food coloring (gel)
- ⅓ cup powdered sugar or cornstarch for rolling
Instructions
- Prepare Your Pan: Grease a 9×9-inch baking pan with cooking spray.
- Bloom the Gelatin: In a stand mixer bowl, add ⅔ cup of cold water and sprinkle the gelatin over it. Let it bloom for about 5 minutes.
- Heat the Sugar: In a saucepan, combine granulated sugar, light corn syrup, and remaining ⅔ cup water. Stir until dissolved, then boil until it reaches 240°F (about 10-12 minutes).
- Combine Mixtures: Remove from heat and pour hot mixture into bloomed gelatin, adding peppermint extract and kosher salt.
- Whip to Perfection: Whip mixture on high until stiff peaks form (about 10-12 minutes).
- Spread the Marshmallow: Pour the mixture into the prepared baking pan and spread evenly.
- Add Color: Drop red food coloring and create swirls with a toothpick.
- Set: Allow to firm for at least 4 hours at room temperature or 2 hours in the fridge.
- Cut and Dust: Dust work surface with powdered sugar or cornstarch. Cut marshmallow into at least 16 squares.
- Roll and Enjoy: Roll each marshmallow in powdered sugar or cornstarch to coat.
Notes
Store in an airtight container at room temperature for up to two weeks. Perfect for gifting!
Nutrition
- Serving Size: 1 square
- Calories: 70
- Sugar: 15g
- Sodium: 5mg
- Fat: 0g
- Saturated Fat: 0g
- Unsaturated Fat: 0g
- Trans Fat: 0g
- Carbohydrates: 18g
- Fiber: 0g
- Protein: 0g
- Cholesterol: 0mg


