
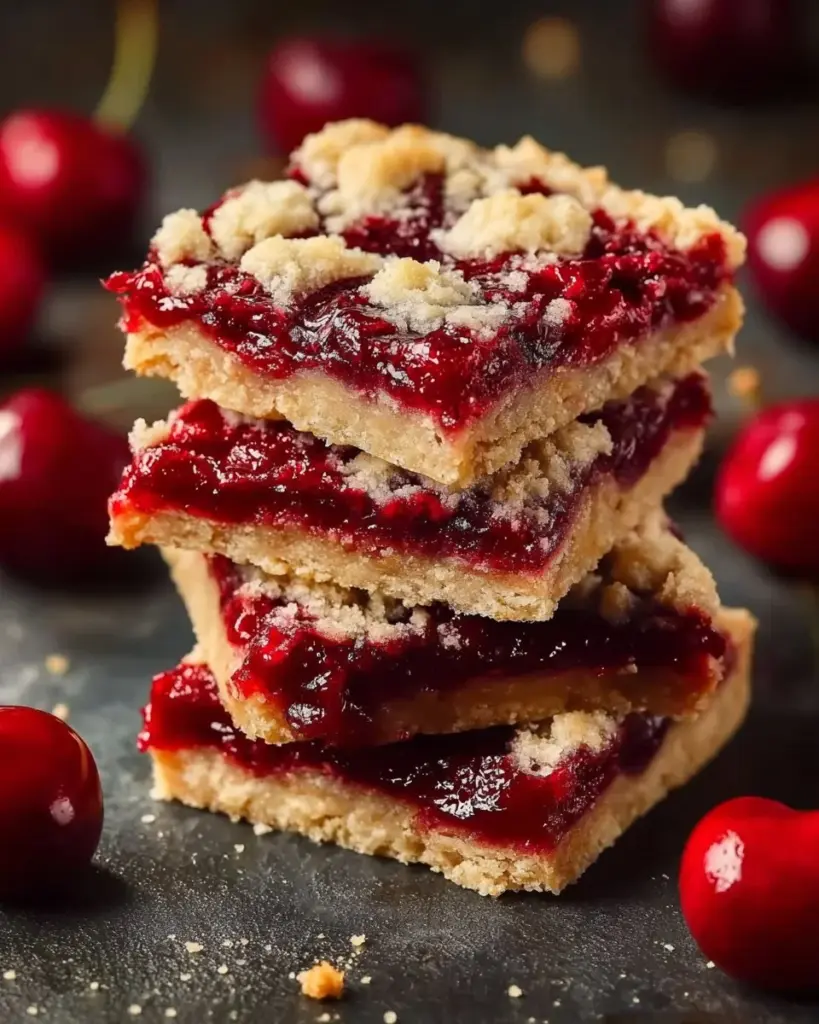
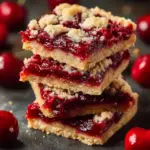
Irresistible Easy Cherry Pie Bars: A Delightfully Simple Cherry Dessert to Savor
Picture this: a warm summer afternoon, the sweet scent of cherries wafting through the kitchen, and your family gathered around the table. That’s the memory I cherish whenever I whip up a batch of Easy Cherry Pie Bars: A Simple Cherry Dessert to Savor. These bars are more than just a recipe; they bring together the joyful essence of nostalgia and the simple pleasures of baking. My grandmother used to make cherry pie from scratch every summer, her kitchen filled with laughter and love.
What sets these cherry pie bars apart? They combine the buttery, flaky goodness of pie with the convenience of a bar dessert, making them easy to share at gatherings or enjoy on a quiet evening at home. Unlike traditional pie, there’s no fussing with a pie crust or worrying about spills. Just bite into these luscious bars, and you’re met with a perfect balance of sweet, tart cherry filling and a delectable, crumbly topping that melts in your mouth.
In this post, I’ll take you through every step of making these easy cherry pie bars, from gathering your ingredients to serving them fresh out of the oven. Get ready to create something special for your friends and family (or just for yourself – I won’t judge!).
What Are Easy Cherry Pie Bars: A Simple Cherry Dessert to Savor?
The magnificent Easy Cherry Pie Bars: A Simple Cherry Dessert to Savor hark back to the classic cherry pie, but they are simplified for the modern baker. These bars celebrate the tantalizing flavor of ripe cherries, enhanced by the comforting embrace of a buttery crust and a sweet glaze that ties it all together.
When you take that first bite, you’ll be greeted by a delightful crunch followed by chewy, fruity goodness. The unique texture comes from pressing half of the dough into the pan to form a sturdy base, adding a rustic charm that feels like home. They’re perfect for picnics, potlucks, or even as a sweet surprise for a special occasion or holiday.
Why make them? Because some recipes are just meant to be shared, and these cherry pie bars are a love letter to family traditions and cherished moments. They’re incredibly easy to whip up, making them ideal for novice bakers and seasoned pros alike.
Why You’ll Love This Recipe
Quick and Easy: Unlike traditional cherry pie, these bars require minimal prep and baking time, making them a breeze to throw together whenever you crave something sweet.
Cost-Effective: You can create a delicious dessert on a budget! With just a handful of ingredients, you won’t break the bank for bakery treats. Plus, you’ll likely have most of them in your pantry!
Gourmet Flavor, Homemade Touch: With the rich taste of cherry filling and a delightful buttery crust, your friends and family will think you slaved away for hours to create these delectable treats.
Customization: Want to switch it up? Add almond slices, or swap half the cherry filling for fresh blueberries! The cherry bars encourage creativity, leaving room for your personal touch.
Crowd Pleaser: These easy cherry pie bars attract fans of all ages. I’ve seen kids devouring them at birthday parties and adults raving about them at potlucks. You can’t go wrong!
With minimal difficulty and a straightforward time investment, you’ll find these bars to be a delightful way to get your baking fix without spending an entire afternoon in the kitchen.
Ingredients Section
To make these delicious Easy Cherry Pie Bars, gather the following ingredients:
- 1 cup softened butter (helps create a tender crust)
- 1 cup sugar (balances the tartness of the cherries)
- 2 large eggs, room temperature (provides richness)
- 1 tsp almond extract (adds a lovely nutty flavor)
- 1 tsp vanilla extract (enhances the sweetness)
- 2 ½ cups all-purpose flour (creates a sturdy base)
- ½ tsp salt (balances sweetness)
- 1 (21 oz) can premium cherry pie filling (the star ingredient!)
- For glaze:
- 1 cup confectioners’ sugar
- 1 tsp almond extract
- ½ tsp vanilla extract
- Milk, as needed (to achieve the desired consistency)
Notes on Ingredients:
- Quality Matters: For the best flavor, opt for a high-quality cherry pie filling. Look for brands without artificial flavors or colors.
- Room Temperature Butter: Make sure your butter is softened to room temperature for optimal creaming with sugar.
Brand Recommendations:
- For pie filling, try Libby’s or Lucky Leaf for rich taste. For almond extract, McCormick is a reliable choice!
Step-by-Step Instructions
1. Preheat Oven: Start by preheating your oven to 350°F (175°C).
2. Cream Butter and Sugar: In a large bowl, cream together 1 cup softened butter and 1 cup sugar until light and fluffy – about 3-4 minutes.
3. Add Eggs and Extracts: Beat in the 2 large eggs, 1 tsp almond extract, and 1 tsp vanilla extract, mixing until well combined.
4. Mix Dry Ingredients: In a separate bowl, whisk together 2 ½ cups all-purpose flour and ½ tsp salt. Gradually add this mixture to the butter mixture, stirring until just combined.
5. Press the Dough: Press about half of the dough into a greased 9×13 inch baking pan evenly — this will be your base.
6. Spread Cherry Filling: Open your 21 oz can of cherry pie filling and spread it evenly over the dough base.
7. Dollop Remaining Dough: Take the remaining dough and dollop it over the cherry filling. It doesn’t need to be perfect – the rustic look adds to the charm!
8. Bake: Bake in the preheated oven for 35-40 minutes or until the top is golden and the filling is bubbling.
9. Cool: Allow the bars to cool completely in the pan before drizzling with glaze.
10. Drizzle Glaze: For the glaze, combine 1 cup confectioners’ sugar, 1 tsp almond extract, ½ tsp vanilla extract, and milk to desired consistency. Drizzle over cooled bars before serving.
Chef’s Tips:
- Timing is key: Keep an eye on the bars near the 35-minute mark; ovens vary, and you want that lovely golden brown!
- Visual Cues: Look for the filling bubbling up around the edges to know it’s done.
- Avoid Overmixing: This recipe yields the best texture when you mix the dough just until it comes together.
Expert Tips & Tricks
Room Temperature Ingredients: Always ensure your eggs and butter are at room temperature for a better texture in baking.
Storage: Store these easy cherry pie bars at room temperature for 2-3 days. For longer storage, place them in the refrigerator for up to a week.
Make Ahead: You can prepare these bars ahead of time. Just bake and cool them, then store in an airtight container until ready to serve.
Troubleshooting: If topping cracks, it may be because it was too dry. Ensure you don’t overmix or add too much flour.
Freezing Instructions: Slice cooled bars and freeze them in an airtight container. They can be frozen for up to 3 months!
Glaze Variations: Try adding a touch of lemon zest to the glaze for a fresh twist!
Serving Suggestions
These Easy Cherry Pie Bars are divine on their own, but here are a few delightful ideas to elevate your serving game:
- Serve with Whipped Cream: Add a dollop of freshly whipped cream for a luxurious touch!
- Pair with Vanilla Ice Cream: There’s nothing like warm cherry bars with a scoop of cold vanilla ice cream!
- Presentation: For a pretty look, cut squares and dust with powdered sugar before serving.
- Occasional Moments: They are perfect for birthdays, holiday gatherings, or just a cozy night in with a cup of tea.
Variations & Substitutions
- Different Fruit Fillings: Swap the cherry filling for blueberry, raspberry, or even apple pie filling for a diverse flavor profile.
- Gluten-Free: Use a gluten-free all-purpose flour blend for a gluten-free version that can be enjoyed by everyone.
- Seasonal Twist: In the fall, consider adding a sprinkle of cinnamon to complement any apple or pumpkin fillings!
Nutrition & Storage Info
- Prep Time: 15 minutes
- Cook Time: 35-40 minutes
- Total Time: 55 minutes
- Yield: About 12-16 servings
- Estimated Calories Per Serving: ~150 calories (depending on portion size)
Storage Instructions:
- Keep at room temperature for up to 3 days
- In the fridge for up to a week
- And they can be frozen for about 3 months.
FAQ Section
Can I use fresh cherries instead of pie filling?
Yes, you can! Just cook them down with some sugar and cornstarch until they’re thickened.How do I know when the bars are done?
They should be golden brown, and the filling should be bubbly.Can I make these bars vegan?
You can substitute butter with coconut oil and replace the eggs with flax eggs or applesauce.What if I don’t have almond extract?
Vanilla extract works fine too, although it’ll have a different flavor profile.How do I prevent the crust from being too crumbly?
Make sure not to overmix the dough; just mix until it all comes together.Can these bars be made gluten-free?
Yes! Use a gluten-free flour blend, and it will work beautifully.Can I double the recipe?
Absolutely! You can use a larger baking pan, just keep an eye on the baking time.What’s the best way to slice the bars?
Use a sharp knife or a pizza cutter for clean edges, especially when they’ve cooled fully.Can I freeze the dough?
Sure! You can freeze the dough before baking; just thaw in the refrigerator overnight before using.How do I make the bars even sweeter?
You can increase the sugar in the dough slightly or add chocolate chips for an extra treat!
Conclusion
In conclusion, these Easy Cherry Pie Bars: A Simple Cherry Dessert to Savor are a heartwarming recipe bursting with flavor and nostalgia. You’ll find that once you make them, they will be a go-to dessert for potlucks, summer BBQs, or cozy evenings at home. I encourage you to give them a try and share your experience in the comments below! Don’t forget to explore more delicious recipes I’ve shared on the blog; there’s something sweet waiting for you! Happy baking!
PrintEasy Cherry Pie Bars
A delightful and simple dessert that combines the flavors of cherry pie with the convenience of bar baking, perfect for any occasion.
- Prep Time: 15 minutes
- Cook Time: 40 minutes
- Total Time: 55 minutes
- Yield: 12-16 servings 1x
- Category: Dessert
- Method: Baking
- Cuisine: American
- Diet: Vegetarian
Ingredients
- 1 cup softened butter
- 1 cup sugar
- 2 large eggs, room temperature
- 1 tsp almond extract
- 1 tsp vanilla extract
- 2 ½ cups all-purpose flour
- ½ tsp salt
- 1 (21 oz) can premium cherry pie filling
- For glaze:
- 1 cup confectioners’ sugar
- 1 tsp almond extract
- ½ tsp vanilla extract
- Milk, as needed
Instructions
- Preheat your oven to 350°F (175°C).
- Cream together softened butter and sugar until light and fluffy, about 3-4 minutes.
- Add the eggs, almond extract, and vanilla extract, mixing until combined.
- In a separate bowl, whisk together flour and salt, then gradually add to the butter mixture, stirring until just combined.
- Press half of the dough into a greased 9×13 inch baking pan as the base.
- Spread the cherry pie filling evenly over the dough base.
- Dollop the remaining dough over the cherry filling.
- Bake in the preheated oven for 35-40 minutes or until golden and bubbly.
- Allow to cool completely before drizzling with glaze.
- For the glaze, combine confectioners’ sugar, almond extract, vanilla extract, and milk to desired consistency, then drizzle over the bars before serving.
Notes
For the best flavor, use high-quality cherry pie filling and make sure butter is softened to room temperature for optimal creaming.
Nutrition
- Serving Size: 1 bar
- Calories: 150
- Sugar: 20g
- Sodium: 100mg
- Fat: 7g
- Saturated Fat: 4g
- Unsaturated Fat: 3g
- Trans Fat: 0g
- Carbohydrates: 22g
- Fiber: 1g
- Protein: 2g
- Cholesterol: 35mg


