
Irresistible Chocolate Blossoms: Melt-in-Your-Mouth Cookies That Bring Joy
I’ll never forget the sweet aroma of freshly baked cookies wafting through my childhood home every Sunday afternoon. My mom would whip up a batch of what we lovingly called "Chocolate Blossoms," those delightful little cookies with a signature chocolate nugget nestled right in the center. Looking back, I realize it wasn’t just the cookies themselves that made those Sundays special; it was the warmth, laughter, and togetherness that filled our kitchen. Every bite felt like a hug.
These Chocolate Blossoms are so much more than your average cookie. Their luscious chocolate flavor, soft and chewy texture, and the magic of that candy surprise are what make every batch a little piece of heaven. You won’t find a cookie reminiscent of home in the store; the love and care baked into each one simply can’t be replicated. Trust me when I say this recipe is far superior to anything you’ll pick up from a shelf.
In this post, I’ll take you through the journey of making these gems and share some tips to ensure your cookies turn out perfect every single time. Get ready to savor the nostalgia and create new memories that’ll stick with you for years to come!
What Are Chocolate Blossoms?
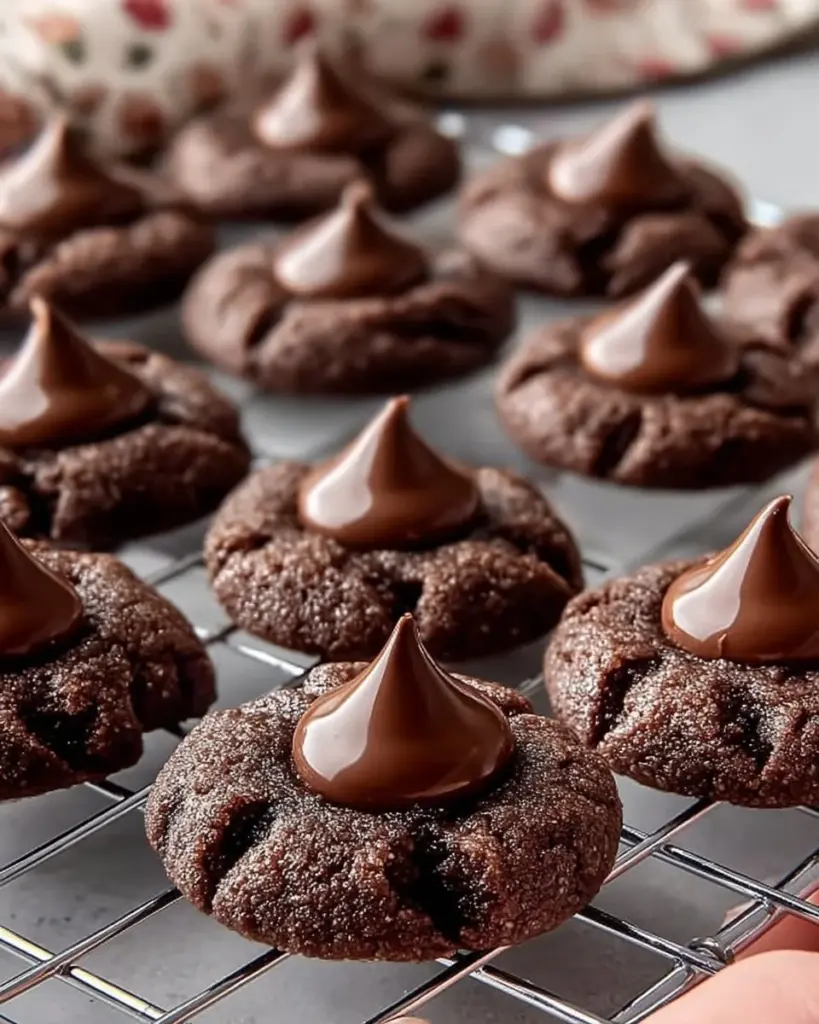
Chocolate Blossoms have a wonderful origin story deeply rooted in the heart of American baking traditions. They are essentially chocolate cookies that feature a signature touch: a chocolate kiss or chip pressed right into the center right after baking. This little detail transforms them from ordinary to extraordinary!
When you bite into one of these cookies, you’ll experience soft, rich chocolate flavor and a delightful, almost fudgy texture. It’s this combination of chewy and melty that makes them absolutely irresistible. Whether you’re looking for a treat to share at a gathering or simply a comforting snack to enjoy at home, Chocolate Blossoms are the perfect choice.
Make them for birthdays, holidays, or just because you deserve a sweet treat! They’re always a hit, bringing smiles and happy memories with every bite.
Why You’ll Love This Recipe
Simple and Straightforward: Making Chocolate Blossoms is incredibly easy! With just a handful of pantry staples and a little mixing, you can whip up these cookies in no time. No need to navigate complicated techniques in this easy recipe.
Money-Saving Delight: Why spend $4 on a single gourmet cookie when you can make a dozen (or more!) at home for a fraction of the price? This recipe allows you to create delicious desserts without draining your wallet!
Endless Customization: Want to make them nutty? Toss in some chopped walnuts! Feeling adventurous? Try adding a dash of peppermint extract during the holiday season. The possibilities are endless, making these cookies suitable for any occasion or taste preference.
Superior Flavor: There’s something special about homemade. Unlike store-bought cookies laden with preservatives and artificial flavors, your homemade Chocolate Blossoms will be bursting with fresh, rich chocolate goodness. You’ll taste the difference with every mouthful!
Easy to Prepare in Bulk: Planning for a gathering? This batch-friendly recipe is perfect for making ahead of time and can easily be doubled if you have a crowd to please!
Get ready; you’re about to experience the best Chocolate Blossoms you’ve ever tasted!
Ingredients Section
For the Chocolate Blossoms
- 1 cup granulated sugar: Choose a high-quality brand for the best sweetness.
- ½ cup unsalted butter, softened: Let it sit at room temperature for easy creaming. I love using Land O’Lakes for its creaminess.
- 2 tablespoons granulated sugar (for rolling): A little additional sweetness for that perfect sugary crust!
- 1 large egg: Room temperature eggs help create a more uniform batter.
- 1 teaspoon vanilla extract: Pure vanilla is worth the splurge; it elevates the flavor.
- 2 cups all-purpose flour: For best texture, go for a reliable brand like King Arthur Flour.
- ½ cup cocoa powder: Use Dutch-processed cocoa for a deeper chocolate flavor.
- 1 teaspoon baking soda: This will ensure your cookies rise beautifully.
- ½ teaspoon salt: Balances out the sweetness.
- 1 cup chocolate kisses or chocolate chips: I love Hershey’s Kisses, but feel free to swap in your favorite chocolate chips!
Prep Notes
- Make sure your butter is softened at room temperature for easy blending.
- For the freshest results, use high-quality ingredients where possible.
Step-by-Step Instructions
Preheat your oven to 375°F (190°C). Ensure your oven is fully heated, as this is crucial for a perfect bake.
In a large bowl, cream together the sugar and butter until light and fluffy. This should take about 2-3 minutes. Use a hand mixer or stand mixer to achieve that airy texture.
Beat in the egg and vanilla extract until well incorporated, about 1 minute. The mixture should be fluffy and pale.
In a separate bowl, combine flour, cocoa powder, baking soda, and salt. Whisk until mixed evenly.
Gradually mix the dry ingredients into the wet mixture until well combined. Use a spatula to scrape down the sides of the bowl and ensure everything is fully blended.
Roll the dough into small balls (about 1 inch in diameter) and then roll each ball in granulated sugar. This step adds a delightful crunch and sweetness to the outer layer.
Place the dough balls on a baking sheet lined with parchment paper. Space them about 2 inches apart to allow for spreading.
Bake for 8-10 minutes. They’re done when they begin to set but are still soft to the touch. Keep an eye on them–you want a soft, chewy center.
Remove from the oven and immediately press a chocolate kiss or chocolate chip into the center of each cookie. This is the fun part! The cookies will be soft enough for the chocolate to slightly melt.
Allow to cool on the baking sheet for a few minutes before transferring to a wire rack to cool completely. This helps them firm up and enhances the flavor!
Chef’s Tips
- Do not overbake! The cookies will continue to bake once taken out of the oven, so removing them just shy of done ensures you have a perfect chewy bite.
- If the dough feels too sticky, chill it in the fridge for 10-15 minutes.
- You can sprinkle a bit of sea salt on top of the cookies after they come out of the oven for a sweet-savory combination!
Expert Tips & Tricks
Storage recommendations: Keep your cookies in an airtight container at room temperature for up to a week. If you want them to last longer, you can freeze them for up to three months.
Make-ahead instructions: You can prepare the dough in advance and keep it in the fridge for up to three days. Just roll into balls right before baking!
Troubleshooting common problems: If your cookies spread too much, check your oven temperature, and ensure your butter isn’t too warm at the start. Adjustments can be made easily!
Serving Suggestions
Chocolate Blossoms pair perfectly with a tall glass of cold milk or a steaming cup of coffee. For a little flair, serve with a scoop of vanilla ice cream on the side. Presentation is key: arrange the cookies on a decorative plate and sprinkle with a dusting of cocoa powder or powdered sugar. They make a delightful addition to any gathering, from birthday parties to holiday celebrations!
Variations & Substitutions
Feeling creative? Here are a few fun variations to try:
- Mint Chocolate Blossoms: Add a drop or two of peppermint extract for a festive twist or use mint-flavored chocolate kisses.
- Nutty Addition: Incorporate chopped almonds or walnuts for added crunch.
- Gluten-free Option: Substitute all-purpose flour with a 1:1 gluten-free blend to make these cookies accessible for everyone.
Nutrition & Storage Info
- Prep time: 15 minutes
- Cook time: 10 minutes
- Total time: 25 minutes
- Yield: Approximately 24 cookies
- Estimated calories per serving: 120
- Storage instructions: Room temperature—up to 1 week; refrigerator—up to 2 weeks; freezer—up to 3 months.
FAQ Section
Can I use margarine instead of butter?
- While butter offers the best flavor, margarine can be a substitute if needed, though it may affect the texture.
Can I use different types of chocolate?
- Absolutely! Swap out chocolate kisses for any chocolate you love—dark, milk, or even white chocolate!
Why are my cookies flat?
- If they spread too much, check your butter temperature and ensure you haven’t over-creamed your mixture.
Can I double the recipe?
- Definitely! Just keep in mind that a larger batch may require a longer mixing time.
What can I use instead of an egg?
- For a vegan option, consider using flaxseed meal (1 tablespoon of ground flax combined with 2.5 tablespoons of water) as an egg substitute.
Can I refrigerate the dough?
- Yes, refrigerating the dough can help with reducing spread and also makes it easier to handle!
How do I get the center to melt properly?
- Press the chocolate into the cookie while they are still warm for a nice melting effect.
How long does it take to bake in a convection oven?
- If using a convection oven, reduce the temperature by 25°F and check for doneness a couple of minutes earlier.
Do they freeze well?
- Yes! These cookies freeze well. Place them in a single layer on a baking sheet, freeze until solid, then transfer to a freezer-safe container.
Can I add other spices like cinnamon?
- Certainly! Adding a pinch of cinnamon can make for a delightful twist.
Conclusion
These Chocolate Blossoms are not just a treat; they’re a gateway to comfort and nostalgia that you can share with those you love. They bring an irresistible joy to every occasion, and I encourage you to try making them yourself! Let your taste buds experience the magic, and don’t forget to share your thoughts in the comments. And if you’re looking for more delightful recipes, check out my blog for more sweet inspirations like Chocolate Chip Cookies or Peanut Butter Blossoms! Happy baking!
PrintIrresistible Chocolate Blossoms

Delightful chocolate cookies with a signature chocolate nugget nestled in the center, offering a soft, chewy texture and rich flavor.
- Prep Time: 15 minutes
- Cook Time: 10 minutes
- Total Time: 25 minutes
- Yield: 24 cookies 1x
- Category: Dessert
- Method: Baking
- Cuisine: American
- Diet: Vegetarian
Ingredients
- 1 cup granulated sugar
- ½ cup unsalted butter, softened
- 2 tablespoons granulated sugar (for rolling)
- 1 large egg
- 1 teaspoon vanilla extract
- 2 cups all-purpose flour
- ½ cup cocoa powder
- 1 teaspoon baking soda
- ½ teaspoon salt
- 1 cup chocolate kisses or chocolate chips
Instructions
- Preheat your oven to 375°F (190°C).
- Cream together the sugar and butter until light and fluffy (about 2-3 minutes).
- Beat in the egg and vanilla extract until well incorporated (about 1 minute).
- In a separate bowl, whisk together the flour, cocoa powder, baking soda, and salt.
- Gradually mix the dry ingredients into the wet mixture until fully combined.
- Roll the dough into small balls (about 1 inch in diameter) and roll in granulated sugar.
- Place the dough balls on a baking sheet lined with parchment paper, spaced about 2 inches apart.
- Bake for 8-10 minutes until they begin to set but remain soft in the center.
- Immediately press a chocolate kiss or chip into the center of each cookie.
- Cool on the baking sheet for a few minutes before transferring to a wire rack.
Notes
Do not overbake and consider adding a pinch of sea salt on top for added flavor.
Nutrition
- Serving Size: 1 cookie
- Calories: 120
- Sugar: 10g
- Sodium: 150mg
- Fat: 6g
- Saturated Fat: 3g
- Unsaturated Fat: 3g
- Trans Fat: 0g
- Carbohydrates: 16g
- Fiber: 1g
- Protein: 2g
- Cholesterol: 10mg


