
Table of Contents
Table of Contents
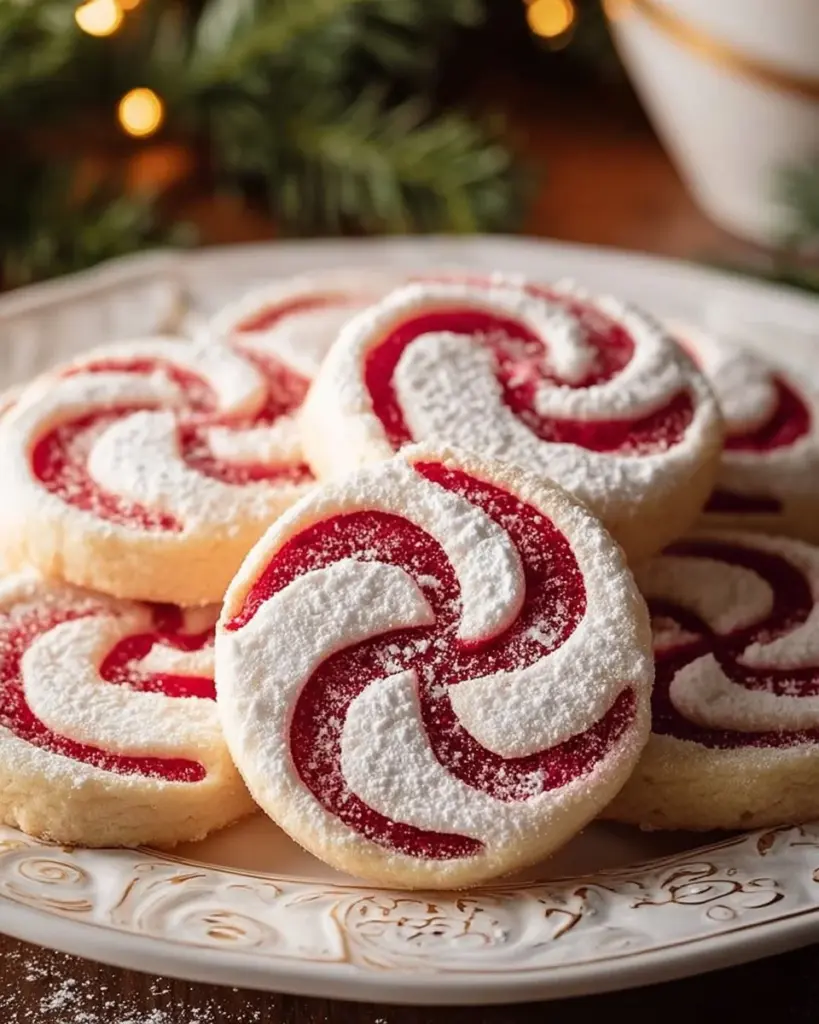
Delightfully Festive Christmas Pinwheel Cookies: A Whirlwind of Flavor and Color!
There’s something incredibly nostalgic about baking Christmas Pinwheel Cookies that takes me right back to my childhood kitchen, filled with laughter and the sweet smell of holiday treats. Every year, as the snow gently falls outside, I find myself surrounded by family, the warmth of the oven enveloping us as we excitedly wait for these colorful cookies to bake.
What makes these cookies so special? It’s the vibrant swirl of red and green, evoking the very spirit of Christmas, and the buttery, melt-in-your-mouth texture that keeps everyone coming back for more. It’s a recipe that not only brings joy to your taste buds but also creates wonderful memories with loved ones gathered around the kitchen table. Unlike other cookie recipes, this one combines fun, creativity, and deliciousness in every slice.
In this post, I’ll guide you step-by-step through my favorite Christmas Pinwheel Cookies recipe, ensuring that you too can create a joyful masterpiece in your own home. Get ready to infuse your holiday celebrations with deliciousness and love!
What Are Christmas Pinwheel Cookies?
Christmas Pinwheel Cookies have a delightful origin that can be traced back to early American baking traditions, where the joy of blending flavors and colors became a staple during holiday seasons. These cookies are two different flavored doughs, one colored red and the other green, rolled together into a vibrant log that, when sliced, reveals stunning swirls reminiscent of candy canes.1
What truly sets them apart is their unique combination of buttery sweetness and a hint of vanilla, creating a tender, rich cookie that melts in your mouth. They’re perfect for holiday gatherings, cookie swaps, or simply to enjoy with a warm cozy drink.
So, whether you’re creating new traditions or looking to brighten your cookie plate at holiday parties, these Christmas Pinwheel Cookies will bring smiles and sweetness to any occasion.
Why You’ll Love This Recipe
- Visual Appeal: The vibrant swirls of red and green make them an eye-catching addition to your holiday dessert table. Who doesn’t love a cookie that looks like a festive work of art?
- Better Than Store-Bought: While you can always buy cookies, there’s a genuine warmth to homemade treats that store-bought simply can’t replicate. Plus, you can customize these cookies to your liking without mysterious additives.
- Cost-Effective: Making these cookies at home is often cheaper than buying premium ones in stores. With simple ingredients like flour, butter, and sugar, you can make a big batch to share.
- Endless Customization: Add sprinkles, swap food colorings for pastels, or even incorporate flavors like peppermint or almond. The base recipe is incredibly versatile for any celebration!
- User-Friendly: Don’t worry if you’re not a baking pro; this recipe is straightforward and has minimal steps. With a little patience, anyone can make these festive cookies.
So gather your ingredients, and let’s jump into the fun world of cookie making!
Ingredients You’ll Need
- 2 cups all-purpose flour: I recommend a high-quality brand like King Arthur Flour for the best results.
- 1 cup unsalted butter, softened: Make sure it’s at room temperature for easy creaming. I love using Kerrygold for its rich flavor.
- 1 cup powdered sugar: Gives the cookies that sweetness and helps with texture.
- 1 egg: Large and at room temperature.2
- 1 teaspoon vanilla extract: Choose pure vanilla for a depth of flavor; I love using Nielsen-Massey.
- 1/2 teaspoon salt: Enhances all the other flavors!
- Red and green food coloring: Go for gel-based food coloring to achieve vibrant colors without altering the dough’s consistency.
Prep Notes
- Butter: Ensure it’s softened by leaving it on the counter for about 30 minutes to an hour before beginning.
- Egg: A room-temperature egg will combine better with the other ingredients.3
Step-by-Step Instructions
- Cream that Butter: In a mixing bowl, cream together 1 cup softened butter and 1 cup powdered sugar until the mixture is light and fluffy (about 3-5 minutes). You’ll know it’s ready when it’s pale in color and has increased in volume.
- Mix in Egg and Vanilla: Beat in 1 large egg and 1 teaspoon vanilla extract until fully incorporated.
- Add Dry Ingredients: Gradually mix in 2 cups all-purpose flour and 1/2 teaspoon salt. Mix until just combined (don’t overmix!).
- Divide the Dough: Now, divide the dough into two equal portions.
- Coloring Magic: Add red food coloring to one portion and green to the other. Start with a few drops of gel coloring and mix until you achieve your desired intensity.
- Roll It Out: Place each colored dough between two sheets of parchment paper. Roll each into a rectangle, roughly 1/4-inch thick. Don’t worry if it’s not perfect—it adds character!
- Layer and Roll: Carefully layer the red dough over the green dough, and gently roll it up into a log from one end to the other. Be tight but not so tight that the dough squishes out!
- Chill: Wrap the log in plastic wrap and refrigerate for at least 2 hours or until firm.4
- Preheat: Once chilled, preheat your oven to 5$350^{\circ}\text{F}$ (6$175^{\circ}\text{C}$).7
- Slice & Bake: Slice the chilled log into 1/4 inch thick rounds. Place them on a baking sheet lined with parchment paper and bake for 10-12 minutes or until they are lightly golden.
- Cool Off: Allow them to cool on the baking sheet for a few minutes before transferring them to a wire rack. This one is hard, but remember, patience is a virtue!
Chef’s Tips
- Overworking the dough can lead to tough cookies, so mix just until combined!8
- If your log is too soft to cut after chilling, you can freeze it for about 30 minutes for easier handling.
- You can use a serrated knife to slice the log neatly.
Expert Tips & Tricks
- Storage: These cookies can be stored in an airtight container for up to a week at room temperature. For longer freshness, freeze them in a single layer and then transfer to a bag; they last up to 2-3 months.
- Make-Ahead: You can prepare the dough a few days in advance and keep it chilled or frozen until you’re ready to bake.
- Troubleshooting: If your dough is crumbly, try adding a teaspoon of milk to hydrate it. If it’s too sticky, sprinkle a bit of flour while rolling.
- Flavor Variations: Try adding citrus zest or almond extract for a different flavor twist.
- Keep It Cool: Always allow cookies to cool completely before frosting or stacking them; it reduces the chance of breaking.
Serving Suggestions
These Christmas Pinwheel Cookies are delightful on their own, but they shine even brighter when paired with a hot mug of cocoa or spiced tea. For a lovely presentation, try arranging them on a decorative platter garnished with festive holly or alongside some candy canes for a pop of color. They make a perfect gift when wrapped in cellophane with a beautiful ribbon.
Variations & Substitutions
- Flavor Combinations: Instead of red and green, try using blue and white for Hanukkah or pastel colors for spring gatherings. You can even infuse flavors like chocolate by incorporating cocoa powder into one half of the dough.9
- Dietary Adjustments: For a gluten-free version, substitute all-purpose flour with a gluten-free blend. You may also replace butter with a vegan alternative to make them dairy-free.
Nutrition & Storage Info
| Detail | Measurement |
| Prep Time | 20 minutes |
| Cook Time | 10-12 minutes |
| Total Time | 2 hours and 30 minutes (including chilling) |
| Yield | Approximately 24 cookies |
| Estimated Calories | About 100 calories per cookie |
Storage Instructions
- Room Temperature: Store for up to one week in an airtight container.
- Fridge: Not necessary, but you can store for extra freshness.
- Freezer: Keep in an airtight container or freezer bag for 2-3 months. Thaw at room temperature before serving.
FAQ Section
- Can I use margarine instead of butter?
- Yes, but the flavor and texture may be slightly altered. For the best results, stick to unsalted butter.
- Why did my cookies spread too much?
- This could be due to warm dough. Always chill it properly before baking.
- Can I use other colors?
- Absolutely! Get creative with your favorite color combinations—just consider the holiday theme!
- What if my dough is too sticky?
- You can add a little flour in small increments until it reaches the desired consistency.
- How do I know when the cookies are done baking?
- They should be lightly golden around the edges but soft in the center. They will continue to firm up as they cool.
- Can I freeze the dough before baking?
- Yes, wrap it tightly and freeze for up to 3 months. Just let it thaw in the fridge overnight before slicing.
- What’s the best way to frost these cookies?
- If you choose to frost, ensure they’re completely cool. Use a simple glaze or royal icing for a festive touch.
- Can I double the recipe?
- Of course! Just ensure you have enough space in your mixing bowl and baking sheets.
- How do I make these gluten-free?
- Use a 1:1 gluten-free flour blend to replace the all-purpose flour; it works beautifully!
- Why aren’t my colors bright?
- Ensure you’re using gel food coloring, which gives a deeper color without altering the dough’s consistency.
Conclusion
These Christmas Pinwheel Cookies truly encapsulate the joy and warmth of the festive season. With their beautiful colors and delightful taste, they’ll be a cherished part of your holiday traditions. I encourage you to give this recipe a try and experience the nostalgia and joy that comes with each swirl.
Would you like me to find some festive beverage recipes to pair with these beautiful cookies?
Chocolate Vanilla Pinwheel Cookies
PrintChristmas Pinwheel Cookies
Delightfully festive cookies with vibrant red and green swirls, perfect for holiday gatherings.
- Prep Time: 20 minutes
- Cook Time: 12 minutes
- Total Time: 150 minutes
- Yield: 24 cookies 1x
- Category: Dessert
- Method: Baking
- Cuisine: American
- Diet: Vegetarian
Ingredients
- 2 cups all-purpose flour
- 1 cup unsalted butter, softened
- 1 cup powdered sugar
- 1 large egg
- 1 teaspoon vanilla extract
- 1/2 teaspoon salt
- Red and green food coloring
Instructions
- In a mixing bowl, cream together softened butter and powdered sugar until light and fluffy (about 3-5 minutes).
- Beat in egg and vanilla extract until fully incorporated.
- Gradually mix in flour and salt until just combined.
- Divide the dough into two equal portions.
- Add red food coloring to one portion and green to the other, mixing until desired color is achieved.
- Roll each dough portion between two sheets of parchment paper into a rectangle, roughly 1/4-inch thick.
- Layer the red dough over the green dough, rolling tightly into a log.
- Wrap the log in plastic wrap and refrigerate for at least 2 hours.
- Preheat the oven to 350°F (175°C).
- Slice the chilled log into 1/4 inch thick rounds and place on a baking sheet lined with parchment paper.
- Bake for 10-12 minutes or until lightly golden.
- Allow to cool on a wire rack.
Notes
For best results, use high-quality ingredients. Store cookies in an airtight container for up to 1 week.
Nutrition
- Serving Size: 1 cookie
- Calories: 100
- Sugar: 6g
- Sodium: 50mg
- Fat: 6g
- Saturated Fat: 4g
- Unsaturated Fat: 2g
- Trans Fat: 0g
- Carbohydrates: 12g
- Fiber: 0g
- Protein: 1g
- Cholesterol: 30mg


