

Table of Contents
Table of Contents
I still remember the joy in my grandmother’s kitchen every Easter morning. The air was filled with the sweet smell of vanilla and butter as we whipped up her famous sugar cookies, a family tradition that has been passed down for generations. This memory often inspires me to recreate that magic, and there’s no better way than with these delightful Easter Basket Cookies!
Imagine soft, buttery cookie cups filled with fluffy frosting and a sprinkle of colorful candy eggs. Each bite transports me back to those cherished moments, reminding me that cooking isn’t just about the food – it’s about the love and laughter shared around it. These Easter Basket Cookies aren’t just another cookie recipe; they are a heartfelt tribute to spring celebrations and family gatherings, combining nostalgia with creativity in every basket.
What makes this recipe shine brighter than others is how simple yet gratifying it is. With just a few ingredients and your personal touch, you can craft adorable treats that will impress both the kids and the adults. You’ll learn to create these whimsical cookies with step-by-step guidance that’s perfect for bakers of all skill levels. So let’s get our hands a little doughy and make some sweet memories together!
What Are Easter Basket Cookies?
Easter Basket Cookies are delightful sugar cookie cups designed to resemble little baskets brimming with treats. This festive treat’s origins can be traced back to the creative baking trends of the Easter season, where sweets take center stage to celebrate renewal and joy. With their soft, chewy texture and sweet frosting, these cookies strike the perfect balance between comforting and celebratory.
They uniquely combine a tender cookie base with decadent frosting, topped with the whimsical look of colorful candy eggs, giving each bite a crunchy sweetness that bursts with flavor. Perfect for Easter celebrations, springtime gatherings, or to bring a smile to a loved one’s face, these cookies are as versatile as they are delightful. You’ll find them to be a fantastic project to make with kids, inspire creativity, and spread joy during the holiday season.
Why You’ll Love This Recipe
- Customization Galore: One of the best aspects of these Easter Basket Cookies is how easily you can make them your own! Want to swap out the buttercream for cream cheese frosting? Go for it! Craving mint-flavored eggs instead of chocolate? The sky’s the limit! Personalizing each basket can turn these cookies into a creation that reflects your unique taste.
- Budget-Friendly Treats: Let’s face it – store-bought desserts can be pricey, especially around holidays. By making these cookies at home, you’ll save money while creating a unique treat that everyone will love. Plus, you probably already have many of the ingredients in your pantry!
- Entertaining and Adorable: It’s hard to resist the charm of these cookies. They are not only easy on the eyes but also a delightful centerpiece for your Easter spread. Imagine the delight on your guests’ faces when they see these charming, colorful cookies!
- Stress-Free Baking: If you’ve been hesitant to bake because you think it’s too hard, fear not! This recipe is straightforward and quick, with a total time of around one hour. You’ll enjoy a rewarding baking experience, even if you’re a novice.
- Create Sweet Memories: Baking these cookies isn’t just about making treats; it’s about creating beautiful memories with family and friends. Trust me, the laughter and joy that unfold in the kitchen is the best part of the process.

Ingredients
Here’s what you’ll need to whip up these scrumptious Easter Basket Cookies:
- 1 batch sugar cookie dough (homemade or store-bought): Make your own for extra yumminess or grab a pre-made batch for convenience. I love using Pillsbury when I’m short on time!
- 1 cup buttercream or vanilla frosting: Store-bought is perfectly fine, but nothing beats homemade! Try making it with Silk vanilla extract for a lovely flavor.
- Food coloring (optional): Bright colors make your treats pop!
- 1 cup shredded coconut (optional, for ‘grass’): This adds a fun texture. Go for unsweetened for a more natural taste.
- Green food coloring (if using coconut): Helps your grass look vibrant and fresh!
- 1 cup candy-coated chocolate eggs (like Cadbury Mini Eggs): They’re the stars of the show and add that vibrant Easter vibe.
- Licorice laces or colored pipe cleaners (for basket handles, optional): These add an extra layer of whimsy and creativity!
Notes on Ingredient Quality/Substitutions:
- Stick with high-quality butter for a richer flavor in your cookie dough.
- If you or your guests have dietary restrictions, consider using gluten-free flour for a stunning alternative.
Step-by-Step Instructions
Let’s get baking! Here’s how to create your delightful Easter Basket Cookies step-by-step.
- Preheat the Oven: Start by preheating your oven to 350°F (175°C). A great tip is to have your oven ready before you start mixing the dough for seamless baking!
- Prepare the Mini Muffin Pan: Lightly grease a mini muffin pan or use non-stick spray. This is crucial to ensure your cookie baskets come out easily!
- Shape the Cookie Dough: Roll the sugar cookie dough into 1-inch balls. You want them to be just the right size for cozy little baskets.
- Bake the Cookie Cups: Place each dough ball into the muffin cups and bake for 10–12 minutes. You’re looking for golden edges and a set center – the scent will be heavenly!
- Create the Basket Shape: As soon as the cookies are out of the oven, use a small spoon or tart press to gently press a well into the center of each cookie. This is where the frosting will go, so make sure it’s deep enough!
- Cool Down: Allow the cookies to cool completely in the pan before gently removing them. Patience here will ensure your cookies stay intact!
- Add the Coconut ‘Grass’: If you’re using coconut, mix it with a few drops of green food coloring until you achieve your desired grass color.
- Fill with Frosting: Generously fill each cookie cup with frosting. The more, the merrier!
- Decorate with Eggs: Top each frosted cookie with 2–3 candy eggs for that iconic Easter look.
- Create Basket Handles: If desired, attach licorice laces or pipe cleaners to each side for a fun touch. It’s all about presentation!
Chef’s Tips
- Ensure your cookie dough is at room temperature for easier rolling.
- Don’t overbake! The cookies will continue to firm up as they cool.
- Use a clean, dry spoon for shaping the bowls to avoid sticking.
Expert Tips & Tricks
- Storage Recommendations: Store unfilled cookies in an airtight container at room temperature for 3-4 days. Once filled, store them in the fridge and enjoy within 2 days for the best texture.
- Make-Ahead Instructions: You can prepare the cookie cups ahead of time and fill them just before serving. Leaving frosting separate keeps everything fresh!
- Troubleshooting Common Problems:
- If cookies spread too much, chill the dough for 30 minutes before baking.
- If the centers do not form properly, use the tart press immediately after baking for a better shape.
- Use Quality Ingredients: Trust me; it makes all the difference! Opt for real vanilla extract over imitation for a richer flavor.
- Get Creative: Don’t be afraid to mix it up! Use different candies or sprinkles to match your celebration’s theme.
Serving Suggestions
These Easter Basket Cookies are bound to be the star of your dessert table, but they can be paired with a light spring salad or fresh fruit for a well-rounded celebration. For presentation, arrange them on a colorful platter lined with Easter grass or cute floral napkins to add to the festive spirit. They are perfect for Easter brunch, potlucks, or just as a fun family project.
Variations & Substitutions
- Flavor Combinations: Swap the sugar cookie dough for chocolate cookie dough for a delightful twist.
- Dietary Restrictions: If you need to accommodate allergies, consider using dairy-free butter and vegan frosting.
- Seasonal Variations: In the fall, you could transform these into pumpkin spice cookie cups with pastel orange frosting for Halloween!
Nutrition & Storage Info
- Prep Time: 20 minutes
- Cook Time: 10-12 minutes
- Total Time: Approximately 1 hour
- Yield: About 24 cookie cups
- Estimated Calories: 150 calories per cookie cup
- Storage Instructions: Keep unfilled cookies at room temperature in an airtight container for up to 4 days. Frosted cookies should be stored in the refrigerator for up to 2 days.
- How Long They Last: These cookies are best enjoyed fresh, but they can last up to a week if stored properly.
FAQ Section
- Can I use a different type of frosting?
- Absolutely! Feel free to explore cream cheese, chocolate, or even whipped cream frostings for a fun twist.
- What kind of food coloring works best?
- Gel food coloring is great for vibrant colors without changing the texture. Liquid works, too, but may alter the consistency slightly.
- Can I freeze these cookies?
- Yes! You can freeze the unbaked cookie dough or the baked cups, but avoid frosting them before freezing to maintain texture.
- How do I keep my cookies from spreading?
- Chilling the dough before baking helps prevent spreading.
- Are there non-candy options for filling?
- Try filling with fresh fruit, mini marshmallows, or a dollop of fruit preserves for a healthier twist.
- Can I make these gluten-free?
- Yes! Use a gluten-free baking mix instead of all-purpose flour for equally delightful results.
- What do I do if my cookies don’t come out right?
- If they don’t hold their shape, don’t stress! You can always repurpose them into a trifle or ice cream topping.
- Is it necessary to make mini muffin cookies?
- While they’re designed for mini muffin pans, you can also shape them into regular cookies; consider adjusting the baking time.
- Can I use ready-made cookie dough?
- Definitely! Pre-packaged sugar cookie dough is an excellent time-saver and still produces delightful cookies.
- What’s the best way to decorate my cookies?
- Get creative! Use sprinkles, edible glitter, or even fondant shapes to customize your baskets.
Conclusion
These delightful Easter Basket Cookies truly embody the spirit of the season, bringing together sweetness and a dash of creativity. They not only satisfy a sweet craving but also create lasting memories with loved ones. I encourage you to dive in and give this recipe a try – I promise the smiles you’ll see will be well worth it. If you create a batch, I’d love to hear your thoughts and see your fabulous creations! Check out more of my favorite spring recipes on the blog for even more delicious inspiration! Let’s celebrate the season with joy and a sprinkle of sweetness!
PrintEaster Basket Cookies

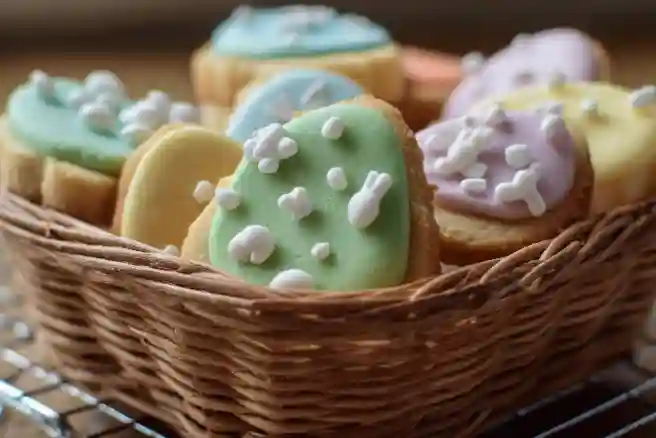
Adorable basket-shaped sugar cookies decorated with pastel icing and filled with colorful Easter candy, perfect for holiday celebrations and gift-giving.
- Prep Time: 30 minutes (plus chilling)
- Cook Time: 10 minutes per batch
- Total Time: 2 hours (including decorating)
- Yield: 24 cookies 1x
- Category: Dessert
- Method: Baking
- Cuisine: American
- Diet: Vegetarian
Ingredients
- 1 batch sugar cookie dough (homemade or store-bought)
- 1 cup buttercream or vanilla frosting
- Food coloring (optional): Bright colors make your treats pop!
- 1 cup shredded coconut (optional, for ‘grass’)
- Green food coloring (if using coconut)
- 1 cup candy-coated chocolate eggs (like Cadbury Mini Eggs)
- Licorice laces or colored pipe cleaners (for basket handles, optional)
Notes on Ingredient Quality/Substitutions:
- Stick with high-quality butter for a richer flavor in your cookie dough.
- If you or your guests have dietary restrictions, consider using gluten-free flour for a stunning alternative.
Instructions
- Whisk together flour, baking powder, and salt in a bowl. Set aside.
- Cream butter and sugar until light and fluffy. Beat in egg and vanilla.
- Gradually mix in dry ingredients until dough forms. Divide into 2 disks, wrap in plastic, and chill for 1 hour.
- Preheat oven to 375°F (190°C). Roll dough to 1/4″ thickness and cut into basket shapes (use a template if needed).
- Bake for 8-10 minutes until edges are lightly golden. Cool completely.
- Decorate cookies with pastel-colored icing to create basket weave patterns.
- While icing is still wet, attach licorice handle ends to each side of basket.
- Once icing sets, fill baskets with assorted Easter candies.
- Let dry completely before packaging or serving.
Notes
- For neater basket shapes, freeze cut-out cookies for 10 minutes before baking.
- Use piping gel to “glue” candy if needed.
- Make ahead tip: Undecorated cookies can be frozen for up to 1 month.
Nutrition
- Serving Size: 1 cookie (without candy)
- Calories: 120
- Sugar: 8g
- Sodium: 35mg
- Fat: 5g
- Saturated Fat: 3g
- Unsaturated Fat: 1.5g
- Trans Fat: 0g
- Carbohydrates: 17g
- Fiber: 0g
- Protein: 1g
- Cholesterol: 20mg


