
Indulge in Elevated Banana Pudding: A Comforting Classic with a Twist
Growing up, my family’s dessert table was a sacred place, and at the very top of that list was my grandmother’s famous banana pudding. The aroma of ripe bananas mingled with creamy vanilla wafted through our home, igniting nostalgia as my siblings and I eagerly awaited our first bowls. This isn’t just any dessert; this is Elevated Banana Pudding, a dish that brings everyone together and provides endless comfort.
What makes this banana pudding "elevated"? It’s the combination of rich, velvety homemade pudding, perfectly ripe bananas, and buttery vanilla wafers that create layers of texture and flavor unlike anything from a store. While most recipes use boring store-bought mixes, my version opts for freshness and quality, giving tender love to every ingredient.
Join me on this journey as I share not just my recipe but the warmth of family memories baked into each serving. By the end of this post, you’ll learn how to whip up an indulgent Elevated Banana Pudding that will charm your loved ones and leave flavor impressions they won’t forget!
What Are Elevated Banana Pudding?
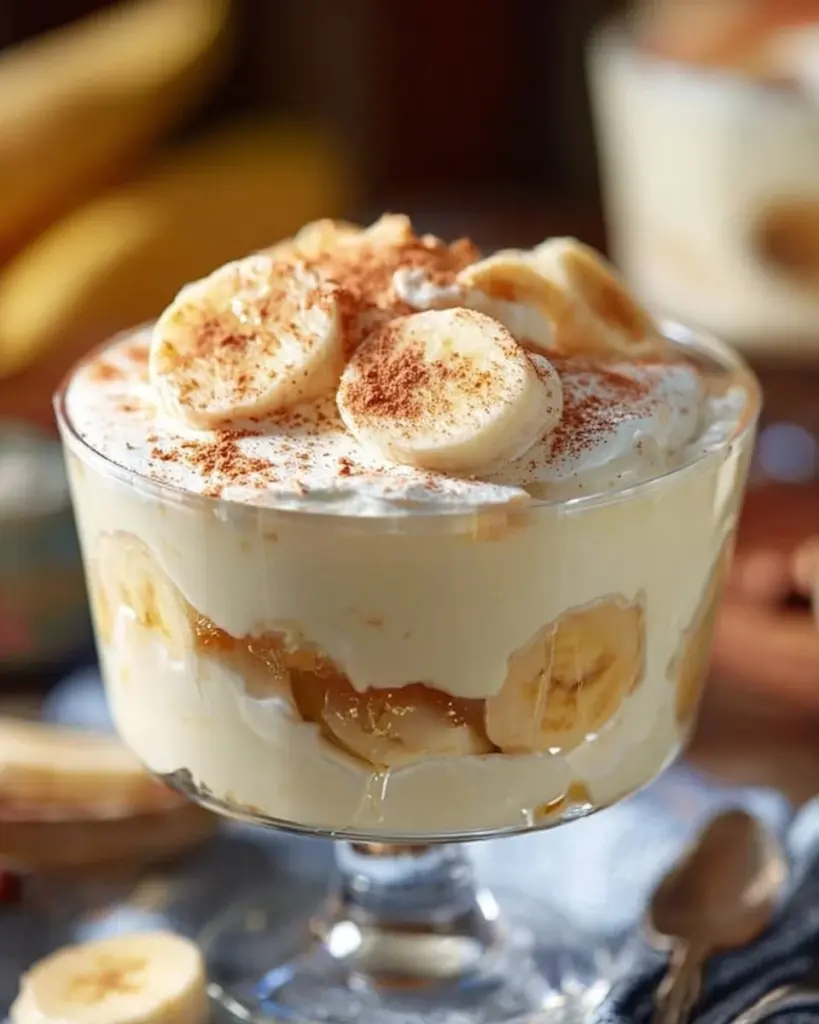
Elevated Banana Pudding can be traced back to classic Southern roots, where it has delighted family gatherings and potlucks for generations. More than just a dessert, it embodies warmth and tradition. The combination of smooth vanilla pudding, fresh banana slices, and crunchy vanilla wafers creates an impeccable balance.
The texture is heavenly: soft, creamy pudding is contrasted by the occasional crunch of wafers soaked in banana goodness. When you take a bite, it’s like a hug in dessert form. You’ll find it to be comforting and indulgent, perfect for a celebration or just a quiet evening at home.
You might want to whip this up for any occasion — from birthdays to holidays or simply when you need a bite of nostalgia. Trust me, once you taste this elevated version, you’ll know that this is the banana pudding you didn’t know you were missing!
Why You’ll Love This Recipe
Homemade Goodness: Forget the bland pre-packaged mixes; this recipe uses fresh ingredients and takes only a few extra minutes to prepare. You’ll notice the difference in flavor right away.
Cost-Effective Delight: Making Elevated Banana Pudding at home is easier on the wallet than buying fancy desserts from restaurants. With just a handful of ingredients, you can create something extraordinary.
Unlimited Customization: Want to throw in a splash of rum? Or perhaps mix in some chocolate chips? This recipe is flexible and begging to be personalized to suit your taste. You can even swap in dairy alternatives if needed!
Suitable for All Occasions: Whether it’s a family picnic or an elegant evening dinner, this banana pudding fits right in and steals the spotlight on the dessert table.
Beginner-Friendly: No culinary degree needed! This recipe doesn’t require any advanced baking skills, but it does provide a sense of accomplishment with its homemade touches.
Ready to impress your family and friends? Let’s dive into the amazing world of Elevated Banana Pudding!
Ingredients Section
To make this decadent Elevated Banana Pudding, gather the following ingredients:
- 5 ripe bananas (preferably speckled for sweetness)
- 2 cups milk (I recommend whole milk for creaminess, but any milk will work)
- 1 cup heavy cream (this is key for dreamy texture; try using organic heavy cream if you can)
- 3/4 cup granulated sugar
- 1/4 cup cornstarch (don’t skip this for thickening!)
- 1 teaspoon vanilla extract (the quality of your vanilla will enhance the flavor; I love using Nielsen-Massey)
- 1/4 teaspoon salt (for balance)
- 1 package vanilla wafers (go for Nilla Wafers for that classic taste)
Prep Notes: Make sure your heavy cream is cold when whipping and if you’re using butter in any variations, ensure it’s at room temperature. Quality ingredients matter for good flavor—so don’t shy away from the best you can find!
Step-by-Step Instructions
- Cook the Pudding:
- In a medium saucepan, whisk together 3/4 cup granulated sugar, 1/4 cup cornstarch, and 1/4 teaspoon salt until combined.
- Gradually add 2 cups milk while stirring to avoid lumps.
- Cook this mixture over medium heat while constantly stirring, until it thickens (about 5-7 minutes). Visual Cue: It should eventually coat the back of a spoon.
- Remove from heat and stir in 1 teaspoon vanilla extract. Set aside to cool completely.
Chef’s Tip: Be patient while cooking; if it’s not thickening, let it cook a little longer!
- Whip the Cream:
- In a large mixing bowl, whip 1 cup heavy cream with an electric mixer until soft peaks form. This should take about 3-5 minutes.
Common Mistake to Avoid: Don’t over-whip the cream; it should be thick but still soft.
Combine:
- Gently fold the cooled pudding into the whipped cream until blended.
Layer the Ingredients:
- In a serving dish (or individual cups for a pretty presentation), start layering with vanilla wafers, followed by sliced bananas, and then pudding mixture. Repeat this process until your ingredients are used, finishing with pudding on top.
Chill:
- Cover with plastic wrap and refrigerate for at least 2 hours before serving. This allows the flavors to meld beautifully, making every spoonful taste even better.
Expert Tips & Tricks
Storage: Leftovers can be stored in an airtight container in the refrigerator for up to 3 days. The wafers may soften, so if you prefer a crunch, store them separately and layer just before serving.
Make-Ahead Instructions: You can prepare the pudding filling a day in advance to save time. Just layer the wafers and bananas on the day of serving.
Fruity Variations: Try adding berries or nuts for added flavor and surprise guests with delightful variations.
Troubleshooting: If your pudding doesn’t thicken, it might need additional cooking—patience is key! If your whipped cream collapses, don’t fret; just retry and be sure not to over-mix it.
Serving Suggestion: Add a dollop of additional whipped cream on top before serving for a nice visual appeal!
Serving Suggestions
Elevated Banana Pudding pairs beautifully with a cup of coffee or tea, making it the perfect ending to any meal. For a fun twist, consider serving it alongside a slice of decadent chocolate cake or even a scoop of vanilla bean ice cream. Presentation is key, so using a clear glass dish or parfait glasses will showcase those beautiful layers!
Variations & Substitutions
Flavor Twists:
- Chocolate: Add a layer of chocolate pudding or sprinkle chocolate shavings between the layers.
- Caramel: Drizzle caramel sauce on the layers for a sweet surprise.
Dietary Restrictions:
- Dairy-Free: Use coconut cream or almond milk as substitutes.
- Gluten-Free: Swap regular vanilla wafers for gluten-free versions.
Seasonal Variations: Consider swapping bananas for seasonal fruits like strawberries in the spring or peaches in the summer for a vibrant twist!
Nutrition & Storage Info
- Prep Time: 20 minutes
- Cook Time: 10 minutes
- Total Time: 2 hours and 30 minutes (includes chilling)
- Yield: About 8 servings
- Estimated Calories: Approximately 300 calories per serving (this may vary based on specific ingredient choices)
Storage Instructions: Keep in the refrigerator for up to 3 days for best quality. The pudding can be frozen, but the consistency and texture will change upon thawing.
FAQ Section
Can I use frozen bananas?
- While fresh bananas provide the best texture and flavor, you can use frozen if you’re in a pinch. Just ensure they are fully thawed and drained.
What can I do if my pudding is lumpy?
- If you encounter lumps, you can strain the pudding through a fine-mesh sieve to create a smooth texture.
How long does this pudding last in the fridge?
- Ideally, consume within 3 days for the best taste and texture.
Can I make this vegan?
- Yes! Swap heavy cream for cashew cream and milk for a plant-based version, and ensure your wafer cookies are vegan.
Do I have to use vanilla wafers?
- Feel free to use any cookie you prefer, like graham crackers or shortbreads.
Is there a way to make this lighter?
- You can reduce the amount of sugar and use low-fat milk instead of whole milk and heavy cream.
Can I use flavored extracts?
- Absolutely, adding almond or coconut extract can enhance the flavor profile beautifully.
What if I want less sweetness?
- Adjust the sugar in the pudding to your taste preference – this recipe allows for tweaking!
What size dish is best for layering?
- A 9×13 inch baking dish or a large glass trifle bowl works great for layering.
Can I skip chilling?
- While you can serve it right away, chilling improves flavor and texture immensely, so it’s worth the wait!
Conclusion
Elevated Banana Pudding is more than just a dessert; it’s a delightful experience wrapped in nostalgia and love. The combination of creamy pudding, fresh bananas, and buttery wafers creates a comforting treat that everyone will adore. I encourage you to try this recipe – feel free to adapt and make it your own!
Please let me know how your Elevated Banana Pudding turns out; I love hearing your stories and experiences! And don’t forget to check out my blog for other delicious recipes that’ll tantalize your taste buds and bring joy to your kitchen!
PrintElevated Banana Pudding
A comforting classic banana pudding made with homemade pudding, fresh bananas, and vanilla wafers, bringing warmth and nostalgia to any occasion.
- Prep Time: 20 minutes
- Cook Time: 10 minutes
- Total Time: 150 minutes
- Yield: 8 servings 1x
- Category: Dessert
- Method: Chilling
- Cuisine: Southern
- Diet: Vegetarian
Ingredients
- 5 ripe bananas
- 2 cups milk
- 1 cup heavy cream
- 3/4 cup granulated sugar
- 1/4 cup cornstarch
- 1 teaspoon vanilla extract
- 1/4 teaspoon salt
- 1 package vanilla wafers
Instructions
- In a medium saucepan, whisk together sugar, cornstarch, and salt until combined.
- Gradually add milk while stirring to avoid lumps.
- Cook over medium heat, stirring constantly, until thickened (about 5-7 minutes).
- Remove from heat and stir in vanilla extract; let cool completely.
- In a large bowl, whip heavy cream with an electric mixer until soft peaks form (about 3-5 minutes).
- Gently fold the cooled pudding into the whipped cream.
- In a serving dish, layer wafers, sliced bananas, and pudding mixture. Repeat until all ingredients are used, finishing with pudding on top.
- Cover and refrigerate for at least 2 hours before serving.
Notes
Optional: Layer with chocolate pudding or drizzle caramel sauce for extra flavor. Store leftovers in an airtight container for up to 3 days.
Nutrition
- Serving Size: 1 serving
- Calories: 300
- Sugar: 25g
- Sodium: 150mg
- Fat: 20g
- Saturated Fat: 10g
- Unsaturated Fat: 5g
- Trans Fat: 0g
- Carbohydrates: 40g
- Fiber: 2g
- Protein: 4g
- Cholesterol: 40mg


