
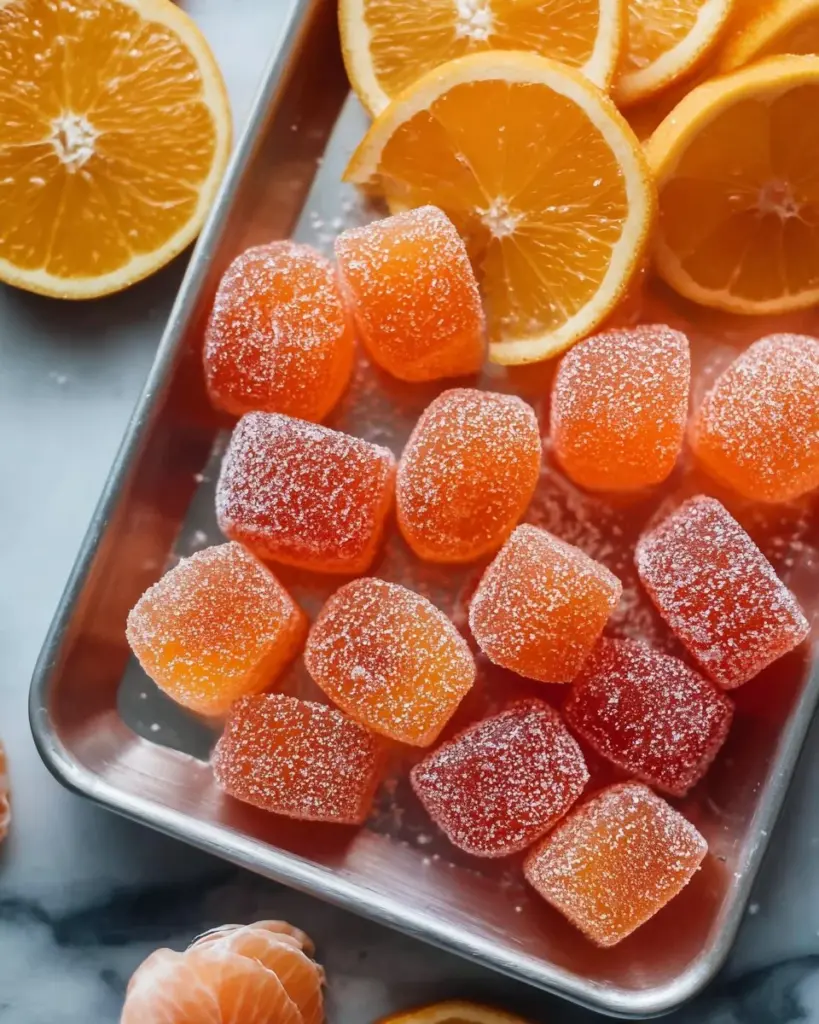
Irresistible Classic Homemade Orange Candy Recipe: A Sweet Family Tradition
There’s something magical about homemade treats that captures the heart, isn’t there? For me, those treasured sweets often evoke memories of my grandmother in her sunny kitchen, the air filled with the sweet fragrance of fresh oranges. She would whip up her Classic Homemade Orange Candy Recipe, and my siblings and I would gather around, eagerly waiting for those tangy, chewy delights to set. Each bite was a burst of citrus sunshine, wrapping us in warmth and playfulness.
What sets this recipe apart from others is not only the fresh, vibrant flavor of real oranges but also the nostalgia it wraps around each piece. It’s a recipe steeped in love, and the process becomes a shared experience, much like a warm hug after a long day. Unlike store-bought versions, these candies are free of artificial additives and can be customized to fit your taste.
In this post, I’ll guide you through making these nostalgic sweets from scratch, sharing my favorite tips and tricks along the way. By the end, you’ll not only have a delightful candy recipe but also a chance to create new memories with your loved ones. So, let’s get started on this citrusy adventure!
What Are Classic Homemade Orange Candies?
The origins of homemade orange candy can be traced back to a time when fruits were preserved for enjoyment long after harvest. This particular candy marries the sweet and tartness of oranges with a rich, chewy consistency that both kids and adults adore. When you indulge in these treats, you’re met with a satisfying chew that melts in your mouth, bursting with intense orange flavor.
What makes these candies unique is the use of fresh oranges—not just juice but the zest too. It’s like pulling a sunbeam into your kitchen! There’s something special about incorporating natural ingredients, which elevates the snack from average to extraordinary. They’re perfect for holidays, birthday parties, or simply when you want to add a pinch of sweetness to your day.
Why You’ll Love This Recipe
1. Fresh Ingredients, Exceptional Flavor
I’ve tried many recipes that just use flavored syrups, but nothing compares to the brightness of using real oranges. The flavor deepens as the syrup simmers, transforming your kitchen into a citrusy oasis.
2. Cost-Effective Treat
Why spend a fortune on gourmet store-bought candies when you can make these delightful treats at home? With just a few exceptionally affordable ingredients, you can whip up a batch that’ll impress your friends and family without breaking the bank.
3. Tailored to Your Taste
One of the best parts of this recipe is the flexibility. Want to add a twist of lemon or mix in some other fruits? Go for it! You’re in control, and I love adding a splash of orange extract for an extra zesty kick!
4. Simple to Make
Don’t be intimidated by the idea of candy-making—this recipe is straightforward and perfect for beginners! If I can master it, so can you. Just grab your ingredients and a little patience, and you’ll be well on your way.
5. Create Lasting Memories
This isn’t just about candy; it’s about togetherness! I remember making these with my kids, giggles echoing in the kitchen, flour dust in the air, and a whole lot of sweet citrus smells. It’s an experience you can share and enjoy.
Ingredients
- 2 large fresh oranges (for juice and zest)
- 2 cups granulated sugar
- 1/4 cup corn syrup
- 1/2 cup water
- 1 tablespoon butter (room temperature)
- 1 packet unflavored gelatin
- 1 teaspoon orange extract (optional)
- Powdered sugar (for dusting, optional)
- A pinch of salt (optional)
Ingredient Quality Tips:
- Fresh Oranges: Look for vibrant, firm oranges—those with a glossy skin are usually the best!
- Granulated Sugar: Any brand will do, but using fine sugar helps dissolve more easily.
- Corn Syrup: This helps with texture, giving your candy that chewy consistency.
- Butter: Always use room temperature butter for easy incorporation.
- Gelatin: I prefer Knox brand, as I find it blooms nicely.
Step-by-Step Instructions
1. Zest & Juice the Oranges
Begin by zesting the oranges to collect the outer peel and set the zest aside. Once that’s done, juice the oranges until you have about 3/4 cup of fresh juice. Set both the zest and juice aside for later use.
2. Make the Syrup
In a medium saucepan, combine the fresh orange juice, 1/2 cup of water, 2 cups of sugar, and 1/4 cup of corn syrup. Place the saucepan over medium heat and stir until the sugar is dissolved. Once dissolved, bring the mixture to a simmer.
3. Simmer for Flavor
Allow the syrup to simmer for approximately 10 minutes, stirring occasionally. This 10-minute window is crucial; as the mixture thickens slightly, it draws out the concentrated orange flavor that you’ll love.
4. Prepare the Gelatin
While the syrup simmers, sprinkle the gelatin over 1/4 cup of cold water in a small bowl and let it bloom for 5 minutes until softened. Then, add it to the simmering syrup and mix until fully dissolved.
5. Add Zest and Butter
Now, add the butter and orange zest to the syrup and continue to cook for an additional 5 minutes. Stir constantly during this phase to avoid sticking!
6. Cool and Set
Once the mixture achieves a honey-like consistency, remove it from the heat and allow it to cool to room temperature for about 1-2 hours. Pour the cooled mixture into a lightly greased 8×8-inch dish or silicone candy molds. Let it set at room temperature for another 1-2 hours, then refrigerate for at least 4-6 hours until fully firm.
7. Cut & Dust
After the candy has set, remove it from the dish or molds and cut it into bite-sized pieces. To prevent sticking, dust the pieces with powdered sugar if desired.
Expert Tips & Tricks
- Storage: Store your candies in an airtight container at room temperature. They can last up to two weeks.
- Make-ahead Instructions: These candies are perfect for preparing in advance. You can easily make them a week prior to an occasion!
- Common Mistakes: One thing I learned the hard way—don’t skip the blooming step for the gelatin! It’s essential for the right texture.
- Troubleshooting: If your candy doesn’t set, it could be due to not simmering long enough. No worries! Simply remelt the mixture, add more gelatin, and re-set.
- Flavor Variations: Feel free to experiment! A teaspoon of lemon or lime zest can add a refreshing twist, while a splash of vanilla extract can give a beautiful depth.
Serving Suggestions
These homemade orange candies are fantastic on their own but pair wonderfully with a hot cup of tea or coffee for a cozy afternoon treat. For special occasions, consider serving them on a beautiful platter adorned with fresh herbs or edible flowers. They make charming favors for parties or celebrations too!
Variations & Substitutions
- Alternative Flavors: Want to switch things up? Try combining orange with grapefruit or lemon for a unique flavor profile.
- Dietary Adaptations: For a vegan version, use agar-agar in place of gelatin.
- Seasonal Additions: During the holidays, consider adding a touch of cinnamon or nutmeg to elevate the taste.
Nutrition & Storage Info
- Prep Time: 15 minutes
- Cook Time: 15 minutes
- Total Time: 5-6 hours (including setting)
- Yield: Approximately 36 bite-sized pieces
- Estimated Calories: 40 calories per piece (based on total yield)
- Storage Instructions: These candies should be kept in an airtight container. They can be stored at room temperature for up to two weeks or refrigerated for up to four weeks.
FAQ Section
Can I use bottled orange juice?
- While you can, I highly recommend using fresh juice for the best flavor.
Can I freeze these candies?
- Freezing isn’t ideal since it may alter the texture. Stick to room temperature or refrigerate.
My candy didn’t set; what went wrong?
- It likely didn’t simmer for long enough, or the gelatin wasn’t properly bloomed.
Can I make this recipe without corn syrup?
- Yes, you can substitute with honey or maple syrup, but it may alter the end texture slightly.
How can I make it firmer?
- Add an extra half packet of gelatin to the mixture before it cools.
Can these be made in advance?
- Absolutely! They keep well and would make a great make-ahead treat.
What if I don’t have orange extract?
- While it enhances the flavor, you can simply omit it and still get delicious candy.
What’s the best way to cut these?
- For cleaner cuts, spray your knife with non-stick spray before slicing.
Can I roll them in chocolate?
- Why not! Consider dipping them in dark or white chocolate for a decadent treat.
What’s the best way to serve them?
- Present them in a decorative candy dish or package them as thoughtful gifts!
Conclusion
This Classic Homemade Orange Candy Recipe is more than just a sweet treat; it’s a journey of flavors and memories you can recreate in your kitchen. I truly believe that every piece crafted brings a sprinkle of joy and warmth, and I can’t wait for you to experience that.
I encourage you to give this recipe a try and immerse yourself in the process of candy-making. I’d love to hear your thoughts and any variations you tried! Don’t forget to explore other delightful recipes on my blog; I’ve got plenty of delicious options waiting for you. Happy candy-making!
PrintClassic Homemade Orange Candy
A delightful homemade orange candy recipe that captures the bright flavor of fresh oranges, perfect for creating sweet memories with family.
- Prep Time: 15 minutes
- Cook Time: 15 minutes
- Total Time: 360 minutes
- Yield: 36 pieces 1x
- Category: Candy
- Method: Candy Making
- Cuisine: American
- Diet: Vegetarian
Ingredients
- 2 large fresh oranges (for juice and zest)
- 2 cups granulated sugar
- 1/4 cup corn syrup
- 1/2 cup water
- 1 tablespoon butter (room temperature)
- 1 packet unflavored gelatin
- 1 teaspoon orange extract (optional)
- Powdered sugar (for dusting, optional)
- A pinch of salt (optional)
Instructions
- Zest the oranges and juice them to collect about 3/4 cup of juice. Set both aside.
- In a medium saucepan, combine the orange juice, water, sugar, and corn syrup. Heat over medium and stir until sugar dissolves, then bring to a simmer.
- Simmer for about 10 minutes, stirring occasionally.
- While the syrup simmers, bloom the gelatin in cold water for 5 minutes, then add it to the syrup and stir until dissolved.
- Add butter and zest to the syrup, cooking for another 5 minutes.
- Remove from heat and cool to room temperature for 1-2 hours, then pour into a greased dish or molds and let set at room temperature for another 1-2 hours and then refrigerate for 4-6 hours.
- Once set, cut into bite-sized pieces and dust with powdered sugar if desired.
Notes
Store candies in an airtight container; they can last up to two weeks at room temperature.
Nutrition
- Serving Size: 1 piece
- Calories: 40
- Sugar: 8g
- Sodium: 5mg
- Fat: 0g
- Saturated Fat: 0g
- Unsaturated Fat: 0g
- Trans Fat: 0g
- Carbohydrates: 10g
- Fiber: 0g
- Protein: 0g
- Cholesterol: 0mg


