
Cozy Up with My Irresistible Hot Cocoa Cake: A Slice of Comfort
Picture this: a chilly winter evening, the kind where the air is crisp and the world outside is dusted with a fresh layer of snow. You’re snuggled up on the couch, a warm blanket wrapped around you, and in front of you sits a slice of my heavenly Hot Cocoa Cake. The first bite transports me right back to my grandma’s kitchen, where the aroma of chocolate wafted through the air as she baked her secret cake recipe. Nothing quite embodies warmth, love, and comfort food like this indulgent dessert.
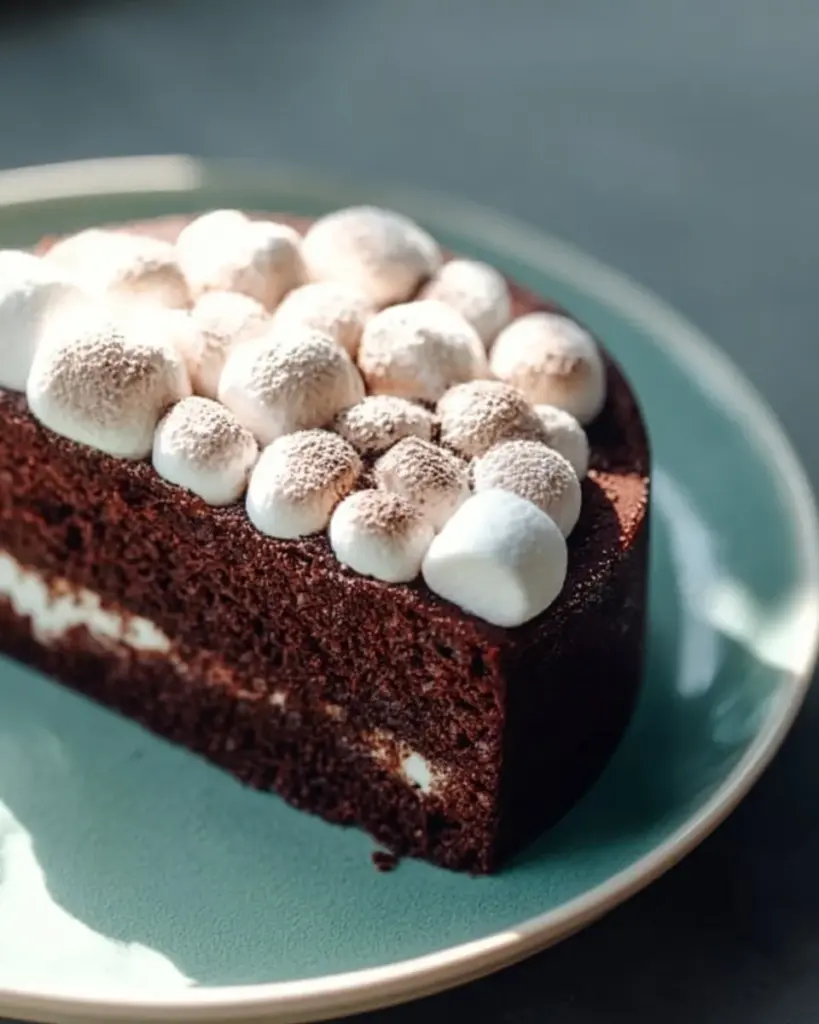
What sets my Hot Cocoa Cake apart from all the others is its decadent chocolate flavor that’s both rich and comforting, with a silky marshmallow fluff filling that reminds me of those cozy evenings spent sipping hot chocolate by the fire. It’s more than just a cake; it’s a time machine that takes you to simpler times when comfort food was the antidote to life’s little stressors.
In this post, I promise to share not just the recipe but also some of my tips and tricks that will have your cake looking like it came straight from a bakery display. Plus, I’ll share ways to customize it to make it your own. So grab your mixing bowls, and let’s dive into this cozy, delightful baking adventure!
What is Hot Cocoa Cake?
Hot Cocoa Cake is a delightful twist on the classic chocolate cake, inspired by the beloved winter beverage we all adore. Traditionally, it’s a moist and rich chocolate cake infused with the essence of a classic hot cocoa, topped with a fluffy marshmallow frosting that mimics the sweet and creamy topping you’d find on your favorite winter drink.
The taste of Hot Cocoa Cake is nothing short of heavenly – it’s rich and chocolatey but lightened by the airy marshmallow fluff. The texture is perfectly moist, making each slice a mouthwatering treat that feels indulgent yet comforting. Perfect for gatherings, cozy nights in, or even as a festive dessert during holiday celebrations, this cake has a unique blend of flavors that dances on your palate, offering both nostalgia and satisfaction.
You’ll want to whip this cake up whenever the weather turns chilly or when you’re in need of a little pick-me-up – because who wouldn’t want a piece of comforting chocolate goodness?
Why You’ll Love This Recipe
Decadence without the Fuss: Unlike many fancy layered cakes that require precise techniques, my Hot Cocoa Cake is remarkably straightforward to make. It’s perfect for bakers of any skill level, making it an ideal choice for beginners and experienced bakers alike.
Budget-Friendly: Why spend a fortune on fancy bakery cakes when you can create something incredible at home? With just a handful of affordable ingredients like all-purpose flour, cocoa powder, and sugar, you can whip up this stunning dessert for a fraction of the cost.
Customization Galore: Love a little twist to your cake? You can easily add peppermint extract for a refreshing holiday flavor or even mixed nuts for extra texture. This recipe serves as a fantastic base, and you can have fun tailoring it to your tastes.
Impressive Factor: No one will believe you made this beauty at home! Once you frost it with that fluffy marshmallow buttercream and add your decorations, it looks like your cake came straight from a gourmet bakery. Your friends will be begging for the recipe!
Nostalgic Delight: This cake has the power to bring back memories and create new ones. Made for gatherings, birthdays, or simply as a treat for yourself, it will leave everyone smiling and reminiscing.
Ingredients Section
Cake Ingredients:
- 1 3/4 cups all-purpose flour (for a gluten-free option, use a 1:1 gluten-free flour blend)
- 3/4 cup unsweetened cocoa powder (look for high-quality Dutch-processed for a deeper flavor)
- 2 cups granulated sugar
- 1 1/2 teaspoons baking powder
- 1 1/2 teaspoons baking soda
- 1 teaspoon salt
- 2 large eggs (room temperature for better mixing)
- 1 cup whole milk (for a dairy-free version, almond or oat milk works well)
- 1/2 cup vegetable oil (feel free to substitute with melted coconut oil)
- 2 teaspoons vanilla extract (pure vanilla extract makes all the difference)
- 1 cup boiling water
Buttercream Frosting Ingredients:
- 1 cup unsalted butter, softened to room temperature (use high-quality butter for the best flavor)
- 4 cups powdered sugar
- 1/4 cup unsweetened cocoa powder
- 3-4 tablespoons heavy cream (more or less for consistency)
- 1 cup marshmallow fluff (can substitute with homemade marshmallow creme)
Preparation Notes:
- Make sure your butter is soft to ensure a creamy frosting.
- Have your eggs and milk at room temperature to achieve the best batter consistency.
Step-by-Step Instructions
Preheat and Prepare: Preheat your oven to 350°F (175°C). Grease and flour two 9-inch round cake pans to prevent sticking.
Mix Dry Ingredients: In a large mixing bowl, whisk together the flour, cocoa powder, granulated sugar, baking powder, baking soda, and salt until well combined.
Wet Ingredients: Add the eggs, milk, vegetable oil, and vanilla extract to the dry mixture. Beat on medium speed for about 2 minutes until everything is smooth.
Boil and Stir: Carefully stir in the boiling water until the batter is evenly mixed. Your batter will be thin; this is perfectly normal!
Bake: Divide the batter evenly between the prepared cake pans and bake in the preheated oven for 30-35 minutes. Check for doneness by inserting a toothpick into the center; it should come out clean or with a few moist crumbs attached.
Cool: Once done baking, remove the cakes from the oven and let them cool in the pans for about 10 minutes, then transfer to wire racks to cool completely.
Make the Buttercream: In a large bowl, beat the softened butter and powdered sugar together, gradually adding in the cocoa powder. Pour in the heavy cream and beat until you reach a creamy, spreadable consistency.
Assemble the Cake: Once your cakes are completely cooled, spread a layer of marshmallow fluff on top of one cake layer, place the second layer on top, and then frost the entire cake with buttercream. Be liberal with the frosting!
Decorate and Serve: Feel free to add sprinkles, chocolate shavings, or more marshmallow fluff on top for extra pizzazz! Slice and serve with a warm cup of cocoa or coffee.
Expert Tips & Tricks
Room Temperature Ingredients: For the best texture, make sure your eggs and butter are at room temperature before mixing. This helps create a smoother batter.
Storage: Store any leftovers in an airtight container at room temperature for up to 2 days, or in the fridge for up to a week. If you want to store it longer, freeze it (well-wrapped) for up to three months.
Make Ahead: You can bake the cakes a day in advance. Just wrap them in plastic wrap after cooling and store them in the fridge overnight – this makes them easier to frost!
Troubleshooting: If your cake sinks in the middle, this is often due to overmixing or underbaking. Always check with a toothpick to ensure it’s done!
Frosting Tip: If your buttercream is too thick, add a splash more of heavy cream until you achieve your desired consistency.
Serving Suggestions
Pair your Hot Cocoa Cake with a steaming cup of classic hot chocolate, topped with whipped cream and a sprinkle of cinnamon for that extra touch of warmth. You could serve it alongside a scoop of vanilla ice cream to balance out the richness, or elevate it even further by using peppermint ice cream for the holidays!
Presentation is key – consider using a cake stand to showcase your beautiful creation or piping extra frosting decorations on the plate for that professional touch.
This cake is perfect for holiday gatherings, birthday parties, or even just a cozy night in with friends. It’s sure to bring smiles and spark joy wherever it’s served!
Variations & Substitutions
Flavor Twists: Add a teaspoon of peppermint extract to your batter for a holiday-inspired cake, or mix in some espresso powder for a mocha-flavored twist.
Dairy-Free Options: Swap out whole milk for almond milk and use coconut oil instead of butter for a dairy-free version of the cake.
Seasonal Variations: Try adding pumpkin spice in the fall or fresh berries during the summer to truly customize this cake to your liking!
Nutrition & Storage Info
- Prep Time: 20 minutes
- Cook Time: 30-35 minutes
- Total Time: About 1 hour
- Yield: 12 servings
- Estimated Calories: Roughly 350 per slice (calorie counts may vary based on exact ingredients used)
Storage Instructions:
- Room Temperature: Up to 2 days.
- Refrigeration: Up to 1 week.
- Freezing: Up to 3 months—wrap slices tightly in plastic wrap and place in an airtight container.
FAQ Section
Can I use different pans?
Absolutely! You can make this as a 9×13-inch sheet cake or in cupcake form; just adjust your baking time accordingly.What’s the best way to frost the cake?
Start with a crumb coat (a thin layer of frosting to lock in crumbs), chill for about 30 minutes, then frost the final layer for a smooth finish.Can I use cake flour instead of all-purpose?
Yes, cake flour will give you an even softer and lighter texture. Just be sure to adjust the measurements slightly.What if my cake is too dry?
Overbaking can lead to dryness; always check for doneness before the time listed. If this happens, you can lightly brush the cake with milk or simple syrup to moisten it.How do I make it chocolate mint flavored?
Add peppermint extract to the batter and use mint-flavored frosting instead of the marshmallow fluff!Do I need special equipment?
No fancy equipment needed! Just a mixer, bowls, measuring cups, and your regular baking pans will do just fine.Is this cake suitable for kids?
Definitely! Just be sure to supervise younger bakers, especially around the boiling water step.How can I make it more visually appealing?
Add decorative touches like chocolate shavings, mini marshmallows, or some festive sprinkles on top!Can I make it gluten-free?
Yes! Substitute all-purpose flour with a gluten-free flour blend, and make sure your baking powder is gluten-free too.Can I freeze this cake?
Yes! Freeze it un-frosted for better results, and allow it to cool completely before wrapping.
Conclusion
My Hot Cocoa Cake embodies everything that makes baking special – it’s not just about flour and sugar, but about creating moments of joy and nostalgia. I hope you give this recipe a try and experience the love and comfort it brings as much as I have. If you make it, I’d love to hear from you! Leave your comments or feedback below, and don’t forget to check out other cozy recipes on the blog that I know your family will cherish. Happy baking!
PrintHot Cocoa Cake
A delightful twist on the classic chocolate cake inspired by the beloved winter beverage, Hot Cocoa. This moist and rich cake features a fluffy marshmallow frosting that captures the essence of hot chocolate.
- Prep Time: 20 minutes
- Cook Time: 35 minutes
- Total Time: 60 minutes
- Yield: 12 servings 1x
- Category: Dessert
- Method: Baking
- Cuisine: American
- Diet: Vegetarian
Ingredients
- 1 3/4 cups all-purpose flour
- 3/4 cup unsweetened cocoa powder
- 2 cups granulated sugar
- 1 1/2 teaspoons baking powder
- 1 1/2 teaspoons baking soda
- 1 teaspoon salt
- 2 large eggs
- 1 cup whole milk
- 1/2 cup vegetable oil
- 2 teaspoons vanilla extract
- 1 cup boiling water
- 1 cup unsalted butter, softened
- 4 cups powdered sugar
- 1/4 cup unsweetened cocoa powder
- 3–4 tablespoons heavy cream
- 1 cup marshmallow fluff
Instructions
- Preheat your oven to 350°F (175°C) and grease and flour two 9-inch round cake pans.
- In a large mixing bowl, whisk together the flour, cocoa powder, granulated sugar, baking powder, baking soda, and salt until well combined.
- Add the eggs, milk, vegetable oil, and vanilla extract to the dry mixture. Beat on medium speed for about 2 minutes until smooth.
- Carefully stir in the boiling water until the batter is mixed. It will be thin.
- Divide the batter evenly between the prepared cake pans and bake for 30-35 minutes. Check for doneness with a toothpick.
- Remove the cakes from the oven, let them cool in the pans for 10 minutes, then transfer to wire racks to cool completely.
- In a large bowl, beat the softened butter and powdered sugar together, gradually adding cocoa powder. Pour in the heavy cream and beat until creamy.
- Spread a layer of marshmallow fluff on top of one cake layer, place the second layer on, and frost the entire cake with buttercream.
- Decorate with sprinkles or chocolate shavings as desired and serve.
Notes
Store leftovers in an airtight container at room temperature for up to 2 days or in the fridge for up to 1 week.
Nutrition
- Serving Size: 1 slice
- Calories: 350
- Sugar: 25g
- Sodium: 400mg
- Fat: 14g
- Saturated Fat: 8g
- Unsaturated Fat: 4g
- Trans Fat: 0g
- Carbohydrates: 50g
- Fiber: 3g
- Protein: 5g
- Cholesterol: 40mg


