
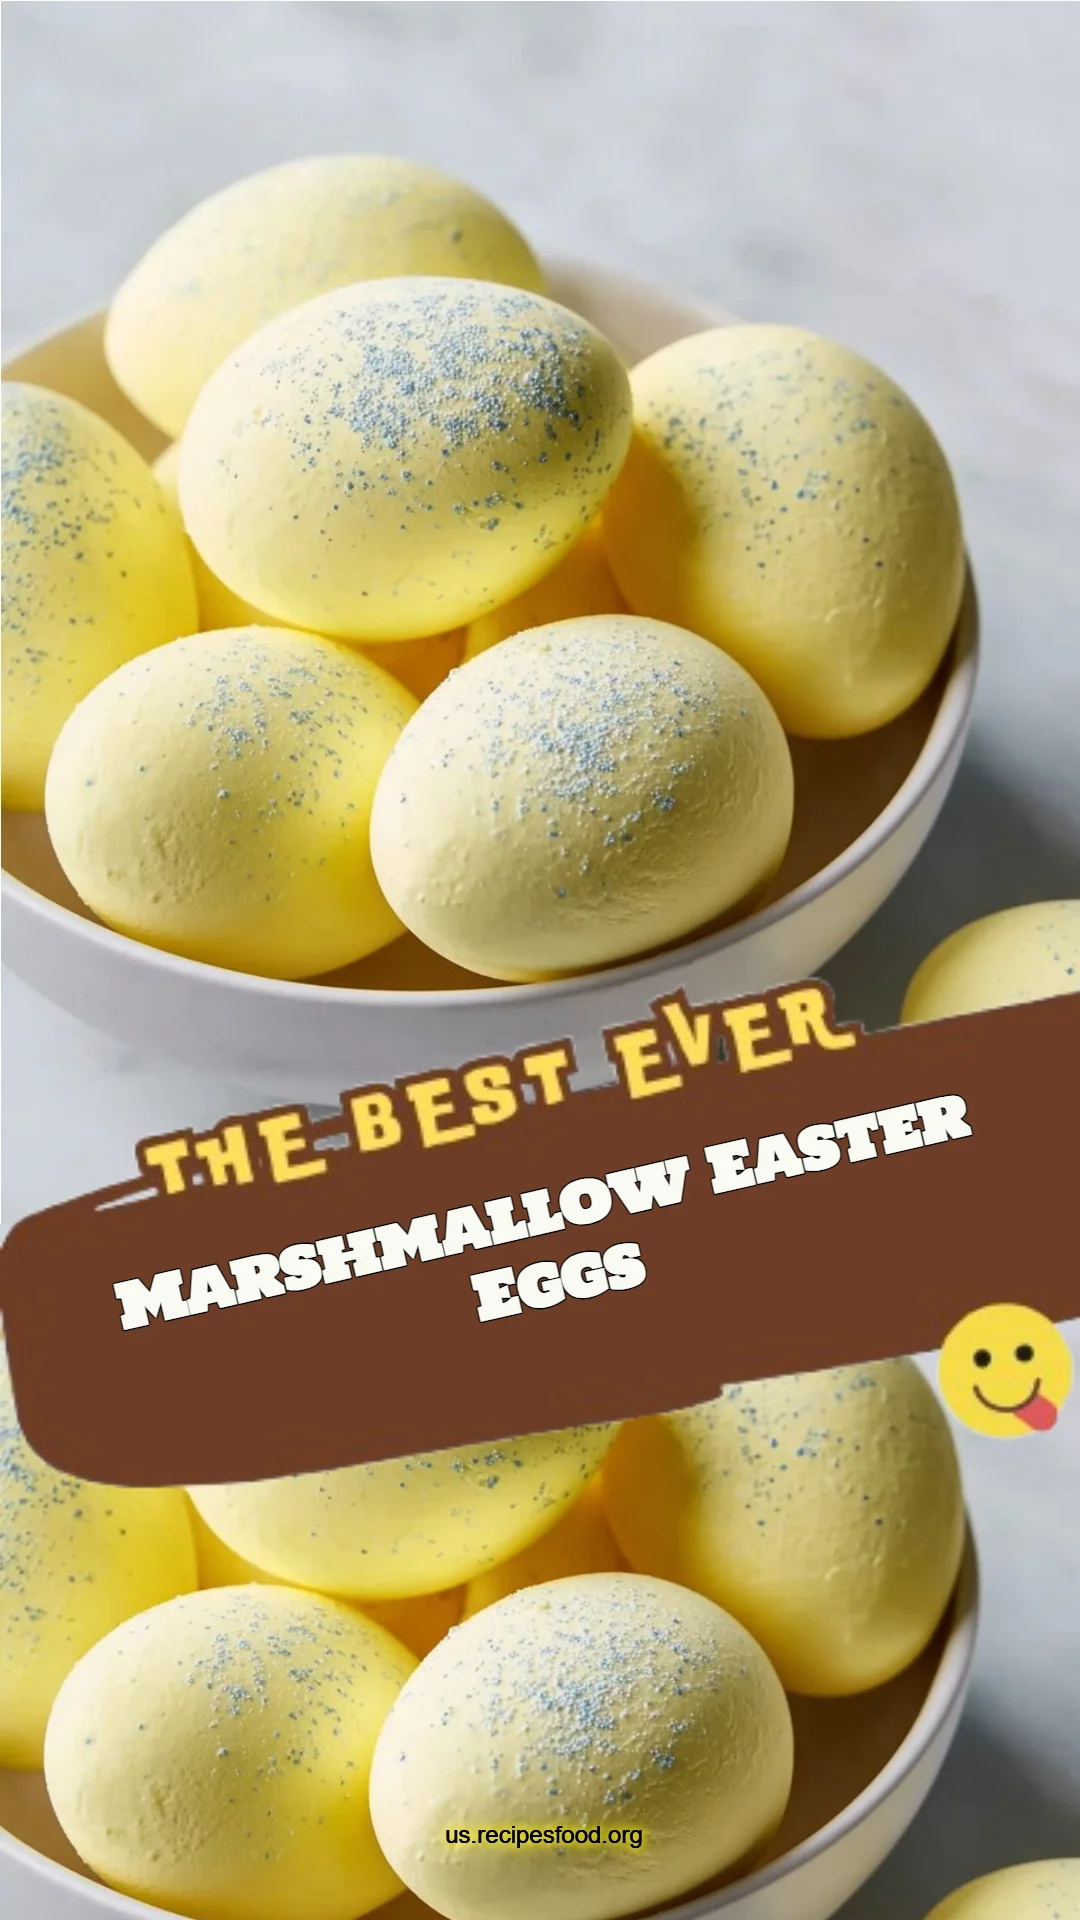
Irresistible Marshmallow Easter Eggs: Sweet Treats to Make Your Holiday Special
As a child, I remember every Easter morning with delight. The air was filled with the sweet scent of chocolate bunnies and the unmistakable presence of vibrant, colorful Marshmallow Easter Eggs hidden around the house. My siblings and I would race through the rooms, laughter ringing in the air, as we uncovered these sugary treasures. Fast forward to today, and nothing brings that nostalgic feeling back quite like creating my very own version of those delightful treats.
What makes these Marshmallow Easter Eggs so special is not just the fluffy texture and sweet vanilla flavor, but the magic of making them from scratch. Unlike store-bought versions, which can often be chewy or lack real flavor, these homemade gems are pillows of airy bliss that simply melt in your mouth. They aren’t just candy; they’re part of a beloved family tradition that blends nostalgia and creativity.
In this recipe, I’ll guide you through each step, sharing personal tips and insights I’ve garnered through trial and error. Whether you’re looking to impress family at your Easter brunch or create a unique gift for friends, you’ll learn how to craft beautifully decorated marshmallow eggs that are sure to evoke smiles and memories. Let’s dive in and create some sweetness together!
What Are Marshmallow Easter Eggs?
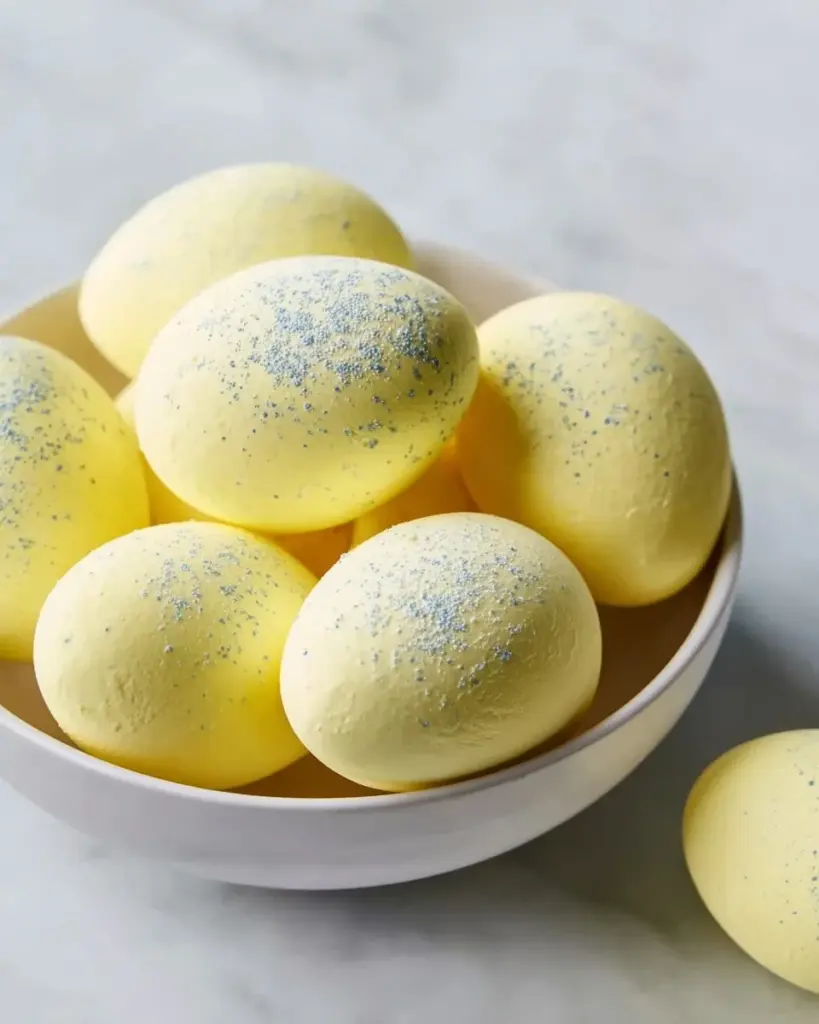
Marshmallow Easter Eggs, as the name suggests, are delightful, egg-shaped sweets made with marshmallow, a concoction of sugar, and gelatin. Their exact origin is a bit of a mystery, but mainstream popularity surged in the United States during the late 19th century, aligning perfectly with Easter celebrations. These soft, pillowy treats are often coated in candy or chocolate, making them a festive favorite.
The taste? Imagine light vanilla marshmallow intermingling with a subtly sweet sugar crust; the texture is soft yet just firm enough to hold its shape. Unique to homemade versions, you can customize the flavors, shapes, and colors to fit your festive needs. They are perfect for sprucing up your Easter table or as fun family activities leading up to the holiday.
So, why whip up a batch of these delightful marshmallow eggs? They make for thoughtful gifts, can be used for Easter egg hunts, or simply enjoyed at home while reminiscing about the joy of the season.
Why You’ll Love This Recipe
Thoroughly Delicious: The flavor is completely customizable! You can experiment with different extracts like almond or lemon, and color them any pastel shades you desire.
Cost-effective Goodness: Why spend a fortune on premium chocolates or specialty marshmallows when you can make these better-tasting treats at home? This recipe is not only fun but wallet-friendly.
Elevate Your Craft: Compared to store-bought options, these are far superior. The satisfaction of whipping up a batch of fluffy marshmallows from scratch surpasses anything you can grab off a shelf. They also use simple ingredients that you likely already have at home.
Fantastic for All Occasions: While perfect for Easter, these marshmallow eggs can easily be adapted for other holidays or seasons. Just change up the colors and edible glitter, and you have a treat for birthdays, baby showers, or even Halloween.
Moderately Simple: While this recipe might look intimidating, I promise you it’s easy and fun! With just a little patience, you’ll end up with beautiful marshmallow eggs.
Follow along, and you’ll master the art of making homemade Marshmallow Easter Eggs in no time!
Ingredients Section
To create these light and fluffy Marshmallow Easter Eggs, you’ll need the following ingredients:
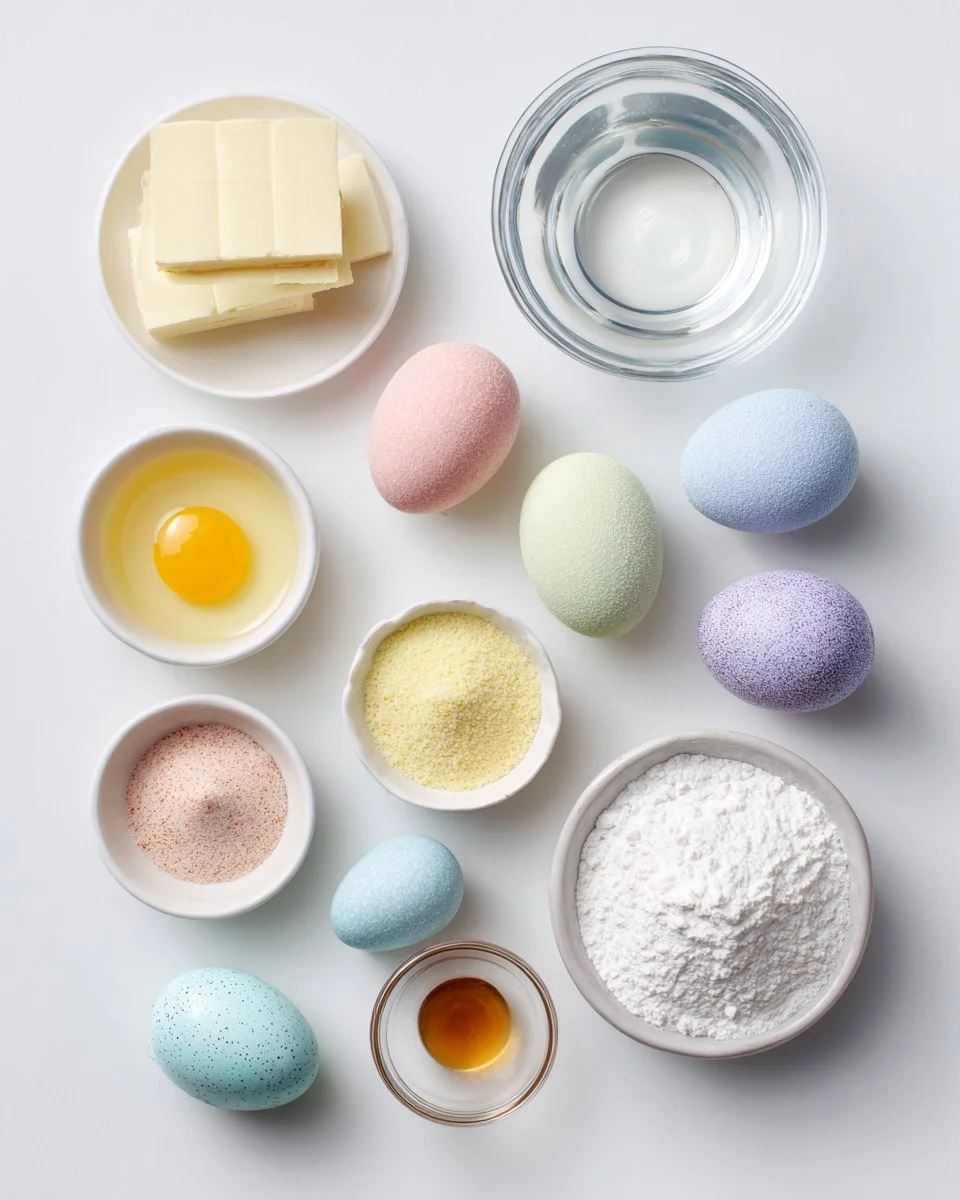
- 3 envelopes (21g) unflavored gelatin: I use Knox brand for consistency.
- 1 cup cold water, divided: Make sure your water is truly cold for best results.
- 1 ½ cups granulated sugar: Regular granulated sugar works best for a perfect texture.
- 1 cup light corn syrup: This adds that delightful chewy consistency.
- ¼ teaspoon salt: To balance the sweetness.
- 1 tablespoon vanilla extract (or almond extract for a twist): Use high-quality extracts for a burst of flavor; I recommend Nielsen-Massey for their rich profile.
- Yellow food coloring (or any pastel color): Get creative with the colors—pastels scream Easter!
- Cornstarch and powdered sugar mix, equal parts (for dusting molds): A must for preventing sticking.
- Edible glitter or sanding sugar (optional): For a festive sparkle!
- Edible wafer paper for stamping (optional): A fun way to personalize your eggs.
Preparation Notes:
- Ensure your butter and other perishable items, if any, are at room temperature before starting.
- Measuring your ingredients accurately will yield the best texture.
Step-by-Step Instructions
Prepare the Molds: Start by lightly dusting your silicone or plastic egg molds with a mixture of powdered sugar and cornstarch. If you opt for a baking pan instead, grease it lightly and dust for later cutting.
Bloom the Gelatin: In a medium bowl, combine ½ cup of cold water and sprinkle gelatin over it. Let it bloom for a full 10 minutes until it’s all absorbed and has transformed into a gel-like consistency.
Make the Sugar Syrup: In a medium saucepan, combine the granulated sugar, light corn syrup, and the remaining cold water. Stir gently to moisten, then bring to a boil without stirring. Use a candy thermometer and cook until it reaches exactly 240°F (the soft-ball stage).
Whip the Marshmallow: Slowly pour the hot sugar syrup into the bloomed gelatin, taking care not to touch the sides of the bowl. Raise the mixer speed to high and whip for 10–12 minutes until thick and glossy. As you get to the last 30 seconds of whipping, add the vanilla and food coloring. You’ll see a beautiful transformation!
Fill the Molds: Immediately fill the prepared molds with the marshmallow mixture, using a spatula to smooth out the tops. This mixture sets quickly, so work fast!
Let it Set: Allow the marshmallow eggs to sit uncovered for at least 6 hours, or preferably overnight. This guarantees they set up nicely!
Unmold and Dust: Gently remove the eggs from the molds, dusting with the cornstarch and powdered sugar mixture if they are sticky. Decorate with edible glitter or wafer papers if you’re up for it!
Chef’s Tips:
- If your mixture seems too thin, it may need additional whipping time. Trust the process!
- If you’re using baking pans, remember to refrigerate the leftover marshmallow mixture for later; it can be used for other treats.
Common Mistakes to Avoid:
- Not letting the gelatin bloom long enough; it ensures proper texture.
- Allowing the sugar syrup to boil too long; avoid a grainy outcome!
Expert Tips & Tricks
Storage Recommendations: Store your marshmallow eggs in an airtight container to keep them fresh. In a cool, dry place, they can last up to 2 weeks.
Make-Ahead Instructions: Don’t hesitate to make these a week in advance! Just store them properly, and they’ll be awaiting your special occasion.
Troubleshooting: If your marshmallows don’t set properly, ensure that the sugar syrup reached the correct temperature before mixing.
Techniques for Success: Use a stand mixer with a whisk attachment for the fluffiest marshmallows.
Customization for Allergies: For a vegan version, try using agar-agar instead of gelatin, but keep in mind the texture will vary.
Decorating Tips: Get the kids involved in the decorating phase! Everyone loves sprinkles and pastel colors.
Serving Suggestions
These Marshmallow Easter Eggs are perfect on their own, but you can elevate your presentation by pairing them with some freshly whipped cream or a decadent chocolate ganache for dipping! Consider adding a vibrant spring fruit salad on the side for a refreshing touch. They are perfect for family gatherings, Easter brunch, or even as delightful treats to leave for the Easter Bunny.
Variations & Substitutions
- Different Flavors: Swap vanilla extract for mint or orange to switch up the flavor profile.
- Dietary Adaptations: For gluten-free treats, ensure all ingredients (especially cornstarch and powdered sugar) are certified gluten-free.
- Seasonal Variations: For fall, sprinkle in some pumpkin spice; for Halloween, try vibrant orange and black colors.
Nutrition & Storage Info
- Prep Time: 15 minutes
- Cook Time: 20 minutes
- Total Time: 6+ hours (mostly setting time)
- Yield: Typically, you’ll make about 12 eggs.
- Estimated Calories: Approximately 120 calories per egg.
- Storage Instructions: Best kept in an airtight container at room temperature; refrigerate only if your home is particularly warm. They will last 1-2 weeks.
FAQ Section
Can I use flavored gelatin instead of unflavored?
Yes, but it will alter the texture and may not firm as nicely.What if my sugar syrup crystallizes?
Adding a bit of lemon juice during boiling can help prevent crystallization.Can I freeze these marshmallow eggs?
While they are best fresh, you can freeze them wrapped individually in plastic wrap for up to a month.Is there a substitute for corn syrup?
Light maple syrup works well as a substitute if you’re looking for a natural option.Do I have to add food coloring?
Not at all! You can leave them plain for a classic look.How do I prevent my marshmallows from being sticky?
Dusting with the corn-starch-powdered sugar mix before and after unmolding helps greatly.What can I use instead of the edible wafer paper?
You could use colored frosting or melted chocolate for a similar decorative effect.Can I make these without a mixer?
It’s quite challenging, but if you beat it by hand, you’ll need a lot of elbow grease!What’s the trick to filling the molds evenly?
Use a piping bag for more control!How can I customize them for other holidays?
Just change your colors and toppings to match whatever festival you’re celebrating!

Conclusion
This Marshmallow Easter Egg recipe represents so much more than just a sweet treat. It’s a blend of cherished memories, creativity, and the joy of sharing deliciousness with loved ones. I encourage you to give this recipe a try and experience the bliss that comes with making something special by hand.
If you enjoyed this recipe or have any questions, I’d love to hear your thoughts! And if you’re looking for more delectable treats, check out my other favorite recipes for festive holiday baking. Happy cooking and happy Easter!
PrintIrresistible Marshmallow Easter Eggs
Create delightful Marshmallow Easter Eggs from scratch that are soft, fluffy, and perfect for Easter celebrations.
- Prep Time: 15 minutes
- Cook Time: 20 minutes
- Total Time: 360 minutes
- Yield: 12 eggs 1x
- Category: Dessert
- Method: Whipping
- Cuisine: American
- Diet: Vegetarian
Ingredients
- 3 envelopes (21g) unflavored gelatin
- 1 cup cold water, divided
- 1 ½ cups granulated sugar
- 1 cup light corn syrup
- ¼ teaspoon salt
- 1 tablespoon vanilla extract (or almond extract)
- Yellow food coloring (or any pastel color)
- Cornstarch and powdered sugar mix, equal parts (for dusting molds)
- Edible glitter or sanding sugar (optional)
- Edible wafer paper for stamping (optional)
Instructions
- Prepare the molds by dusting them with powdered sugar and cornstarch.
- Bloom the gelatin in a bowl with ½ cup of cold water for 10 minutes.
- In a saucepan, mix granulated sugar, light corn syrup, and remaining cold water, then bring to a boil.
- Pour the hot sugar syrup into the bloomed gelatin and whip for 10–12 minutes until thick and glossy, adding vanilla and food coloring toward the end.
- Fill the molds with the marshmallow mixture and smooth the tops.
- Let the marshmallows sit uncovered for at least 6 hours or preferably overnight.
- Unmold the eggs and dust with cornstarch and powdered sugar, then decorate as desired.
Notes
Store in an airtight container at room temperature for 1-2 weeks. Use a stand mixer for best results. Customize flavors and colors for different occasions.
Nutrition
- Serving Size: 1 egg
- Calories: 120
- Sugar: 25g
- Sodium: 50mg
- Fat: 0g
- Saturated Fat: 0g
- Unsaturated Fat: 0g
- Trans Fat: 0g
- Carbohydrates: 30g
- Fiber: 0g
- Protein: 1g
- Cholesterol: 0mg


