
# Deliciously Simple Mini Apple Pies: Your New Favorite Comfort Dessert
## Introduction
Every time autumn rolls around, my kitchen transforms into a comforting haven filled with the sweet scent of cinnamon and baking apples. It's in these moments that I find myself daydreaming about *Mini Apple Pies*. These bite-sized delights are not just a treat for the taste buds but a nostalgic hug for the soul—each one lovingly reminiscent of my grandmother's kitchen, where I learned the art of pie-making. Unlike other dessert recipes that often seem overwhelming, these mini wonders are deceptively simple and wholly satisfying, marrying the classic flavors of tart apples with a perfectly flaky crust.
Why are these pies better than store-bought versions? Well, they pack a punch when it comes to flavor, freshness, and love—ingredients that no store can replicate. They’re perfect for sharing with family or sneaking a cozy treat all to yourself while wrapped in a blanket on the couch. In this post, you’ll discover step-by-step instructions to create these delightful morsels, along with tips and tricks that guarantee they’ll turn out perfectly every time.
## What Are Mini Apple Pies?
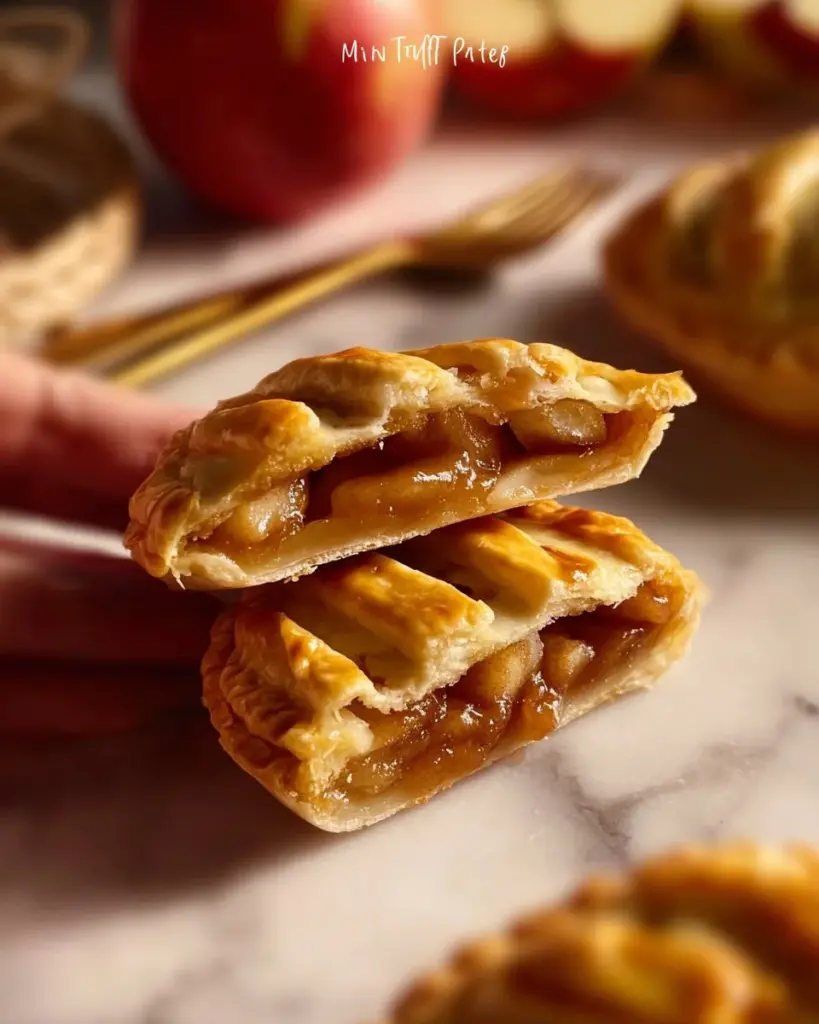
*Mini Apple Pies* have a charming backstory that goes beyond their origins as a classic American dessert. These little portions trace back to early pioneers who made the most of their apples, creating convenient, portable pies that traveled well. Imagine the warmth of a fresh-baked pie that’s just the right size to fit in your palm.
The taste? Exuberant notes of sweet and tart apples blend seamlessly with warm spices, all nestled in a buttery, flaky crust. Each bite offers a satisfying crunch followed by the comforting gooiness of spiced apples—a texture that’s simply irresistible!
These treats are perfect for any occasion, whether it’s a cozy family gathering, a fun holiday celebration, or a simple weeknight dessert. With their adorable appearance and delightful flavor, *Mini Apple Pies* are sure to cozy up any gathering.
## Why You’ll Love This Recipe
1. **Quick and Easy**: Let’s face it: life is busy! This easy recipe takes less than an hour from start to finish, making it perfect for quick weeknight desserts or last-minute gatherings. You can have freshly baked mini pies on the table in no time.
2. **Customization Galore**: Whether you adore golden raisins, walnuts, or a maple twist, this recipe provides the perfect canvas for your unique preferences. I’ve often added a splash of bourbon for an extra layer of flavor—just don’t tell the kids!
3. **Cost-Effective**: Why spend big when you can whip up these tasty treats at home? The ingredients are simple and often staples you may already have on hand. Think of it as a fun way to stretch your budget while impressing everyone at the dinner table.
4. **Better than Store-Bought**: Let’s be real. Have you ever had a mini pie that tasted like it’s been frozen for months? These homemade gems are fresh, and you can control every aspect of their flavor. Store-bought doesn’t stand a chance!
5. **Memories for All Times**: Baking together can create lasting memories. Invite the kids or a friend to help. Share stories while rolling out dough and filling up each spice-hugged apple piece.
You’ll discover that this delightful mini pie recipe is not only tension-free but also a means of making heartfelt memories!
## Ingredients
- **Pie Crust**:
- 1 ¼ cups all-purpose flour (preferably unbleached)
- ¼ teaspoon salt
- ½ cup unsalted butter, chilled and cubed (I love using *Kerrygold* for its rich flavor!)
- 3–4 tablespoons ice water
- **Filling**:
- 3 medium tart apples, peeled and diced (Granny Smith works great)
- ½ cup granulated sugar
- 1 teaspoon cinnamon
- ¼ teaspoon nutmeg
- 1 tablespoon lemon juice
- 1 tablespoon all-purpose flour (for thickening the filling)
**Prep Notes**: Make sure your butter is nice and cold to ensure flakiness in your crust. Ice water is essential for the dough—don’t skip this!
## Step-by-Step Instructions
### 1. Prepare the Pie Crust
- **Timing**: 10 minutes to make the dough
- In a medium bowl, combine flour and salt.
- Cut in chilled butter until mixture resembles coarse crumbs. (Chef's Tip: Use a pastry blender or your fingertips to ensure the butter doesn't melt.)
- Stir in ice water, one tablespoon at a time, until the dough holds together. Form into a disk, wrap in plastic, and refrigerate for at least 30 minutes to allow it to rest.
### 2. Make the Filling
- **Timing**: 10 minutes
- In a large bowl, combine diced apples, sugar, cinnamon, nutmeg, lemon juice, and flour. Toss until apples are fully coated.
### 3. Assemble the Pies
- Preheat your oven to 375°F (190°C).
- Roll out the chilled dough on a lightly floured surface to about ¼ inch thick. Cut out circles to fit your muffin tin—about 4 inches in diameter works well.
- Press the dough circles into the muffin tin and fill them with the apple mixture.
### 4. Bake!
- **Timing**: 25-30 minutes
- Bake in the preheated oven until the crust is golden and the filling is bubbling (look for that lovely shimmer!).
- Cool in the pan for 5 minutes before transferring to a wire rack to cool completely.
**Common Mistake to Avoid**: Overfilling your pies can lead to messy edges! Ensure you leave a little space at the top.
## Expert Tips & Tricks
- **Butter Quality Matters**: Use high-quality unsalted butter for a richer flavor.
- **Storage**: These mini pies can last up to 2 days at room temperature. Alternatively, freeze unopened pies for a month—just bake from frozen when cravings hit!
- **Make-Ahead Magic**: You can prepare the dough and filling the day before. Assemble and bake when you’re ready!
- **Troubleshooting Filling**: If your apples seem mushy, reduce your cooking time a little, or use firmer varieties for crispier bites.
- **Glazing**: Brush the tops with beaten egg for a shiny finish before baking.
## Serving Suggestions
These *Mini Apple Pies* are delightful when served warm out of the oven accompanied by a scoop of vanilla ice cream or a dollop of fresh whipped cream. For a cozy presentation, dust them with powdered sugar and serve on a rustic wooden board. They make for a charming addition to any fall celebration or family dinner!
## Variations & Substitutions
- **Flavors on the Fly**: Transform your apple pies by incorporating cranberries or pears for a unique twist.
- **Dietary Adaptations**: Substitute gluten-free flour for a gluten-free dessert, or switch to coconut sugar for a low-glycemic sweetener.
- **Seasonal Insights**: In winter, add a pinch of cardamom or some candied ginger, or try pumpkin for a festive fall vibe.
## Nutrition & Storage Info
- **Prep time**: 20 minutes
- **Cook time**: 30 minutes
- **Total time**: 50 minutes
- **Yield**: 12 mini pies
- **Estimated Calories**: About 150 per pie
- **Storage**: Keep in an airtight container at room temperature for up to 2 days, in the fridge for up to a week, or freeze for up to a month.
## FAQ Section
1. **Can I use store-bought pie crust?**
- Absolutely! Just ensure it’s fully thawed according to package instructions.
2. **What kind of apples work best?**
- Tart apples like Granny Smith or Honeycrisp offer the perfect balance to the sweetness.
3. **Can I make these gluten-free?**
- Yes, substitute your favorite gluten-free flour blend in the pie crust and filling.
4. **How long do they take to bake?**
- Generally, 25-30 minutes—but keep an eye out for golden edges and bubbling filling!
5. **Can I freeze them?**
- Yes! Bake as usual and then cool completely before freezing in an airtight container or zip-top bag.
6. **What do I do if the crust is tough?**
- Overworking the dough can toughen it. Try to mix just until combined.
7. **Can I add more spices?**
- Certainly! A splash of vanilla extract or a pinch of allspice can elevate your flavor profile.
8. **Is this recipe suitable for kids to help with?**
- Yes! They can help with cutting the dough and filling the pies, supervised, of course.
9. **How can I serve leftovers?**
- They’re just as delicious cold, or reheat in the oven for a warm treat.
10. **What’s the best way to store them?**
- Allow them to cool completely and store in an airtight container at room temperature.
## Conclusion
There you have it—*Mini Apple Pies* that will win over the hearts (and stomachs) of everyone who tries them! Not only are they a delightful explosion of flavor, but they invite a sense of warmth and nostalgia that’s hard to beat. I encourage you to give this recipe a whirl on your next baking adventure. I’d love to hear your thoughts and any variations you tried in the comments below. If you enjoyed this recipe, be sure to check out my other apple-themed creations on the blog!
Deliciously Simple Mini Apple Pies

These Mini Apple Pies are a delightful twist on a classic dessert, featuring sweet and tart apples nestled in a flaky crust, perfect for any occasion.
- Prep Time: 20 minutes
- Cook Time: 30 minutes
- Total Time: 50 minutes
- Yield: 12 mini pies 1x
- Category: Dessert
- Method: Baking
- Cuisine: American
- Diet: Vegetarian
Ingredients
Scale
- 1 ¼ cups all-purpose flour (preferably unbleached)
- ¼ teaspoon salt
- ½ cup unsalted butter, chilled and cubed
- 3–4 tablespoons ice water
- 3 medium tart apples, peeled and diced (Granny Smith works great)
- ½ cup granulated sugar
- 1 teaspoon cinnamon
- ¼ teaspoon nutmeg
- 1 tablespoon lemon juice
- 1 tablespoon all-purpose flour (for thickening the filling)
Instructions
- In a medium bowl, combine flour and salt. Cut in chilled butter until mixture resembles coarse crumbs. Stir in ice water, one tablespoon at a time, until the dough holds together. Form into a disk, wrap in plastic, and refrigerate for at least 30 minutes.
- In a large bowl, combine diced apples, sugar, cinnamon, nutmeg, lemon juice, and flour. Toss until apples are fully coated.
- Preheat your oven to 375°F (190°C). Roll out the chilled dough on a lightly floured surface to about ¼ inch thick. Cut out circles to fit your muffin tin—about 4 inches in diameter works well. Press the dough circles into the muffin tin and fill them with the apple mixture.
- Bake in the preheated oven until the crust is golden and the filling is bubbling, about 25-30 minutes. Cool in the pan for 5 minutes before transferring to a wire rack to cool completely.
Notes
Use high-quality unsalted butter for the best flavor. Store in an airtight container at room temperature for up to 2 days.
Nutrition
- Serving Size: 1 pie
- Calories: 150
- Sugar: 10g
- Sodium: 200mg
- Fat: 8g
- Saturated Fat: 4g
- Unsaturated Fat: 3g
- Trans Fat: 0g
- Carbohydrates: 20g
- Fiber: 2g
- Protein: 1g
- Cholesterol: 15mg


