
Table of Contents
Table of Contents
When the leaves start turning and the air turns crisp, my heart races—Halloween is just around the corner! Growing up, my family had a tradition of making fun treats to celebrate the spooky season, but none ever made me smile quite like the Monster Marshmallow Bars. With their gooey marshmallow centers, crispy rice goodness, and playful decorations, these bars were a sweet staple that echoed laughter and bonding on those chilly October evenings.
What makes my recipe for Monster Marshmallow Bars truly special is the customization. You can turn them into whatever fantastic creature your imagination dreams up! You’ll find my version isn’t just a regular dessert; it’s a lively celebration of flavors and textures that brighten your Halloween gatherings. Plus, compared to those store-bought alternatives, you’ll find this recipe beaming with heart—and it’ll save you some dollars to boot!
So, if you’ve ever craved the perfect blend of nostalgia, fun, and tasty sweetness, stay with me. You’re about to learn all the ins and outs of whipping up these delightful Monster Marshmallow Bars, making memories that’ll last long after the Halloween treats are devoured!
What Are Monster Marshmallow Bars?
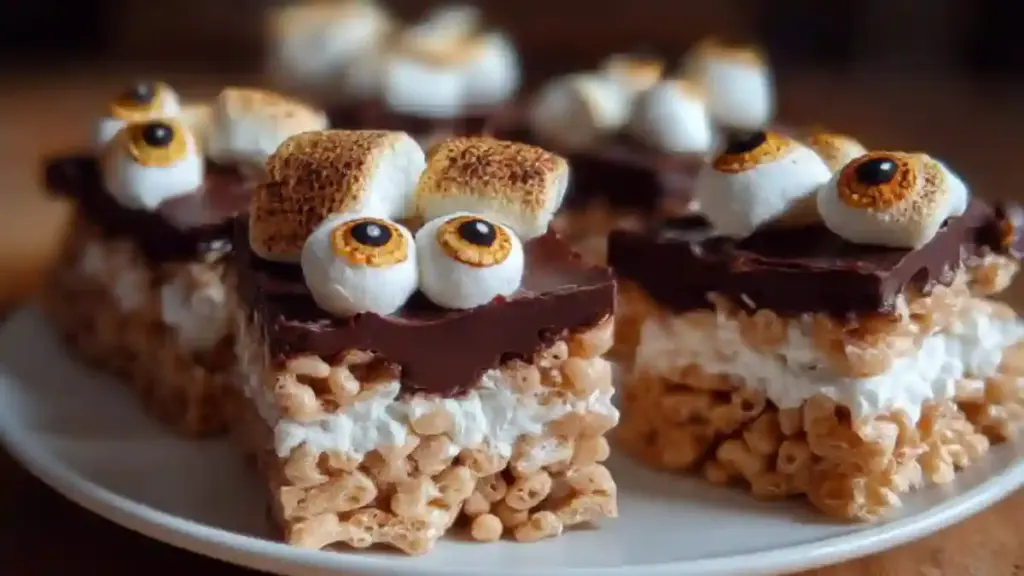
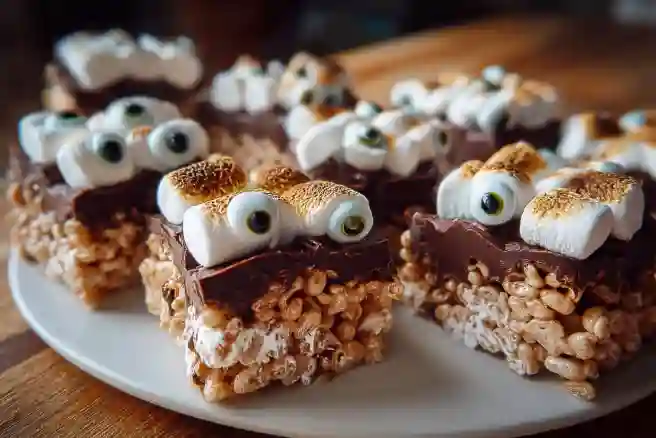
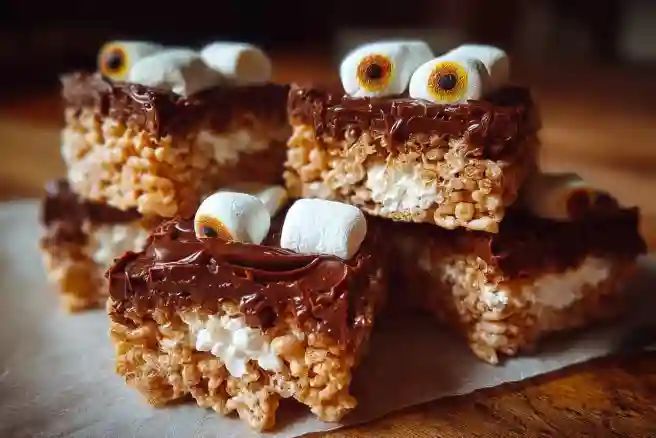
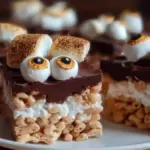
Monster Marshmallow Bars are a creative, no-bake treat that features a delightful mix of chewy mini marshmallows, crispy rice cereal, and just the right amount of melted butter. Born from the merger of classic Rice Krispies Treats and a fun Halloween twist, they bring a smile to kids and adults alike. Each bite is an explosion of sweet, marshmallowy goodness, evenly balanced with the crunch of crispy cereal.
These bars are particularly unique because they can take on any shape or theme you desire, turning a simple treat into a whimsical work of art. They are perfect for Halloween parties, classroom treats, or cozy family evenings spent watching scary movies! Whether you enjoy making them with kids or just want to indulge your inner child, these bars will become a go-to in your festive repertoire.
Why You’ll Love This Recipe
Versatile and Customizable: Whether you want to add candy pumpkins for a fall touch or sprinkles for some colorful flair, this recipe is a blank canvas! Each batch can be transformed to fit any occasion.
Cost-Effective: Making your own Monster Marshmallow Bars at home is not only fun but also budget-friendly. You’ll spend far less compared to the price of store-bought treats—plus, you get to control the ingredients!
Satisfying Texture: The combination of chewy marshmallows and crispy rice means every bite is a mix of textures that will satisfy your taste buds in a whole new way.
Quick and Easy: Under an hour is all it takes to prepare these bars! No lengthy waits or complicated baking processes—just melt, mix, and let them set.
Perfect for Any Skill Level: Whether you’re a seasoned baker or a first-time kitchen adventurer, this recipe is foolproof and perfect for all ages.
So, if you’ve ever found yourself disappointed by the same ol’ snack choices, it’s time to elevate your treat game with something that’s not just easy, but absolutely delicious!
Ingredients
To whip up a batch of these delightful Monster Marshmallow Bars, you’ll need the following ingredients:
- 6 tablespoons Salted Butter: Make sure it’s at room temperature for easier melting and mixing.
- 16 ounces Mini Marshmallows: Reserve about 1 to 1.5 cups for adding texture later.
- 1 teaspoon Pure Vanilla Extract: This elevates the taste and adds a lovely scent.
- 6 cups Crispy Rice Cereal: Use a quality brand like Kellogg’s for the best crunch.
- Green Gel Food Coloring: It’s Halloween, after all! Feel free to use other colors for different themes.
- 1 cup Bright White Candy Melts: These will act as your “monster frosting.”
- Assorted Candy Eyeballs: For that playful monster look.
- Halloween Sprinkles (Optional): Add a festive touch if you like!
Prep Notes: Start with room-temperature butter for smooth melting. Also, keep in mind that you can use gluten-free crispy cereal to suit dietary needs.
Step-by-Step Instructions
Prepare Your Pan: Grease a 9×13 inch baking pan with cooking spray and optionally line it with parchment paper. This helps with easy removal later. Set aside.
Create the Marshmallow Base: In a large pot, melt the salted butter over low heat. Add 15.5 ounces of mini marshmallows, saving 1 to 1.5 cups for later.
Melt the Marshmallows Slowly: Stir constantly until the mixture is smooth and completely lump-free—about 5 minutes. Be patient; low heat keeps your marshmallows from burning.
Add Flavor and Color: Remove from heat, then mix in the vanilla extract and green gel food coloring until you achieve a delightful green hue.
Combine Cereal and Marshmallow: Pour the crispy rice cereal into your pot and gently fold it into the marshmallow mixture. Add the reserved mini marshmallows for that extra fluff!
Press the Mixture into the Pan: Scrape the mixture into the prepared pan, spreading it evenly without compacting too much—this preserves that crunchy texture.
Let the Bars Set: Allow the mix to set at room temperature for at least one hour or until firm.
Decorate Your Monsters: Melt the white candy melts in the microwave in 30-second intervals, stirring in between. Drizzle over your set bars and immediately press on candy eyeballs and sprinkles for a fun finish!
Final Set and Slicing: Let the drizzle harden, then lift the bars from the pan using the parchment and cut into 12-16 squares.
Chef’s Tips:
- If the mixture seems too sticky while pressing it into the pan, rub a bit of butter on your hands.
- Do not rush the melting step—keeping the heat low allows for smoother marshmallow integration!
Expert Tips & Tricks
Storage: Store your Monster Marshmallow Bars in an airtight container at room temperature for up to 4 days. If you want to prolong their shelf life, refrigerate for up to a week!
Make-Ahead: You can make these bars a couple of days in advance of your festivities without sacrificing freshness.
Troubleshooting: If your mixture feels too dry, adding a bit of butter can help restore moisture. If too sticky, consider lightly buttering your spatula or hands.
Avoiding Common Mistakes: Don’t crank the heat up too high. You’d rather take your time than end up with burnt marshmallows!
Experiment with Flavors: Want to try something new? Experiment with different flavored extracts, like almond or peppermint, for a unique twist.
Serving Suggestions
Serve your Monster Marshmallow Bars alongside a big bowl of popcorn, perfect for movie nights! For a festive presentation, place them on a black platter with some cobweb decorations or serve them in cupcake liners at a Halloween party. These bars are not just snacks—they’re an experience!
Variations & Substitutions
Using this basic recipe as your foundation, consider trying:
- Different Flavors: Swap in butterscotch or chocolate chips for a taste variation.
- Dietary Adaptations: Make them gluten-free with gluten-free cereals, or use vegan marshmallows for a dairy-free option.
- Seasonal Variants: In the spring, swap out the green food coloring for pastel shades with decorations like edible flowers for an Easter-themed treat!
Nutrition & Storage Info
- Prep Time: 15 minutes
- Cook Time: 10 minutes
- Total Time: 1 hour 25 minutes
- Yield: 12-16 servings
- Estimated Calories: About 150 calories per serving
- Storage: Room temperature for 4 days, fridge for up to a week, freezer for up to 3 months.
FAQ Section
Can I use different cereals?
Absolutely! Cheerios or granola could work just as well.What if I can’t find candy eyeballs?
You can use M&Ms or chocolate chips as fun eyes!How do I make these bars vegan?
Use vegan butter and marshmallows, and substitute the white candy melts with a dairy-free version.What’s the best way to cut these bars?
Use a sharp knife sprayed with cooking spray for clean cuts.Can I freeze the bars?
Yes! Just ensure they are stored in an airtight container or wrapped tightly.Why did my marshmallows turn hard?
You may have heated them too quickly or allowed them to cool for too long before mixing in the cereal.How can I make these bars more festive?
You can experiment with different food colorings, sprinkles, or themed decorations!Can I add nuts to the recipe?
Certainly! Chopped nuts can add a delightful crunch.What if I want to incorporate chocolate?
You can mix in mini chocolate chips or dip the bars in melted chocolate!Are these bars gluten-free?
Yes, if you use gluten-free crispy rice cereal.
Conclusion
These Monster Marshmallow Bars feel like a slice of childhood nostalgia—perfect for fall celebrations and gatherings with loved ones. The ease of this recipe, alongside the joyous potential for creativity, makes it a true winner in my book. I challenge you to try these out, and I bet they’ll become a new favorite for your Halloween festivities as well!
So grab your ingredients, channel your inner monster creator, and get baking! I’d love to hear how your bars turn out, so feel free to drop your feedback in the comments below! Plus, if you’re in the mood for more festive recipes, check out my blog for delightful treats that’ll spark joy in any season!
Ghostly Chocolate Cupcake Bites
Happy baking!
PrintMonster Marshmallow Bars
A fun, no-bake Halloween treat featuring a chewy and crispy marshmallow cereal base, dyed a spooky green and decorated with candy eyes and festive sprinkles for a monstrously good time.
- Prep Time: 15 minutes
- Cook Time: 10 minutes
- Total Time: 1 hour 25 minutes
- Yield: 12–16 servings 1x
- Category: Dessert
- Method: No-Bake
- Cuisine: American
- Diet: Vegetarian
Ingredients
- 6 tablespoons salted butter, at room temperature
- 16 ounces mini marshmallows (divided)
- 1 teaspoon pure vanilla extract
- 6 cups crispy rice cereal
- Green gel food coloring
- 1 cup bright white candy melts
- Assorted candy eyeballs
- Halloween sprinkles (optional)
Instructions
- Grease a 9×13 inch baking pan with cooking spray and optionally line it with parchment paper. Set aside.
- In a large pot, melt the salted butter over low heat. Add 15.5 ounces of the mini marshmallows, reserving 1 to 1.5 cups for later.
- Stir constantly until the marshmallow mixture is smooth and completely lump-free, about 5 minutes. Be patient and keep the heat low to prevent burning.
- Remove the pot from the heat. Mix in the vanilla extract and green gel food coloring until a uniform green hue is achieved.
- Pour the crispy rice cereal into the pot and gently fold it into the marshmallow mixture. Add the reserved mini marshmallows for extra texture.
- Scrape the mixture into the prepared pan, spreading it evenly without compacting it too much to preserve the crunchy texture.
- Allow the mixture to set at room temperature for at least one hour, or until firm.
- Melt the white candy melts in the microwave in 30-second intervals, stirring in between. Drizzle over the set bars.
- Immediately press on candy eyeballs and sprinkles onto the drizzle before it hardens.
- Let the drizzle harden completely, then lift the bars from the pan using the parchment paper and cut into 12-16 squares.
Notes
- If the mixture is too sticky, rub a bit of butter on your hands or spatula for easier handling.
- Do not rush the melting step; low heat is crucial for a smooth texture.
- These bars are highly customizable with different colors, extracts, and decorations for any season.
- Letting the bars set completely is key for clean slicing.
Nutrition
- Serving Size: 1 bar (1/12 of recipe)
- Calories: 150
- Sugar: 20g
- Sodium: 180mg
- Fat: 5g
- Saturated Fat: 3g
- Unsaturated Fat: 1.5g
- Trans Fat: 0g
- Carbohydrates: 28g
- Fiber: 0g
- Protein: 1g
- Cholesterol: 10mg


