
Irresistible Russian Honey Cake (Medovik): A Sweet Slice of Tradition
There’s a special glow that fills the kitchen when you’re baking something that stirs the soul. I’ll never forget the day I stumbled upon the Russian Honey Cake, or Medovik, while sifting through my grandmother’s old recipe box. Picture this: a cozy evening, the gentle hum of the kettle in the background, and a faint whisper of honey wafting through the air. As I flipped through those flour-dusted pages, I was transported back to the years when my grandmother would whip up this delightful cake for family gatherings, each layer a testament to love and tradition.
What makes Russian Honey Cake so special? It’s not just the sweet, caramelized honey mingling beautifully with layers of light, fluffy cake; it’s the stories each bite carries, echoing laughter and joyous celebrations. Today, I’m thrilled to share my cherished recipe, which, I promise, brings an elevated twist to traditional Medovik. Not only is this version more accessible and bursting with flavor, but it also bridges generations through its simple yet loving preparation.
Join me as we dive into the world of indulgent layers and creamy frosting, where comfort food meets heartfelt memories. You’ll learn how to create your own masterpiece that will surely become a family favorite!
What Are Russian Honey Cakes (Medovik)?
Ah, Medovik! This charming dessert hails from Russia and has been delighting taste buds since the 18th century. Legend has it that this cake was created for a Russian queen and quickly became a staple in homes nationwide, as every household added its own unique spin to the recipe.
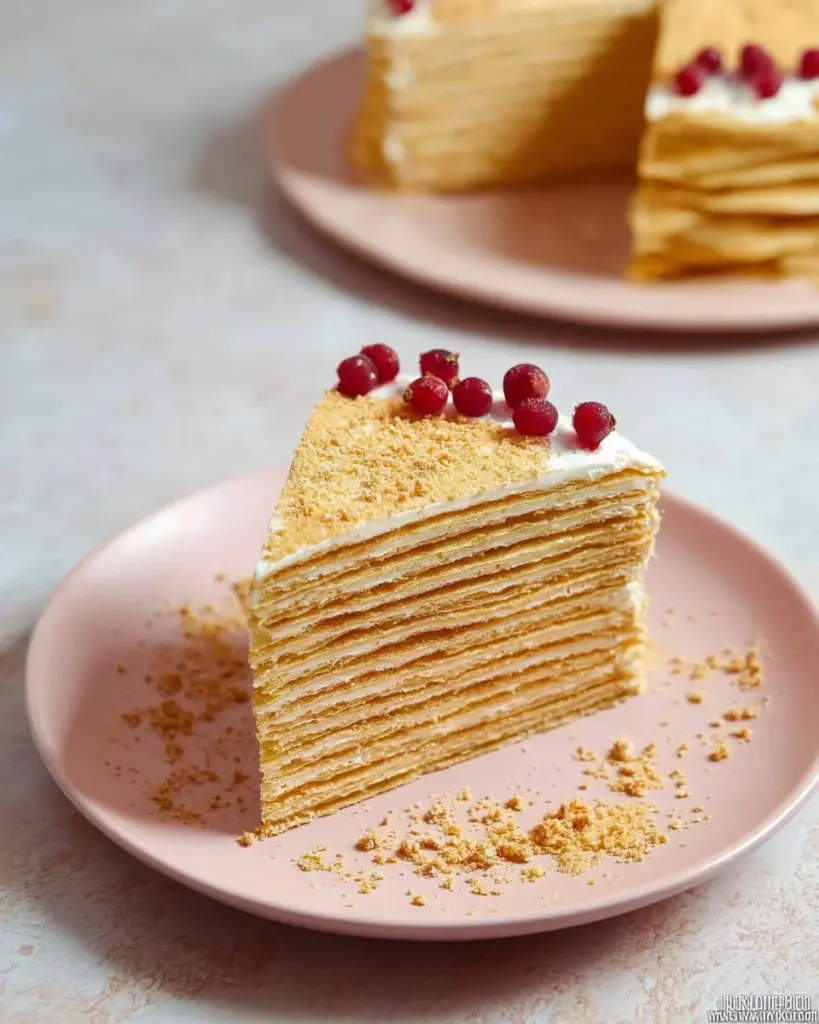
So, what’s special about Medovik? It’s a celebration of textures and flavors. From the first bite, the cake’s layers—tender yet sturdy—melt in your mouth, delivering a luscious sweetness balanced by tangy cream. The frosting, made from decadent sour cream or crème fraîche, adds a refreshing note, making it feel indulgent yet light. Medovik is perfect for various occasions: birthdays, holidays, or simply when you crave a slice of nostalgia. Whether you serve it chilled or room temperature, it never fails to impress!
Why You’ll Love This Recipe
A Flavor Explosion: Unlike store-bought honey cakes that can be overly sweet or dry, this homemade Medovik strikes the perfect balance between rich honey flavor and light-textured sponge. Each layer is infused with love!
Cost-Effective: Making Medovik at home is surprisingly budget-friendly. With pantry staples like flour, butter, and eggs, you’ll save a pretty penny while impressing family and friends.
Customizable: Want a twist on tradition? No problem! This recipe allows plenty of room for creativity—think adding zesty lemon zest or swapping honey with maple syrup for a different flair. The options are endless!
Stress-Free Baking: Many people shy away from layer cakes, fearing complexity. But with this recipe, I promise that you will feel confident every step of the way! Even your kitchen novice friend could pull this off.
Great for Make-Ahead: Medovik actually gets better with time! Preparing it ahead means you get to savor those flavors developing overnight. So whether it’s an event or just a lazy Sunday, you can enjoy the reward without the rush!
Ingredients Section
To create your own Russian Honey Cake (Medovik), gather these ingredients:
- 3 Eggs (large, room temperature for easier mixing)
- 1 and 1/4 cup (250 grams) Sugar (granulated)
- 3 tbsp Honey (use high-quality, raw honey for the best flavor)
- 1 tbsp Baking Soda (make sure it’s fresh for proper rise)
- 3 tbsp Unsalted Butter (melted; I love using Kerrygold for its creamy richness)
- 3 cups (385 grams) All-Purpose Flour (plain flour; sifted for lightness)
- 1000 ml Crème Fraîche or Sour Cream (full-fat, for a rich frosting)
- 1 cup (200 grams) Sugar (for the frosting)
- 1 can (14 oz or 397 ml) Condensed Milk (this adds sweetness and creaminess to the frosting)
- Fresh Berries of your Choice (strawberries, pitted cherries, raspberries; they’re perfect for garnish)
Quality Notes
- Honey: The star ingredient here. Raw honey has a deeper flavor than your typical grocery store variety, making a noticeable impact on the cake.
- Sour Cream or Crème Fraîche: Choose full-fat versions for a luscious texture that adds creaminess to each layer.
Step-by-Step Instructions
Making the Honey Cake (Medovik) Frosting
- Mix the Frosting: In a large bowl, combine 1000 ml of full-fat sour cream (or crème fraîche), 200 grams of sugar, and 1 can of condensed milk. Blend until smooth and creamy.
- Chill: Once mixed, cover and refrigerate until you’re ready to frost the cake.
Making the Honey Cake (Medovik) Layers
- Melt the Butter: In a small bowl, melt 3 tbsp of unsalted butter and set aside.
- Egg and Sugar Mixture: In a mixing bowl, beat 3 eggs with 1 and 1/4 cups of sugar until light and fluffy.
- Create a Double Boiler: Place the egg mixture over a double boiler. Gradually whisk in 1 tbsp of baking soda, 3 tbsp of melted butter, and 3 tbsp of honey. Stir constantly using a wooden spoon until well combined.
- Incorporate Flour: Gradually add in 3 cups of flour (about 1/2 cup at a time), mixing thoroughly. This should take about 5-6 minutes.
- Cool Down the Dough: Once mixed, pull the bowl off the heat and allow it to cool slightly.
- Divide and Roll: Divide the dough into 12 equal pieces. Roll each piece out into a thin layer using a rolling pin and transfer to a baking sheet. Don’t discard leftover scraps—you’ll use those for decorating later!
- Prepare for Baking: Using a fork, poke holes in each layer (this prevents excess puffing) and bake in a preheated oven at 390°F (200°C) for 3-4 minutes until golden brown. Repeat for all layers.
- Allow to Cool: Stack the baked layers on top of each other and let them cool completely.
Assembling the Honey Cake (Medovik)
- Layer It Up: Start with the first layer; spread about 6 tablespoons of frosting evenly on the top. Add the second layer on top and continue this process until you’ve added 11 layers, saving one layer and some frosting for later.
- Refrigerate: Wrap the assembled cake in cling film and refrigerate for a few hours, ideally overnight.
Decorating
- Create Crumbs: Use the scraps from before and the reserved layer—crush them in a Ziploc bag with a rolling pin for decorative crumbs.
- Finish the Cake: Once rested, frost the top and sides of the cake with the remaining frosting, and sprinkle with the crushed crumbs.
- Garnish: For an extra pop, top with fresh fruit like raspberries or pitted cherries for a gorgeous presentation.
Chef’s Tips
- Baking Time: Watch the layers carefully as oven times can vary. You want each layer to be a light golden brown but not too dark.
- Assembling: Make sure the layers are completely cool to prevent melting the frosting when you assemble.
- Store Extra Frosting: If you have leftover frosting, it can be stored in the fridge for a few days and works great for dipping fruits or spreading on toast!
Expert Tips & Tricks
- Storage: Medovik can be stored in an airtight container in the fridge for up to a week. The flavors deepen over time for even better taste!
- Make Ahead: This cake is ideal for prep! Make the layers a day ahead and simply assemble the day you plan to serve.
- Troubleshooting: If your cake layers puffed up too much, try rolling them even thinner next time to achieve that signature flat layer.
- Flavor Boost: For a richer flavor, you can add a dash of vanilla extract to the egg mixture or a hint of lemon zest for brightness.
Serving Suggestions
Serve slices of Medovik with a steaming cup of tea or coffee. For a touch of elegance, plate the cake with additional fresh berries and perhaps a dusting of powdered sugar. This cake is perfect for special occasions or a delightful treat for an everyday dessert!
Variations & Substitutions
- Flavor Combinations: Experiment with different syrups, such as maple or agave instead of honey for a unique flavor twist.
- Dietary Adaptations: For gluten-free options, substitute all-purpose flour with a gluten-free blend and check the labels for dairy-free substitutions for the frosting to accommodate lactose-intolerant friends.
- Seasonal Variations: In the Fall, you can add pumpkin spice to the batter for a cozy twist!
Nutrition & Storage Info
- Prep Time: 30 minutes
- Cook Time: 30 minutes
- Total Time: 60 minutes (plus refrigeration time)
- Yield: Serves 12-14 people
- Calories per Serving: Approximately 300-350 calories (depending on serving size)
- Storage:
- Room Temp: Not recommended as it will spoil.
- Fridge: 5-7 days in an airtight container.
- Freezer: Can be frozen for up to 2 months. Wrap it well in plastic wrap and foil.
FAQ Section
Can I substitute sour cream with yogurt?
Yes, plain yogurt can work, but it may change the texture slightly. Full-fat Greek yogurt is a great alternative.Can I make a Medovik without eggs?
For an egg-free version, you can try using flax eggs or unsweetened applesauce, but the texture will vary.How do I know when my cake layers are done?
They should look golden brown and dry to the touch. A toothpick inserted into the center should come out clean.What kind of honey works best?
Raw, liquid honey adds the best flavor and moisture. Avoid crystallized honey for this recipe.Can I incorporate fruits into the cake layers?
Yes, finely chopped fruits such as apricots or apples can be added for an exciting twist!How long should the cake chill before serving?
Ideally, let it chill overnight to allow the flavors to meld; however, a minimum of 4 hours is required.What if my frosting is too thin?
If your frosting is too runny, incorporate a bit more sour cream or add powdered sugar to thicken.Is this cake suitable for freezing?
Yes, you can freeze the baked layers (wrapped well) or the entire assembled cake—though assembling it fresh is best.Can I make this in advance?
Absolutely! It’s a make-ahead cake that improves in flavor when chilled.What’s the best way to slice a layered cake?
For clean cuts, use a warm knife and wipe it clean between slices.
Conclusion
The charm of Russian Honey Cake (Medovik) lies in its layers of love, history, and tastes that connect us all. I hope you take a moment to try this recipe, share it with friends and family, and create your own sweet memories. I’d love to hear how your cake turns out—your feedback and stories truly bring this blog to life! And don’t forget to check out related recipes here for a complete and delightful baking journey.
Happy baking, and enjoy every scrumptious bite of your Medovik!
PrintIrresistible Russian Honey Cake (Medovik)

A delightful and traditional Russian Honey Cake made with layers of fluffy cake and creamy frosting, perfect for special occasions.
- Prep Time: 30 minutes
- Cook Time: 30 minutes
- Total Time: 60 minutes
- Yield: 12-14 servings 1x
- Category: Dessert
- Method: Baking
- Cuisine: Russian
- Diet: Vegetarian
Ingredients
- 3 large Eggs (room temperature)
- 1 and 1/4 cups (250 grams) Sugar (granulated)
- 3 tbsp Honey (high-quality, raw)
- 1 tbsp Baking Soda
- 3 tbsp Unsalted Butter (melted)
- 3 cups (385 grams) All-Purpose Flour (sifted)
- 1000 ml Crème Fraîche or Sour Cream (full-fat)
- 1 cup (200 grams) Sugar (for frosting)
- 1 can (14 oz or 397 ml) Condensed Milk
- Fresh Berries of your Choice (for garnish)
Instructions
- Mix the frosting by combining sour cream, sugar, and condensed milk; blend until smooth and refrigerate.
- Melt the butter in a small bowl and set aside.
- In a mixing bowl, beat eggs with granulated sugar until light and fluffy.
- Place the egg mixture over a double boiler, whisk in baking soda, melted butter, and honey until well combined.
- Gradually add flour, mixing thoroughly until dough is formed.
- Cool the dough slightly, then divide into 12 pieces, roll out, and place on a baking sheet.
- Poke holes in each layer and bake in a preheated oven at 390°F (200°C) for 3-4 minutes until golden brown.
- Stack and cool the baked layers completely.
- Layer the cake with frosting between layers and refrigerate assembled cake for a few hours or overnight.
- Decorate with crushed crumbs and fresh berries before serving.
Notes
This cake gets better with time; prepare it ahead to enjoy the developed flavors. Store in the fridge for 5-7 days.
Nutrition
- Serving Size: 1 serving
- Calories: 325
- Sugar: 40g
- Sodium: 150mg
- Fat: 18g
- Saturated Fat: 10g
- Unsaturated Fat: 8g
- Trans Fat: 0g
- Carbohydrates: 48g
- Fiber: 1g
- Protein: 7g
- Cholesterol: 80mg


