
Irresistible Snowball Cookies: The Perfect Bite-Sized Treat
When I think about the winter holidays, my mind wanders to our family kitchen, filled with the sweet scent of vanilla and warmth from the oven. Among the array of festive goodies, it was the Snowball Cookies that always caught my eye. They brought a sprinkle of magic, with their delightful snowy coating and melt-in-your-mouth texture, transporting me right back to cozy afternoons spent with Mom and Grandma, meticulously rolling dough balls and covering them in powdered sugar.
What I love about these Snowball Cookies is how simple yet incredible they are; they require minimal ingredients but pack a punch of flavor that store-bought versions just can’t match. There’s something profoundly comforting in their buttery richness, and when you bite into that cookie, with its subtle crunch from the nuts, you can’t help but feel a wave of nostalgia wash over you. They’re not just cookies; they’re little pieces of home, filled with memories and love.
In this post, I’m excited to share my secret Snowball Cookie recipe, with details that will elevate your baking game. Get ready to dive into a delicious adventure that will not only teach you how to craft these beauties but also ensure you have a memorable kitchen moment with those you love.
What Are Snowball Cookies?
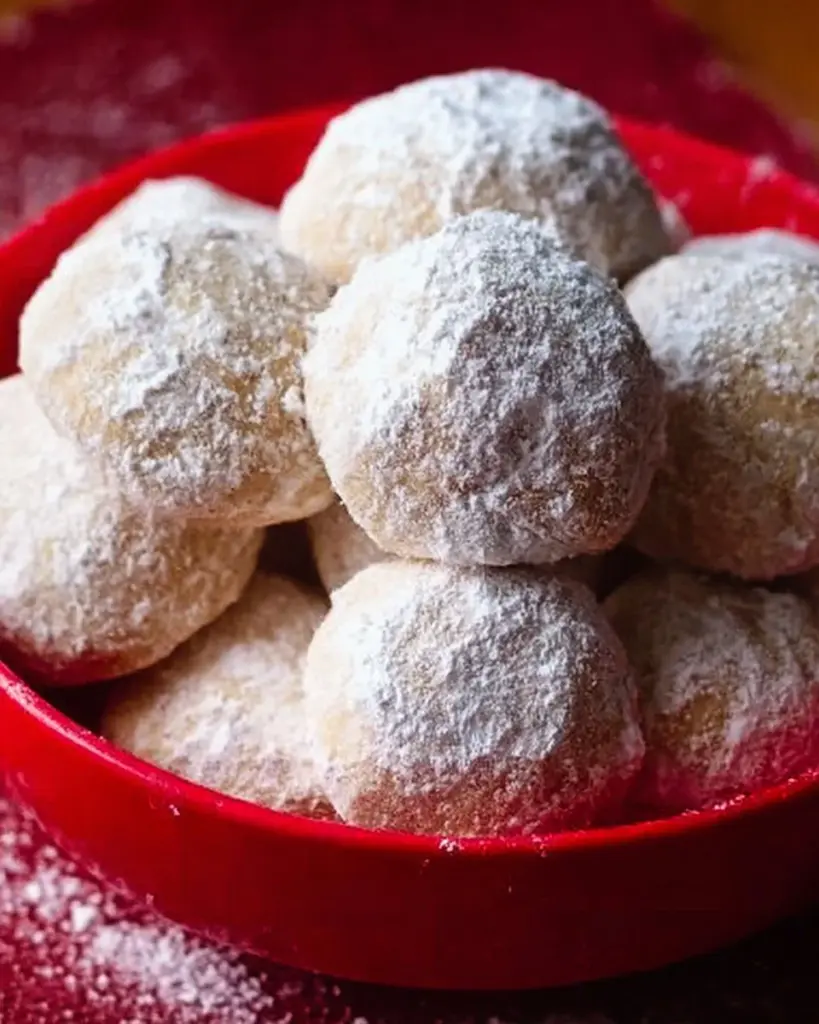
Snowball Cookies, often affectionately referred to as Russian Tea Cakes or Mexican Wedding Cookies, boast an interesting history that draws influences from various cultures. Believed to have originated in Europe, these delicate treats have found their way into kitchens around the world. Their name is derived from their round shape and the heavy dusting of powdered sugar that resembles freshly fallen snow.
When you sink your teeth into a Snowball Cookie, you are met with a delightful mix of buttery richness and a nutty crunch—think of a light, crumbly shortbread that melts in your mouth. What truly makes them unique is their simplicity. There are no fancy layers or extravagant fillings—just pure, straightforward goodness that harks back to simpler times.
These cookies are perfect for holidays, gatherings, or simply to brighten a dreary day. Whether enjoyed with a cup of tea or as a surprise treat in lunch boxes, they are versatility incarnate.
Why You’ll Love This Recipe
Unmatched Flavor: Unlike the typical store-bought cookie, my Snowball Cookies are made with love and real ingredients. The use of high-quality butter and finely chopped nuts gives them an unbeatable buttery taste and texture you’ll crave.
Customization Options: This recipe is highly adaptable. Feel free to swap out walnuts for almonds or pecans, and you can even roll them in cocoa powder for a delightful twist. Want to add a touch of vanilla or almond extract? Go for it!
Cost-Effective: Baking at home not only saves you money but also allows you to control the quality of your ingredients, making these cookies a budget-friendly indulgence.
Ease of Preparation: With just a handful of ingredients and straightforward steps, you don’t need to be a seasoned baker to whip up these treats. Plus, they can be made in under an hour!
Perfect for Sharing: Whether you’re attending a holiday party or simply want to surprise friends and family, these cookies are guaranteed to impress. Just imagine watching their faces light up as they take that first bite!
Ingredients
For the Best Snowball Cookies You’ll Ever Make:
- 2 cups flour (I recommend all-purpose flour, but you can also use spelt or whole wheat pastry flour for a nuttier taste, or even gluten-free flour for a gluten-free option!)
- 1/2 cup finely chopped walnuts (Or substitute with your favorite nuts like almonds or pecans.)
- 1 cup unsalted butter (or coconut oil for a dairy-free option—just remember it needs to be at room temperature!)
- 1/2 cup powdered sugar (Plus more for rolling after baking.)
- Optional: Additional powdered sugar or cocoa powder for rolling, to taste.
Ingredient Notes:
- Quality Matters: Use high-quality butter for the richest flavor. If you’re using coconut oil, make sure it’s refined if you want to avoid the coconut taste!
- Nut Options: Toast your nuts lightly before chopping for an extra depth of flavor.
- Room Temperature Ingredients: Make sure your butter is at room temperature for easy creaming. This makes for a smoother dough.
Step-by-Step Instructions
Preheat: Start by preheating your oven to 325°F (163°C), and line a baking sheet with parchment paper.
Cream the Butter and Sugar: In a medium bowl or stand mixer, combine 1 cup of room-temperature unsalted butter with 1/2 cup of powdered sugar. Beat until the mixture is fluffy and light in color—this usually takes 2-3 minutes.
Mix Dry Ingredients: In a separate bowl, whisk together 2 cups of flour and 1/2 cup of finely chopped walnuts (or your choice of nuts). This ensures an even distribution of ingredients.
Combine: Gradually mix the dry ingredients into the butter mixture, stirring until a dough forms. It should hold together slightly but be soft.
Shape Cookies: Roll the dough into small balls, about one inch in diameter, and place them on the prepared cookie sheet. Make sure to leave some space between each cookie as they will spread slightly.
Bake: Place in the preheated oven and bake for 20-25 minutes, or until the bottoms are lightly browned. You want them to be firm but not overly crispy.
Dust with Sugar: While still warm, roll each cookie in an additional bowl of powdered sugar until they’re thoroughly coated.
Cool Down: Allow cookies to cool on a wire rack for a few minutes before transferring them to an airtight container.
Chef’s Tips
- Visual Cues: Look for lightly golden bottoms—it’s a sign they’re ready.
- Common Mistakes: Don’t overbake, or they’ll lose that delightful melt-in-your-mouth texture.
- Storage Instructions: Store in an airtight container at room temperature. They can also be frozen for up to three months!
Expert Tips & Tricks
- Storing Cookies: These cookies last about a week at room temperature. If you want to keep them longer, freeze them in a single layer before transferring them to an airtight container.
- Make Ahead: You can prepare the dough in advance and refrigerate it for up to three days. Just roll and bake when you’re ready to enjoy.
- Reduce Mess: Use glove-covered hands to roll the dough into balls for less stickiness!
- Troubleshooting: If your dough feels too crumbly, add a teaspoon of milk to bind it together. If it’s too sticky, a touch more flour will help.
Serving Suggestions
Snowball Cookies are delightful on their own, but here are a few ideas to elevate your presentation:
- Pairs Well With: Serve alongside a warm cup of tea or coffee, and perhaps a dollop of whipped cream for those who want to indulge even further!
- Presentation: Arrange them on a festive plate, and dust with some extra powdered sugar for that “wow” factor.
- Occasion Recommendations: Perfect for holiday gatherings, birthday parties, or cozy family get-togethers!
Variations & Substitutions
- Flavor Combinations: For a winter twist, try adding a hint of cinnamon or nutmeg to the dough.
- Dietary Restrictions: These can easily be made dairy-free with coconut oil and a gluten-free option using the right flour blend.
- Seasonal Variations: Try rolling them in crushed peppermint for a seasonal touch during the holidays!
Nutrition & Storage Info
- Prep Time: 15 minutes
- Cook Time: 20-25 minutes
- Total Time: Approximately 45-50 minutes
- Yield: About 24 cookies
- Estimated Calories: Approximately 120 calories per cookie
- Storage Instructions: Keep in an airtight container at room temperature for up to a week, or freeze for up to three months.
FAQ Section
Can I use margarine instead of butter?
- While technically you can, I recommend sticking with real butter for the best flavor and texture.
How can I tell if my cookies are done?
- Look for a slight golden brown color on the bottom. They will continue to cook slightly after removing them from the oven.
Is it normal for the dough to be crumbly?
- Yes, the dough should be soft yet compact without being overly sticky. If it’s too dry, add a splash of milk.
How do I make these gluten-free?
- Replace the all-purpose flour with a 1:1 gluten-free baking mix. I recommend Bob’s Red Mill or King Arthur Flour brands.
What can I use instead of powdered sugar?
- If you have granulated sugar on hand, you can pulse it in a blender or food processor until fine to create substitute powdered sugar.
Can I add chocolate chips?
- Absolutely! Feel free to fold in mini chocolate chips for a delicious twist on the classic flavor.
How long do they take to cool?
- Allow at least 20 minutes of cooling on a wire rack to ensure they hold their shape before packing.
Can I freeze these cookies?
- Yes, these cookies freeze beautifully! Just place them in a single layer on a baking sheet until frozen, then transfer to an airtight container.
What’s a good dip for Snowball Cookies?
- These cookies are delightful on their own, but they pair wonderfully with warm chocolate sauce for dipping!
What’s the best way to serve these at a party?
- Arrange them in a decorative box or platter with some festive decorations; they make an inviting centerpiece!
Conclusion
These Snowball Cookies are more than just a dessert; they’re a heartfelt slice of simplicity and love, with a flavor that dances with nostalgia. Their irresistible buttery texture and customizable qualities make them a must-try for any gathering. So why not give this recipe a whirl? I’d love to hear how yours turn out! Leave a comment or share feedback, and while you’re here, check out my other festive recipes on the blog. Happy baking!
PrintIrresistible Snowball Cookies
Delicious buttery cookies coated in powdered sugar, perfect for the winter holidays.
- Prep Time: 15 minutes
- Cook Time: 25 minutes
- Total Time: 45 minutes
- Yield: 24 cookies 1x
- Category: Dessert
- Method: Baking
- Cuisine: International
- Diet: Vegetarian
Ingredients
- 2 cups all-purpose flour (or spelt or gluten-free flour)
- 1/2 cup finely chopped walnuts (or almonds, or pecans)
- 1 cup unsalted butter (or coconut oil at room temperature)
- 1/2 cup powdered sugar (plus more for rolling)
- Optional: Additional powdered sugar or cocoa powder for rolling
Instructions
- Preheat your oven to 325°F (163°C) and line a baking sheet with parchment paper.
- Cream together 1 cup of room-temperature butter and 1/2 cup of powdered sugar until fluffy.
- In another bowl, whisk together 2 cups of flour and 1/2 cup of walnuts.
- Combine the dry mixture into the butter mixture until a soft dough forms.
- Roll the dough into 1-inch balls and place them on the baking sheet.
- Bake for 20-25 minutes until the bottoms are lightly browned.
- While warm, roll each cookie in powdered sugar.
- Let cool on a wire rack before storing.
Notes
For a twist, try rolling cookies in crushed peppermint or adding a hint of cinnamon to the dough.
Nutrition
- Serving Size: 1 cookie
- Calories: 120
- Sugar: 6g
- Sodium: 50mg
- Fat: 10g
- Saturated Fat: 6g
- Unsaturated Fat: 4g
- Trans Fat: 0g
- Carbohydrates: 15g
- Fiber: 1g
- Protein: 2g
- Cholesterol: 30mg


