
Irresistibly Easy Apple Pie Filling for Your Next Baking Adventure!
When it comes to cozy family gatherings in the fall, nothing whispers “home” quite like the inviting smell of a freshly baked apple pie wafting through the kitchen. As a passionate food blogger and home baker, I have fond memories of slaving over a hot stove beside my grandmother, as she taught me the art of making delicious pies from scratch. And let me tell you, her secret was always in the filling! This is where Easy Apple Pie Filling comes into play.
You see, this isn’t just any apple filling—this is the one that brings warmth and nostalgia to your table. With its perfectly balanced sweetness, delightful cinnamon warmth, and a gooey texture that envelops the apples like a cozy blanket, it’s the heart of every apple pie I create. Unlike store-bought versions that rely on preservatives, this homemade filling also allows for customization according to personal preferences, be it extra spice or a splash of creativity.
So, if you’re ready to dive into a world of delightful aromas and flavors, grab your apron! In this post, I promise to share everything you need to learn about crafting the most irresistible Easy Apple Pie Filling that will not only elevate your desserts but also create memories for your family to cherish.
What Are Easy Apple Pie Filling?
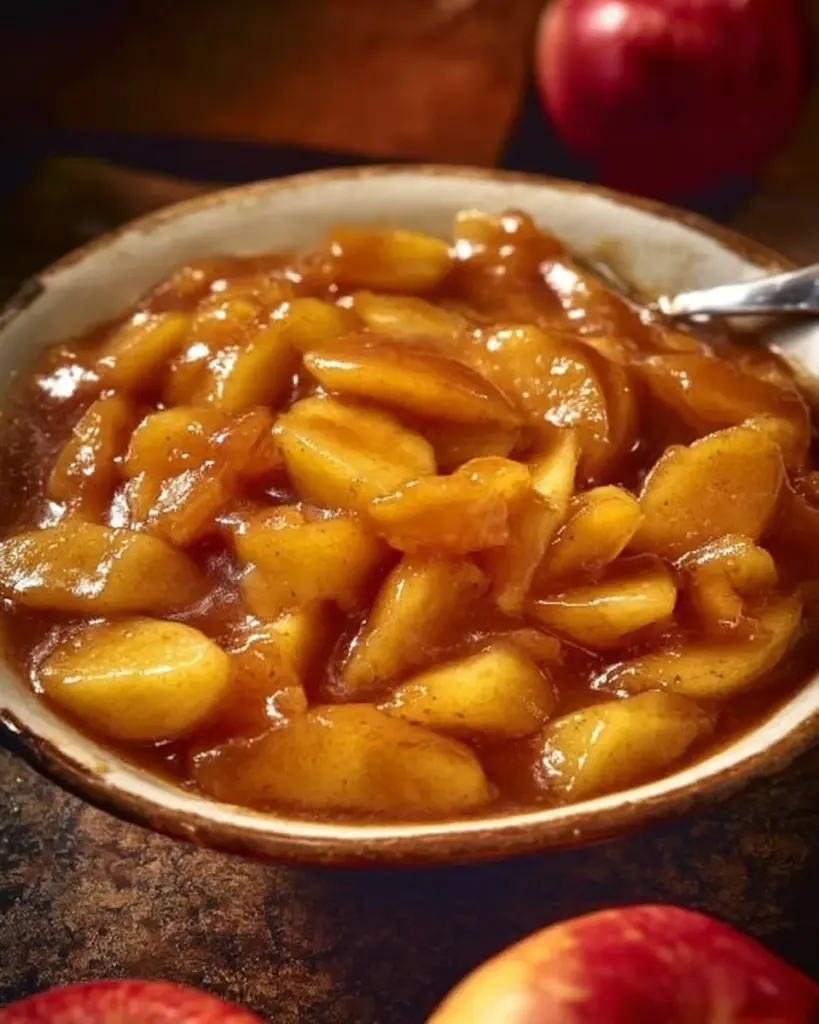
At its core, Easy Apple Pie Filling is a simple mixture of tender apples, sugar, and warm spices—like cinnamon—that creates the delicious filling for apple pies. What’s enchanting about this recipe is its ability to transform seasonal apples into a nostalgic melody of flavors that can burst forth with every single bite.
Originating during the early days of American baking, apple pie and its fillings became a beloved staple in many homes, especially during harvest time. It’s not just about flavor, but also about texture; the filling should be perfectly gooey without being overly runny, allowing it to hold its shape beautifully when baked.
Whether you’re looking to fill a flaky pie crust or top off a scoop of vanilla ice cream, this filling is your go-to companion. It’s perfect for family gatherings, holiday celebrations, or simply because you want a comforting dessert—this is the essence of why you should make it!
Why You’ll Love This Recipe
1. Incredible Flavor and Texture
The flavor of this Easy Apple Pie Filling is a symphony of sweet and tart from the apples, enhanced by the caramel notes of brown sugar, and rounded out by warm cinnamon. It’s like a hug in a bowl!
2. Better Than Store-Bought
Why would you settle for store-bought versions when you can achieve a fresher, tastier filling at home? Many commercial fillings are loaded with preservatives, which we can easily avoid by making this recipe from scratch.
3. Cost-Effective
Homemade Easy Apple Pie Filling can save you money compared to buying pre-made options. With just a few simple ingredients, you can whip up a batch that will dazzle your family without breaking the bank!
4. Customization Galore
Feel free to have fun with the spices! Want to add a splash of vanilla extract or some nutmeg? Go for it! This recipe is a blank canvas that allows you to adjust to your taste buds.
5. Quick and Simple to Make
With just 15-20 minutes of cooking time, even novice bakers can tackle this recipe. Plus, it requires minimal kitchen prowess!
With these reasons in mind, you’ll find that creating a delicious Easy Apple Pie Filling is not only rewarding but also enhances your dessert game significantly.
Ingredients
4 cups apples, peeled and sliced
(I recommend Granny Smith for tartness or Honeycrisp for sweetness)1 cup brown sugar
(Light or dark, depending on your preferred depth of flavor; I love dark for extra richness)2 tablespoons lemon juice
(Freshly squeezed is best! It brightens the flavor and prevents browning)2 teaspoons ground cinnamon
(Cinnamon is essential! Don’t skimp on the quality; stick to brands like Vietnam or Ceylon for a real treat)2 tablespoons cornstarch
(For perfect thickening; you can substitute with tapioca flour if desired)1/4 teaspoon salt
(Just a pinch intensifies the overall flavor)1/4 cup water
(Adjust to reach desired filling consistency)
Step-by-Step Instructions
Prep Your Ingredients: Start by peeling and slicing your apples. Aim for uniform slices for even cooking. This can be a great time to involve the kids or get your family excited about pie-making!
Combine Ingredients: In a large skillet, combine the sliced apples, brown sugar, lemon juice, cinnamon, cornstarch, and salt. Give everything a gentle toss to coat the apples evenly.
Chef’s Tip: Ensure your apples are unblemished and fresh; this makes all the difference in your filling’s final taste!!
Cook the Mixture: Heat the mixture over medium heat, stirring occasionally. You’ll want to cook until the apples are tender and the mixture is bubbly, about 10-15 minutes.
Professional Technique: Keep an eye on the apples and don’t let them become mushy—perfectly tender apples with a slight bite are the aim!
Adjust Consistency: If the filling is too thick, add water a tablespoon at a time, stirring to reach your desired consistency.
Serve or Store: Once your filling is ready, use it as a filling for apple pie or enjoy it warm with vanilla ice cream. Your kitchen will smell divine!
Common Mistake to Avoid: Overcooking the apples can lead to a mushy filling. Keep them crispy!
Expert Tips & Tricks
Storage Recommendations: Store your Easy Apple Pie Filling in an airtight container in the refrigerator for up to 5 days. To freeze, place it in an airtight freezer bag for up to 3 months.
Make-Ahead Instructions: You can make this filling in advance, allowing the flavors to meld beautifully. Just reheat before using it in your baking endeavors!
Troubleshooting Common Problems: If your filling turns out too watery, an additional teaspoon of cornstarch can help. Cook it further until you reach the right consistency.
Quality Matters: Always choose fresh, crisp apples for the best results. A mix of tart and sweet apples can also elevate the flavor profile.
Taste Test: Always taste your filling before using it! You can adjust sweetness and spices to personal preference at that point.
Serving Suggestions
For a show-stopping dessert, serve your Easy Apple Pie Filling in a flaky crust, topped with a scoop of vanilla ice cream or whipped cream. If you’re feeling adventurous, try it over pancakes or in a warm crêpe for breakfast!
Presentation ideas include using a shallow pie dish or mason jars for individual servings. This brings a rustic charm to your table, perfect for fall gatherings, Thanksgiving celebrations, or any cozy night in.
Variations & Substitutions
Spiced Variation: Add a pinch of nutmeg or allspice to amplify the fall flavors.
Tropical Twist: Swapping some apple slices for fresh pineapple can provide a fun tropical twist to your filling.
Dietary Adaptations: For a sugar-free alternative, feel free to use your favorite sugar substitute; simply adjust the quantity to sweeten to taste.
Seasonal Fruits: In summer, try peaches or berries mixed with apples for a delicious twist!
Nutrition & Storage Info
- Prep Time: 10 minutes
- Cook Time: 15 minutes
- Total Time: 25 minutes
- Yield: Approximately 6-8 servings
- Estimated Calories per Serving: 180 calories
Storage Instructions: Allow the filling to cool completely before storing in the fridge (up to 5 days) or freeze (up to 3 months). For best results, thaw overnight in the fridge before reheating.
FAQ Section
Can I use frozen apples?
Yes, you can, but be wary that they may release more moisture; adjust your cornstarch accordingly.What type of apples work best?
Granny Smith and Honeycrisp are perfect for a balanced flavor and texture.Can I double the recipe?
Absolutely! Just ensure your skillet is large enough to accommodate the extra volume.Is this filling gluten-free?
Yes, this recipe is naturally gluten-free as it doesn’t contain wheat.What can I do if I overcook the apples?
If your apples become mushy, consider blending the mixture into a spiced apple butter instead!How do I know when my filling is fully cooked?
Look for tender apples that hold shape, with the filling bubbling around them.Can I make this filling without sugar?
You can substitute with sugar alternatives, adjusting to taste.Is it okay to add more spices?
Absolutely! Adjust spices to your personal preferences and entice your taste buds.Can I use this recipe for other desserts?
Yes! Use it in tartlets, as a topping for oatmeal, or even straight from the jar!How should I serve leftovers?
Leftover filling can be served with yogurt, on pancakes, or as filling for pastries!
Conclusion
This Easy Apple Pie Filling is truly something special. It holds our family traditions, warmth, and love, while also inviting delicious smells into our homes. I encourage you to give this recipe a go and relish in the delightful taste of homemade goodness. Your family will thank you for it, and I welcome your feedback and comments. Don’t forget to check out my other seasonal recipes on the blog—like my classic apple pie or decadent apple crisp. Happy baking!
PrintEasy Apple Pie Filling

A perfectly balanced homemade apple pie filling that adds warmth and nostalgia to your desserts.
- Prep Time: 10 minutes
- Cook Time: 15 minutes
- Total Time: 25 minutes
- Yield: 6-8 servings 1x
- Category: Dessert
- Method: Stovetop
- Cuisine: American
- Diet: Vegetarian
Ingredients
- 4 cups apples, peeled and sliced
- 1 cup brown sugar
- 2 tablespoons lemon juice
- 2 teaspoons ground cinnamon
- 2 tablespoons cornstarch
- 1/4 teaspoon salt
- 1/4 cup water
Instructions
- Prep Your Ingredients: Start by peeling and slicing your apples.
- Combine Ingredients: In a large skillet, combine the sliced apples, brown sugar, lemon juice, cinnamon, cornstarch, and salt.
- Cook the Mixture: Heat the mixture over medium heat, stirring occasionally, until the apples are tender and the mixture is bubbly, about 10-15 minutes.
- Adjust Consistency: Add water a tablespoon at a time if the filling is too thick.
- Serve or Store: Use it as a filling for apple pie or enjoy it warm with vanilla ice cream.
Notes
Store your Easy Apple Pie Filling in an airtight container in the refrigerator for up to 5 days or freeze for up to 3 months. Always taste your filling before using to adjust sweetness and spices.
Nutrition
- Serving Size: 1 serving
- Calories: 180
- Sugar: 30g
- Sodium: 100mg
- Fat: 0g
- Saturated Fat: 0g
- Unsaturated Fat: 0g
- Trans Fat: 0g
- Carbohydrates: 45g
- Fiber: 3g
- Protein: 1g
- Cholesterol: 0mg


