

Sweet Treats Reimagined: Healthy Honey Marshmallows Recipe
Have you ever felt that rush of nostalgia from a childhood favorite? As I stood in my kitchen, surrounded by the sweet aroma of melting honey, I couldn’t help but be transported back to rainy days spent indoors with my family, where marshmallows were a must-have companion for our hot chocolate marathons. These moments inspired my passion for baking, and that’s where my Healthy Honey Marshmallows Recipe comes into play.
What sets this recipe apart is not just its vibrant taste but the wholesome ingredients that make it a guilt-free delight. Unlike the store-bought versions filled with artificial flavors and preservatives, my healthy honey marshmallows bring comfort food into the 21st century. They’re soft, fluffy, and bursting with natural sweetness, making them the perfect touch to any dessert or hot drink. Plus, they’re easy to whip up with just a handful of ingredients!
Join me in learning how to make marshmallows that are so good, you’ll find it hard to stop at just one bite. Let’s bring that nostalgic sweetness back into your kitchen with a healthy twist!
What Are Healthy Honey Marshmallows?
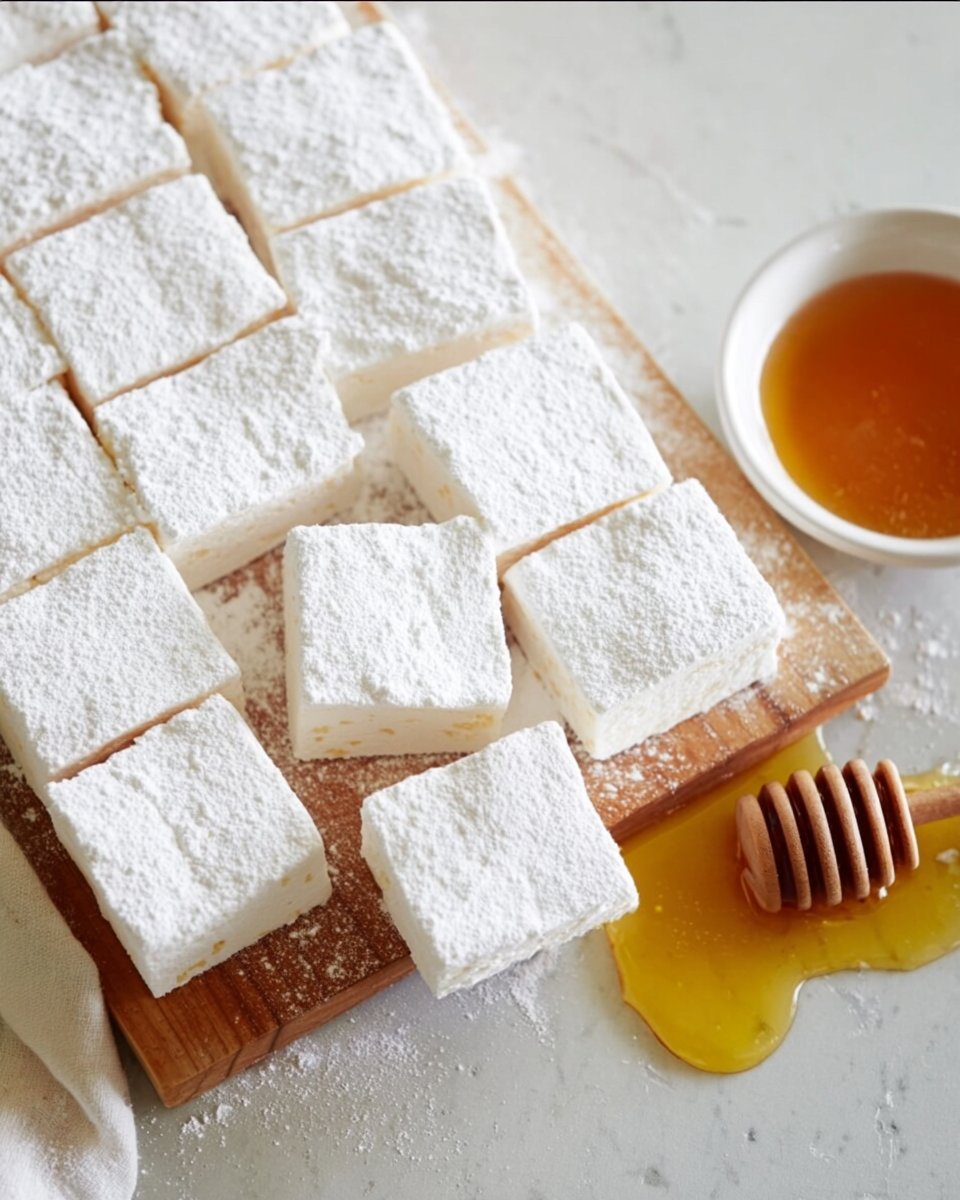
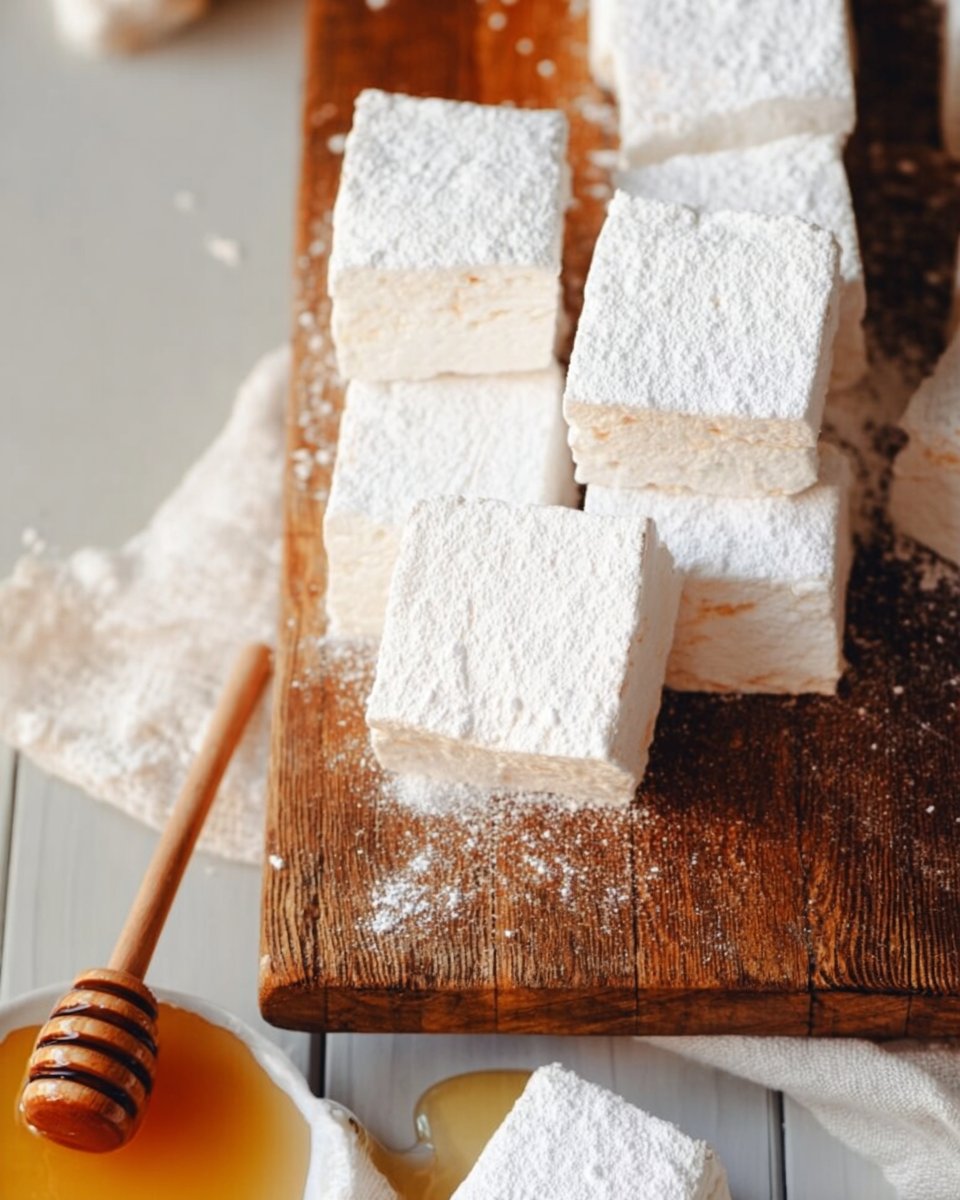
While marshmallows have a long history dating back to ancient Egypt, where they were made from the sap of the mallow plant, today’s version bears little resemblance to its roots. My Healthy Honey Marshmallows Recipe captures that original essence while enhancing flavor and texture with wholesome honey. The experience of biting into one of these marshmallows is simply divine: chewy, airy, and sugary-sweet with a soft melt-in-your-mouth quality that rivals any confection you’ll find at a grocery store.
These marshmallows are unique not only in their healthier ingredients but also in their versatility. Use them to elevate a cup of cocoa, put them on s’mores, or indulge in them straight from the bag! The best part? They’re perfect for holidays, parties, or even an afternoon treat on a cozy day at home.
Why You’ll Love This Recipe
Wholesome Ingredients: Unlike traditional marshmallows dense with corn syrup, my healthy version uses 100% natural honey. This adds a delightful flavor while cutting down on refined sugars. You’ll feel good knowing what you’re indulging in!
Customizable Flavors: You can easily personalize these marshmallows—think peppermint extract for winter or a dash of cinnamon for fall. The opportunities to mix it up are endless!
Cost-Effective: Making marshmallows at home is kinder to your wallet. Store-bought can cost a pretty penny, but this recipe will give you a generous batch at a fraction of the price. Plus, you can make them in bulk!
Easy to Make: Don’t worry if you’re not a seasoned baker. This recipe is beginner-friendly and will reward you with that wow factor!
Memorable: With every sticky bite, these marshmallows conjure up memories of laughter, shared conversations, and a warmth that fills both heart and home. You’ll be making lasting memories right alongside these delights!
Ingredients
Here’s what you’ll need to whip up these delightful marshmallows:
- Water (1-1/4 cups, divided): Cold water for blooming gelatin, warm water for melting honey.
- Honey (1-1/2 cups): Look for raw, organic honey for the best flavor.
- Gelatin Powder (4 tablespoons): Ensure it’s unflavored for the right texture.
- Kosher Salt (1/4 teaspoon): Enhances the sweetness beautifully!
- Vanilla Extract (1 teaspoon): Pure vanilla is preferable for a rich aroma.
- Powdered Sugar (1/4 cup): Great for dusting your marshmallows to keep them from sticking together.
- Cornstarch (1/4 cup): Mixed with powdered sugar, this will further prevent sticking.
Prep Notes:
- Ensure your gelatin powder is at room temperature before use for optimal blooming.
- Have butter or coconut oil on hand to grease utensils.
- Choose high-quality honey; it truly makes a difference in flavor!
Step-by-Step Instructions
Prepare Your Dish
- Line a Baking Dish: First, grab a 9×13 baking dish. Line it with parchment paper, then coat it lightly with oil. Set aside; we’ll bring the magic here soon!
Creating the Honey Mixture
Heat Honey: In a medium pot, combine 3/4 cup of water with 1-1/2 cups honey over medium-high heat. Once boiling, reduce to medium.
Cook to Temperature: Using a candy thermometer, allow the mixture to reach 242-245°F (this is the firm ball stage). Keep an eye on it; this is crucial for achieving the right texture!
Blooming the Gelatin
- Bloom Gelatin: While the honey mixture is heating, take the remaining 1/2 cup of water and sprinkle the gelatin over it in your stand mixer bowl—stir to combine and let it sit. This helps the gelatin dissolve fully.
Combine Honey and Gelatin
Mix Together: When the honey mixture reaches the right temperature, remove it from heat. With your mixer on low, carefully pour the hot honey down the side of the bowl into the gelatin mixture (this prevents the gelatin from burning).
Beat Until Fluffy: Raise the mixer speed to medium-high and beat for about 5 minutes.
Add Flavor & Whip More: Now add your salt and vanilla extract, then beat on high for an additional 5 minutes, until the mixture is glossy and has almost doubled in volume.
Transfer to Baking Dish
- Spread the Mixture: Grease a spatula with coconut oil or butter and quickly spread the marshmallow mixture evenly into your prepared dish. Don’t worry if it’s a bit messy; it will set beautifully!
Allow to Set
- Rest Time: Let the mixture sit uncovered at room temperature for 6-8 hours or overnight.
Slice & Coat
Cut Them Up: After setting, turn the marshmallow slab onto a cutting board. Using a large knife coated with oil, cut into 1.5-inch squares.
Toss in Sugar: In a small bowl, mix together cornstarch and powdered sugar. Toss your marshmallow squares in this mixture to coat all sides, preventing any sticking.
Store: Store the marshmallows in a large bowl or canister. For a bit of extra love, sprinkle more powdered sugar on top to keep them from sticking.
Chef’s Tip: Always ensure your utensils and workspace are greased to prevent the sticky marshmallow mixture from giving you a tough time!
Expert Tips & Tricks
Storage Recommendations: Keep your marshmallows in an airtight container at room temperature. They’ll last for about 2 weeks, but trust me, they’ll disappear before then!
Make-Ahead Instructions: In need of a treat for an upcoming gathering? These marshmallows can be made up to a week in advance. Just coat them well in the sugar mixture!
Common Troubleshooting: If your marshmallows don’t set properly, the most likely culprit was not reaching the proper temperature while heating. Always keep an eye on your candy thermometer.
Reusing Leftovers: If you have leftover gelatin, it can be used for other recipes like homemade gummy candies or panna cotta.
Serving Suggestions
These delightful marshmallows can be enjoyed on their own, but they elevate a simple cup of hot cocoa or coffee into a luxurious treat. I often pair them with a drizzle of dark chocolate for a decadent dessert or sprinkle them over fresh fruit for a healthy twist. For gatherings, consider serving them with skewers and a bowl of melted chocolate for DIY s’mores!
Variations & Substitutions
Flavored Marshmallows: Add 1-2 tablespoons of your favorite extract, such as almond, coconut, or peppermint, to give them a unique spin!
Dietary Adaptations: Want to make them vegan? Substitute honey with maple syrup or agave nectar (note that texture may slightly differ) and use agar-agar in place of gelatin.
Seasonal Flourishes: Try adding pumpkin spice in the fall or citrus zest for a refreshing spring flavor. The combinations are endless!
Nutrition & Storage Info
- Prep Time: 20 minutes
- Cook Time: 10 minutes
- Total Time: 6-8 hours (setting time)
- Yield: Approximately 36 marshmallow squares
- Estimated Calories per Serving: About 30 calories per marshmallow (depending on size)
Storage Instructions: Store at room temperature in an airtight container. Marshmallows last about 2 weeks—if they last that long!
FAQ Section
Can I use liquid sweeteners instead of honey?
Yes, maple syrup or agave nectar are great alternatives, just note the flavor will change!Do I need a candy thermometer?
While it’s recommended for the perfect texture, you can use the cold water test method as a backup!What happens if I overbeat the marshmallow mixture?
It may become grainy or dry out. Stop beating once it’s glossy and doubled in volume.Can I add colors for a festive touch?
Absolutely! Gel food colorings can easily be added after the vanilla.Are these marshmallows gluten-free?
Yes, they are naturally gluten-free. Just ensure the ingredients you use are certified gluten-free.How can I prevent them from sticking together?
Coating them in the powdered sugar and cornstarch mix is key. Storing them properly also helps.Can I freeze marshmallows?
Yes, but they may become a bit chewy. Just thaw them at room temperature before serving.How long do they take to set?
Ideally, give them at least 6 hours, but overnight is best for a firm texture.Can I add nuts or dried fruit to the recipe?
Yes! Fold in mini chocolate chips or chopped dried fruit once the mixture is fluffy!What if I don’t have a stand mixer?
You can use a hand mixer—just be prepared for a workout!
Conclusion
This Healthy Honey Marshmallows Recipe embodies comfort and nostalgia, transforming a beloved treat into something wholesome and delightful. Whether you’re indulging yourself or sharing with loved ones, each bite brings back memories and creates new ones. I hope you give this recipe a try, and when you do, I’d love to hear your feedback! Have fun with the variations and make them uniquely yours. Don’t forget to check out more delicious recipes on my blog for further adventures in baking!
Happy cooking!
PrintHealthy Honey Marshmallows
A nostalgic treat reimagined with wholesome ingredients, these Healthy Honey Marshmallows are fluffy and naturally sweetened, perfect for dessert or hot drinks.
- Prep Time: 20 minutes
- Cook Time: 10 minutes
- Total Time: 420 minutes
- Yield: 36 squares 1x
- Category: Dessert
- Method: No-Bake
- Cuisine: American
- Diet: Vegetarian
Ingredients
- 1–1/4 cups Cold Water (divided)
- 1–1/2 cups Raw, Organic Honey
- 4 tablespoons Unflavored Gelatin Powder
- 1/4 teaspoon Kosher Salt
- 1 teaspoon Pure Vanilla Extract
- 1/4 cup Powdered Sugar
- 1/4 cup Cornstarch
Instructions
- Line a 9×13 baking dish with parchment paper and lightly grease it with oil.
- In a medium pot, combine 3/4 cup of water and honey over medium-high heat. Bring to a boil, then reduce to medium.
- Heat the mixture to 242-245°F using a candy thermometer.
- In a stand mixer bowl, sprinkle the gelatin over the remaining 1/2 cup of water and let it sit to bloom.
- Once the honey mixture reaches the right temperature, carefully pour it into the bloomed gelatin while mixing on low.
- Increase the speed to medium-high and beat for about 5 minutes.
- Add salt and vanilla extract, then beat on high for another 5 minutes until glossy and doubled in volume.
- Spread the mixture into the prepared dish using a greased spatula.
- Allow the marshmallows to sit uncovered at room temperature for 6-8 hours or overnight.
- Once set, turn the slab onto a cutting board and cut into 1.5-inch squares.
- Coat marshmallow squares in a mixture of cornstarch and powdered sugar to prevent sticking.
- Store in an airtight container at room temperature.
Notes
Ensure utensils and workspace are greased to prevent sticking. These marshmallows can be made in advance and flavored with various extracts.
Nutrition
- Serving Size: 1 square
- Calories: 30
- Sugar: 6g
- Sodium: 5mg
- Fat: 0g
- Saturated Fat: 0g
- Unsaturated Fat: 0g
- Trans Fat: 0g
- Carbohydrates: 8g
- Fiber: 0g
- Protein: 0g
- Cholesterol: 0mg


