
I vividly remember the first time I tried Salt and Pepper Chicken. It was during one of those chilly family gatherings, where laughter and warmth filled the air, and the tantalizing aroma from the kitchen made my stomach rumble with anticipation. My aunt, the culinary maestro of our family, whipped up a batch of these golden, crispy delights that had everyone coming back for seconds—myself included!
What makes Salt and Pepper Chicken truly special is its perfect balance of flavors: the salt enhances the savoriness, while the black pepper adds just the right amount of kick. Toss in some garlic and onion powder, and you’ve got a crispy coating that crunches with every bite! My recipe elevates the traditional approach by using fresh ingredients and emphasizing frying techniques that guarantee a delightful crispness without compromising juiciness.
Beyond being a crowd-pleaser, Salt and Pepper Chicken holds a sacred place in my heart as comfort food. It’s the kind of dish that brings families together, making memories over shared plates. In this post, I promise you’ll learn how to create your own batch of this crisp sensation right at home, complete with expert tips to ensure perfection every time.
What Are Salt and Pepper Chicken?
Salt and Pepper Chicken is a beloved dish originating from Asian cuisine, most notably from Chinese and Taiwanese culinary traditions. It showcases tender, juicy chicken pieces enveloped in a perfectly seasoned crispy coating. This dish is incredibly versatile and can be served as an appetizer, main course, or even a snack!
When made right, Salt and Pepper Chicken features a double-fried exterior that’s gloriously crunchy, contrasted with the succulent tenderness of the chicken inside. The flavor profile is delightfully savory, with the salt and pepper creating a harmonious balance that excites your taste buds—it’s comfort food at its best!
Consider whipping up Salt and Pepper Chicken for casual family dinners, during game day gatherings, or at a festive occasion. It’s sure to make an impression, leaving everyone coming back for more!
Why You’ll Love This Recipe
- Irresistibly Crispy: This recipe guarantees a crunchy, golden-brown exterior without needing fancy equipment. You won’t find a crispier version at any restaurant!
- Cost-Effective: Making Salt and Pepper Chicken at home is budget-friendly. With affordable chicken breasts and pantry staples, you save money while indulging in a restaurant-quality meal.
- Customizable: Whether you want to crank up the heat with extra pepper or add a twist with spices like cayenne or smoked paprika, this recipe is adaptable to your taste preferences.
- Easy to Follow: You don’t need to be a master chef to nail this dish! With clear, step-by-step instructions and chef tips, you’ll feel confident in your frying skills.
- Quick to Prepare: In under 30 minutes, you’ll have a deliciously crispy meal ready to serve. Perfect for busy weeknights or last-minute gatherings!
Forget about store-bought frozen chicken strips or takeout—they simply can’t match the taste of homemade, fresh-battered Salt and Pepper Chicken made with love!
Ingredients
To make this scrumptious Salt and Pepper Chicken, you’ll need:
- 4 Chicken Breasts: Use fresh, high-quality chicken. If possible, opt for organic or free-range options for better flavor.
- 1 Cup All-Purpose Flour: This will give your chicken that perfect crispy coating. You can substitute with gluten-free flour if needed.
- 2 Teaspoons Salt: This helps enhance the natural flavors of the chicken.
- 1 Teaspoon Ground Black Pepper: Add more for an extra kick!
- 1 Teaspoon Garlic Powder: Brings a lovely savory aroma.
- 1 Teaspoon Onion Powder: It pairs beautifully with the garlic and enhances the overall flavor.
- 1/2 Teaspoon Paprika: A hint of smokiness and color.
- 2 Eggs: Beaten with water to create a binding agent for the flour coating.
- 2 Tablespoons Water: To help mix with the eggs.
- Vegetable Oil for Frying: Use canola or any neutral oil with a high smoke point.
Prep Notes
- Ensure your eggs are at room temperature for better integration. This helps with the coating sticking to the chicken.
- Consider brands like Pristine or King Arthur for reliable, high-quality flour.
Step-by-Step Instructions
- Prep the Coating Mixture: In a large bowl, whisk together the flour, salt, ground black pepper, garlic powder, onion powder, and paprika until well combined.
- Chef Tip: Sifting the flour before mixing can enhance the texture for a lighter coating.
- Prepare the Egg Wash: In another bowl, beat the eggs with 2 tablespoons of water until well blended.
- Timing: This should take about 1 minute.
- Coat the Chicken: Take each chicken breast and dip it into the egg mixture, allowing any excess to drip off, then coat it generously with the flour mixture.
- Chef’s Tip: Press the flour onto the chicken for better adherence, ensuring that it’s evenly coated.
- Heat the Oil: In a large skillet, heat 1/2 inch of vegetable oil over medium-high heat. The oil should reach about 350°F (180°C) for optimal frying. You can test by dropping a pinch of the flour mixture in; if it sizzles, you’re ready to go!
- Visual Cue: The oil should shimmer but not smoke.
- Fry the Chicken: Carefully add the coated chicken breasts to the hot oil. Fry them for about 5-7 minutes on each side or until they are golden brown and cooked through.
- Common Mistakes to Avoid: Avoid overcrowding the pan, as this will lower the oil temperature and result in soggy coating.
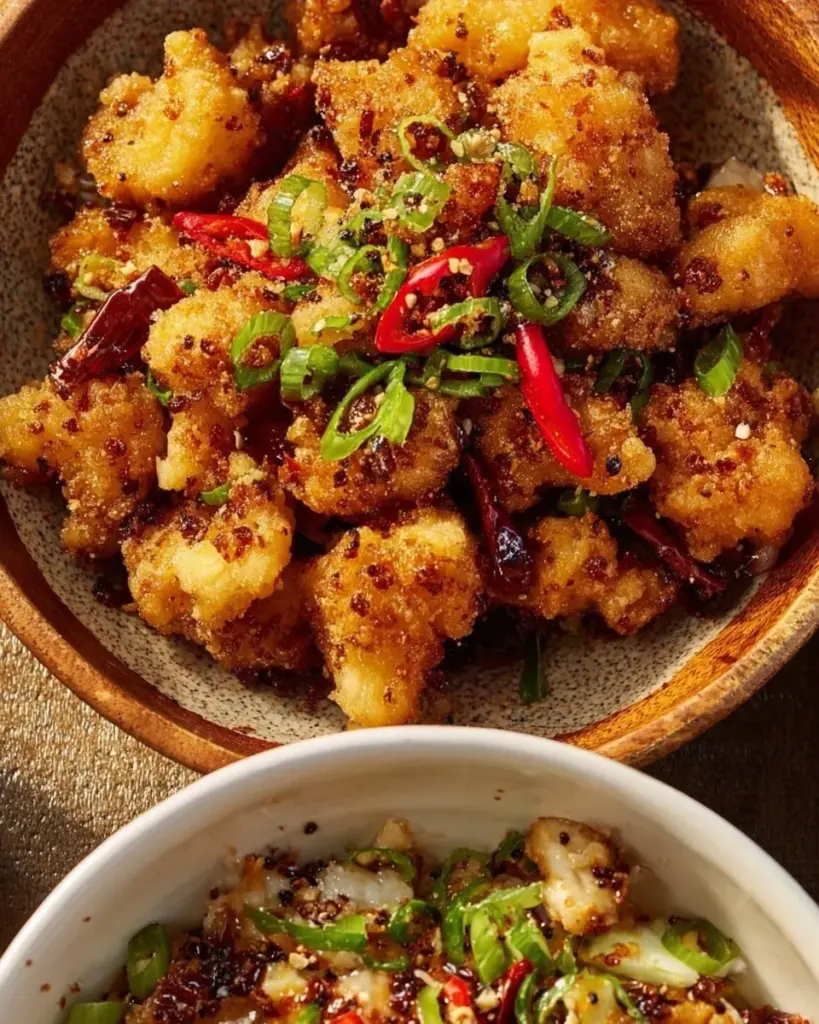
- Drain and Serve: Once fried to perfection, place the chicken on a paper towel-lined plate to absorb excess oil. Serve hot and enjoy your homemade Salt and Pepper Chicken!
- ![image_1]
Expert Tips & Tricks
- Storage Recommendations: Leftover chicken can be stored in an airtight container in the refrigerator for up to 3 days.
- Freezing: If you have extras, freeze them after cooking. Lay them out on a baking sheet to freeze individually for 1 hour, then transfer to a freezer-safe bag. They’ll last up to 2 months.
- Make-Ahead Instructions: You can coat the chicken ahead of time and refrigerate for a couple of hours before frying, which can enhance the flavor. Just ensure to bring it back to room temperature before frying.
- Troubleshooting: If the coating falls off during frying, make sure the chicken is well-coated and that the oil is properly heated.
Serving Suggestions
Serve your Salt and Pepper Chicken with a side of jasmine rice or steamed vegetables for a complete meal. For a more festive touch, a sprinkle of finely chopped scallions and sesame seeds on top can add a delightful pop of color and texture. This dish is perfect for family dinners, casual get-togethers, or even game day events!
Variations & Substitutions
- Flavor Combinations: Try adding a pinch of chili powder for a spicy version or a dash of lemon zest for a zesty twist.
- Dietary Adaptations: Make it gluten-free by using a gluten-free flour mix or utilizing almond flour for a nutty flavor.
- Seasonal Variations: Add seasonal veggies like bell peppers or zucchini to the frying pan for a colorful and nutritious twist.
Nutrition & Storage Info
- Prep Time: 10 minutes
- Cook Time: 20 minutes
- Total Time: 30 minutes
- Yield: 4 servings
- Estimated Calories: 350 calories per serving
- Storage Instructions: Store at room temperature if you’re serving immediately, or refrigerate any leftovers. Consume within 3 days. They can also be frozen for up to 2 months.
FAQ Section
- Can I make Salt and Pepper Chicken in the oven instead of frying?
- Yes! You can bake the chicken at 425°F (220°C) for 20-25 minutes or until cooked through and golden, though the coating will not be as crispy.
- What dipping sauce pairs well with Salt and Pepper Chicken?
- A sweet chili sauce or a tangy soy sauce with lime are excellent choices!
- Can I use chicken thighs instead of breasts?
- Absolutely! Chicken thighs will add more flavor and moisture but may require a few extra minutes of cooking time.
- How do I know when the chicken is cooked through?
- A meat thermometer should read 165°F (74°C) when properly cooked.
- What’s the best oil for frying?
- Canola oil or peanut oil are ideal due to their high smoke points.
- How can I reheat leftover Salt and Pepper Chicken?
- Reheat in the oven at 350°F (175°C) for about 10-15 minutes to retain crispiness.
- Can I prepare this recipe without eggs?
- Yes! You can use a buttermilk wash or a mixture of cornstarch and water as an egg replacement.
- Are there any vegetarian options?
- Try using cauliflower or paneer as a substitute for chicken, coated in the same spice mix.
- Can I double the recipe?
- Definitely! Just ensure you fry in batches to keep the oil temperature consistent.
- What sides complement Salt and Pepper Chicken?
- Steamed broccoli, fried rice, or a light salad would all pair wonderfully.
![image_2]
Conclusion
Salt and Pepper Chicken is more than just a dish; it’s a fond memory of family, laughter, and love served on a plate. I hope you give this recipe a try and discover the joy of making your own crispy delight at home. And don’t forget to share your thoughts in the comments below; I would love to hear how it turns out for you! If you’re hungry for more delightful recipes, check out my blog for additional inspiration. Happy cooking!
PrintSalt and Pepper Chicken
Crispy and juicy Salt and Pepper Chicken that elevates comfort food with its perfect balance of flavors.
- Prep Time: 10 minutes
- Cook Time: 20 minutes
- Total Time: 30 minutes
- Yield: 4 servings 1x
- Category: Main Course
- Method: Frying
- Cuisine: Asian
- Diet: Gluten-Free option available
Ingredients
- 4 Chicken Breasts
- 1 Cup All-Purpose Flour
- 2 Teaspoons Salt
- 1 Teaspoon Ground Black Pepper
- 1 Teaspoon Garlic Powder
- 1 Teaspoon Onion Powder
- 1/2 Teaspoon Paprika
- 2 Eggs (beaten)
- 2 Tablespoons Water
- Vegetable Oil for Frying
Instructions
- Prep the Coating Mixture: In a large bowl, whisk together flour, salt, black pepper, garlic powder, onion powder, and paprika.
- Prepare the Egg Wash: In another bowl, beat eggs with 2 tablespoons of water.
- Coat the Chicken: Dip chicken breasts into the egg mixture then coat with the flour mixture.
- Heat the Oil: In a skillet, heat 1/2 inch of vegetable oil over medium-high heat until shimmering.
- Fry the Chicken: Add the coated chicken breasts to the hot oil and fry for 5-7 minutes on each side until golden brown.
- Drain and Serve: Place fried chicken on a paper towel-lined plate and serve hot.
Notes
Ensure your eggs are at room temperature for better coating adherence.
Nutrition
- Serving Size: 1 piece
- Calories: 350
- Sugar: 1g
- Sodium: 500mg
- Fat: 18g
- Saturated Fat: 4g
- Unsaturated Fat: 10g
- Trans Fat: 0g
- Carbohydrates: 28g
- Fiber: 2g
- Protein: 30g
- Cholesterol: 120mg


