
Deliciously Authentic Thai Shrimp Fried Rice: An Easy Recipe You’ll Love
There are certain dishes that transport you back to cherished memories, and for me, Thai Shrimp Fried Rice is one that never fails to warm my heart. I remember the first time I tasted this vibrant dish at my favorite little Thai spot; the aroma of cilantro, the tender shrimp, and the perfectly stir-fried rice created an unforgettable experience. It became a staple in my family because it’s not just a meal; it’s comfort food. My kids love it, and I cherish the moments spent together at the dinner table, sharing stories and laughter while devouring every colorful bite.
What makes my Thai Shrimp Fried Rice special? Well, for starters, this recipe embraces the richness of flavors you might find at a restaurant but relies on simple ingredients and techniques that are easy for you to master at home. Unlike the takeout version, this one packs a freshness and customizability that simply can’t be beat. With this recipe, you’ll learn how to stir-fry your way to a family favorite, ready in just 30 minutes!
What Are Thai Shrimp Fried Rice?
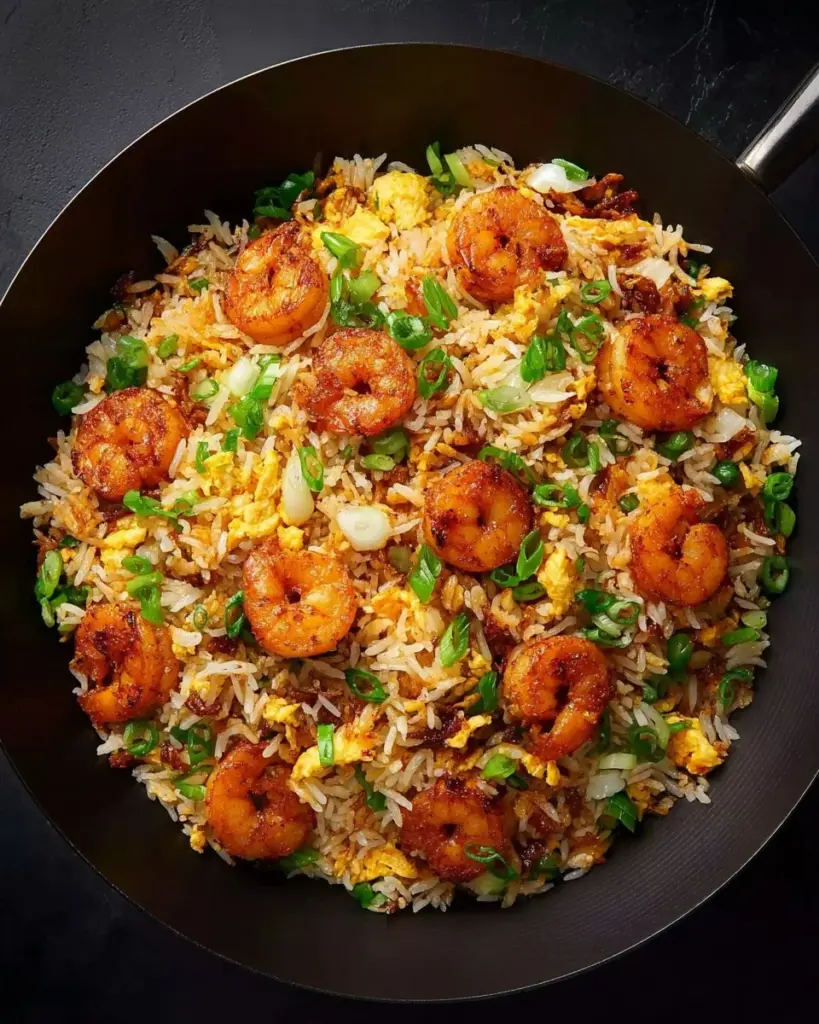
Thai Shrimp Fried Rice, or "Khao Pad Goong," is a beloved street food staple in Thailand, renowned for its delightful balance of flavors and textures. Imagine perfectly cooked jasmine rice that’s been stir-fried with succulent shrimp, a medley of aromatic herbs, and a touch of umami from sauces—all tossed together at high heat in a sizzling wok!
The dish captures a wonderful harmony of sweet, salty, and savory notes, enhanced by fragrant garlic and shallots. Each bite delivers a satisfying crunch from the veggies, a hint of zesty lime, and, of course, the delightfully tender shrimp. Whether you whip this up for a quick weeknight dinner or a weekend treat, Thai Shrimp Fried Rice is the perfect dish to bring a little adventure to your kitchen!
Why You’ll Love This Recipe
Here are five compelling reasons you’ll fall in love with my Thai Shrimp Fried Rice recipe:
Fast and Easy: With a total time of just 30 minutes, this dish allows you to whip up something fantastic without spending hours in the kitchen!
Fresh Ingredients: Unlike takeout that can sometimes taste soggy or overly greasy, using day-old jasmine rice, fresh shrimp, and bright vegetables ensures every bite is packed full of flavor.
Cost-Effective: Making this dish at home saves you money while allowing you to customize the ingredients! You’ll impress friends and family with a restaurant-quality meal at a fraction of the price.
Endless Customization: Feel free to add your favorite veggies—like bell peppers or snow peas—or adjust the heat level with fresh Thai chilies (if you dare!). This recipe is flexible enough to cater to every palate.
Satisfying and Flavorful: With a savory blend of sauces and aromatic herbs, you’ll find this dish incredibly satisfying. Plus, the textures will keep your taste buds dancing—crispy, tender, and oh-so-delicious.
Ingredients Section
To make the Thai Shrimp Fried Rice, you will need the following ingredients:
- 1 pound shrimp, peeled and deveined (fresh or frozen; if using frozen, thaw beforehand)
- 3 cups cooked jasmine rice, preferably day-old and cold (this helps achieve the right texture)
- 3 cloves garlic, minced
- 1 small shallot, finely chopped
- 2 green onions, sliced (separate white and green parts for better flavor layering)
- 2 eggs, beaten (room temperature is best for even cooking)
- 2 tablespoons neutral oil (like canola or avocado oil; choose high smoke point oils)
- 1 tablespoon Thai soy sauce
- 1 tablespoon oyster sauce
- 1 tablespoon fish sauce (creates an amazing umami flavor)
- 1/2 teaspoon sugar (to balance the savory flavors)
- 1/4 teaspoon white pepper (adds a gentle spice)
- 1 lime, cut into wedges (for that zesty finish)
Optional for serving: sliced cucumber, fresh cilantro, and sliced Thai chilies for an added kick.
Ingredient Quality Notes:
- I recommend using high-quality shrimp; if you’re unsure, check for those that are sustainably sourced.
- For the best flavor, use Thai brands for soy and fish sauce when possible, as they tend to provide richer taste profiles.
Step-by-Step Instructions
Now, let’s bring this delicious Thai Shrimp Fried Rice to life! Follow these steps carefully for the best results:
Prepare the Shrimp: Pat the shrimp dry with a paper towel and season lightly with a sprinkle of salt and a dash of white pepper.
Cook the Shrimp: In a large wok or skillet set over medium-high heat, add 1 tablespoon of oil. When the oil is hot, add the shrimp and cook for just 1-2 minutes on each side until they turn pink and opaque. Remove from the pan and set aside.
Sauté Aromatics: Add another tablespoon of oil to the same pan. Stir in minced garlic, chopped shallot, and the white parts of the green onions. Sauté for about 30 seconds, or until fragrant—watch carefully not to burn!
Scramble the Eggs: Push the aromatics to the side and crack the beaten eggs into the pan. Scramble until just set, then mix everything together for an even distribution.
Add the Rice: Break up the cold rice gently with your hands to separate any clumps, then add it to the pan. Stir-fry for about 2-3 minutes, using your spatula to press and toss it gently to heat the rice evenly.
Flavor It Up: Pour in the Thai soy sauce, oyster sauce, fish sauce, sugar, and white pepper. Stir everything together, ensuring the rice is evenly coated with the sauces.
Combine Shrimp and Rice: Add the cooked shrimp back to the pan. Stir-fry for another minute, mixing well so the shrimp and rice are perfectly combined.
Final Touches: Remove from heat. Garnish your Thai Shrimp Fried Rice with the green onion tops, a squeeze of fresh lime, and any optional cucumber slices or cilantro you like.
Chef’s Tips:
- Timing is key! Keep the heat high but be attentive to avoid burning.
- If you find the mixture too dry, add a splash of water or additional sauces for moisture.
Common Mistakes to Avoid:
- Don’t skip the cold rice; fresh rice can become mushy.
- Avoid overcooking the shrimp—it should be just cooked through.
Expert Tips & Tricks
Here are my professional insights to ensure your Thai Shrimp Fried Rice turns out perfectly:
Use Day-Old Rice: This key ingredient prevents the rice from getting mushy and allows for that delightful chewy texture. If you need to cook rice on the same day, spread it out on a baking sheet to cool it down quickly.
Don’t Crowd the Pan: If your skillet isn’t large enough, cook in batches. Crowding the pan can cause your shrimp and veggies to steam instead of fry.
Storage Recommendations: Store leftovers in an airtight container in the fridge for up to 3 days. Reheating in a skillet with a splash of water can help restore the texture.
Make-ahead Instructions: You can pre-chop your vegetables and sauces, making your cooking process even quicker when you’re ready to fry!
Troubleshooting: If your fried rice is tasting bland, adjust the sauces or add a dash more fish sauce for increased umami.
Serving Suggestions
Serve your Thai Shrimp Fried Rice alongside some tangy cucumber salad or fresh spring rolls for a complete meal. For presentation, consider garnishing with extra lime wedges, vibrant cilantro, and a sprinkle of sesame seeds for an elevated touch. It’s perfect for any occasion—weeknight dinners, family gatherings, or casual get-togethers with friends!
Variations & Substitutions
Feel free to explore different flavor combinations with your Thai Shrimp Fried Rice:
- Vegetable Power: Add bell peppers, peas, or carrots for a pop of color and nutrition.
- Protein Swap: Substitute shrimp with chicken, tofu, or your favorite protein to customize to diet preferences.
- Herb Variations: Try adding fresh basil or mint for an aromatic twist.
Nutrition & Storage Info
- Prep Time: 10 minutes
- Cook Time: 20 minutes
- Total Time: 30 minutes
- Yield: Serves 4
- Estimated Calories: Approximately 350 calories per serving
- Storage Instructions: Keep in airtight containers at room temperature for about 2 hours, or refrigerate for up to 3 days. For longer storage, freeze for up to a month. Reheat thoroughly before serving.
FAQ Section
Can I use frozen shrimp?
- Yes! Ensure you thaw them beforehand to maintain a proper texture.
What kind of rice should I use?
- Jasmine rice is best due to its fragrance and texture, but you can use other long-grain rice types.
What can I substitute for fish sauce?
- Soy sauce can work in a pinch, or you might try a vegan alternative like coconut aminos.
Can I make this dish vegetarian?
- Absolutely! Use tofu instead of shrimp and substitute fish sauce with soy sauce or a veggie-friendly option.
What’s the best cooking oil to use?
- High smoke point oils like canola, avocado, or peanut oil are perfect for stir-frying.
How do I make this dish spicier?
- Add sliced Thai chilies or a dash of chili paste while cooking for an extra spicy kick.
Can I add other proteins?
- Of course! Chicken, beef, or pork can be used instead of shrimp, just adjust cooking times accordingly.
What’s the secret to perfect fried rice?
- Use cold, day-old rice for the best texture and ensure you don’t overcrowd the pan!
Can I make this ahead of time?
- Yes, it can be made in advance but is best served fresh. Reheat in a skillet before serving.
Can I use this recipe for meal prep?
- Absolutely! It is ideal for meal prep and reheats well.
Conclusion
Now that you know how to make this delightful Thai Shrimp Fried Rice, I hope you’ll give it a try! This recipe not only brings a taste of Thailand to your kitchen but also creates memories that make every bite more special. Share your experiences in the comments, and don’t forget to check out my other delicious recipes for more culinary fun! Happy cooking!
PrintDeliciously Authentic Thai Shrimp Fried Rice

A vibrant and flavorful Thai dish that embodies comfort and freshness, featuring succulent shrimp and day-old jasmine rice stir-fried to perfection.
- Prep Time: 10 minutes
- Cook Time: 20 minutes
- Total Time: 30 minutes
- Yield: 4 servings 1x
- Category: Main Course
- Method: Stir-frying
- Cuisine: Thai
- Diet: Pescatarian
Ingredients
- 1 pound shrimp, peeled and deveined
- 3 cups cooked jasmine rice, preferably day-old and cold
- 3 cloves garlic, minced
- 1 small shallot, finely chopped
- 2 green onions, sliced (white and green parts separated)
- 2 eggs, beaten
- 2 tablespoons neutral oil (like canola or avocado oil)
- 1 tablespoon Thai soy sauce
- 1 tablespoon oyster sauce
- 1 tablespoon fish sauce
- 1/2 teaspoon sugar
- 1/4 teaspoon white pepper
- 1 lime, cut into wedges
Instructions
- Pat the shrimp dry and season lightly with salt and white pepper.
- In a large wok, heat 1 tablespoon of oil over medium-high heat and cook the shrimp for 1-2 minutes on each side until pink and opaque. Remove and set aside.
- Add another tablespoon of oil and sauté minced garlic, chopped shallot, and white parts of green onions until fragrant.
- Push the aromatics to the side and crack in the beaten eggs. Scramble until just set, then mix everything together.
- Add in the cold jasmine rice and stir-fry gently for 2-3 minutes.
- Pour in soy sauce, oyster sauce, fish sauce, sugar, and white pepper. Mix well to coat the rice.
- Add the cooked shrimp back in and stir-fry for another minute.
- Remove from heat and garnish with green onion tops, a squeeze of fresh lime, and optional cucumber slices or cilantro.
Notes
Use day-old jasmine rice for the best texture. Adjust spices and vegetables to personal preference.
Nutrition
- Serving Size: 1 serving
- Calories: 350
- Sugar: 5g
- Sodium: 800mg
- Fat: 12g
- Saturated Fat: 2g
- Unsaturated Fat: 10g
- Trans Fat: 0g
- Carbohydrates: 45g
- Fiber: 2g
- Protein: 15g
- Cholesterol: 180mg


