
Irresistibly Easy Apple Pie Filling Cake: Your New Favorite Dessert
There’s something profoundly comforting about the smell of a freshly baked cake wafting through the house. For me, that aroma is tied to cherished childhood memories spent in my grandmother’s cozy kitchen, where we would whip up delicious treats together. One of my all-time favorites was her Apple Pie Filling Cake. It’s a delightful mashup of classic apple pie and a fluffy yellow cake that leaves everyone begging for seconds.
What sets this recipe apart from the rest? Not only is it incredibly easy to make, but you can also whip it up using just a few ingredients—most of which you probably already have in your pantry! Beyond simplicity, this dessert packs in the heartfelt flavor of spiced apples and moisture from the cake, creating a remarkable combination that feels like a warm hug on a chilly day.
In this post, I promise to guide you through the process of making this easy Apple Pie Filling Cake, sharing secret tips and tricks to ensure you achieve that perfect bake. Get ready to impress your family and friends with this show-stopping dessert that will evoke sweet memories of gatherings around the dinner table. Let’s dive in!
What Are Apple Pie Filling Cakes?
The Apple Pie Filling Cake is a delightful creation that bridges two beloved desserts—apple pie and cake—into one easy-to-make treat. This cake became a favorite in many households, particularly during the fall months when apples are at their peak, but it’s a versatile recipe you can enjoy year-round!
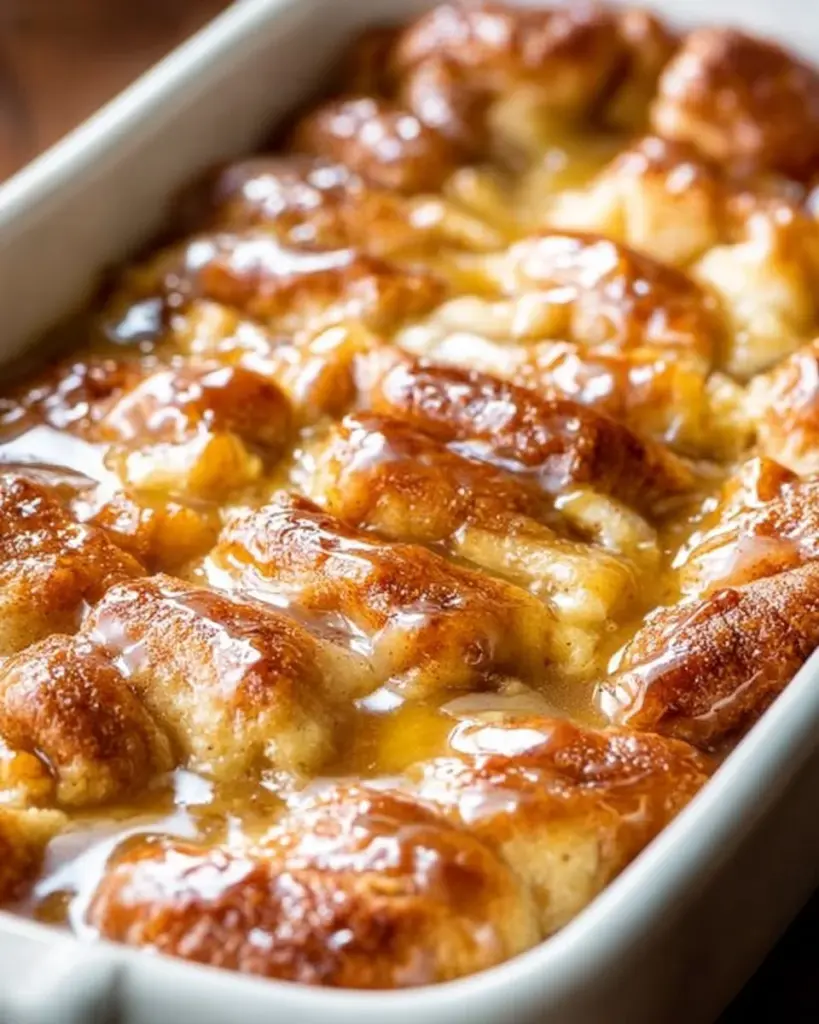
Taste and Texture: The cake is moist and fluffy, with a pleasantly sweet apple flavor enhanced by warm spices such as cinnamon and nutmeg. Each bite offers a beautiful marriage of cake and fruit that keeps you coming back for more.
What makes it truly unique? It’s almost like a surprise inside every piece! The apple pie filling creates pockets of soft, spiced apples throughout the cake, elevating the experience and ensuring that you won’t find a dry crumb here. This is the perfect dessert to make for gatherings, potlucks, or even just a cozy night in with family.
Why You’ll Love This Recipe
Easy and Quick: This is an incredibly straightforward recipe that takes minimal effort—perfect for novice bakers or those short on time! With just a few steps and mixing, you’ll have a delicious cake ready for the oven.
Cost-Effective: Using a can of apple pie filling and boxed cake mix means you can create a delightful dessert without breaking the bank. Plus, many of these ingredients are pantry staples!
Customizable: The beauty of this recipe lies in its versatility. You can swap out the apple pie filling for cherry, peach, or even mixed berries—making it your own. Want a little extra crunch? Toss in some chopped nuts or a sprinkle of oats on top!
Deliciousness Guaranteed: Unlike store-bought desserts that can taste artificial, this homemade version brims with rich flavors. The fresh ingredients and warm spices bring an authentic taste that everyone will appreciate.
Time Investment: In less than an hour, you’ll have a gorgeous dessert cooling on your counter. With only about 15 minutes of prep, you can spend more time enjoying your cake and less time slaving away in the kitchen.
Ingredients
To whip up this delicious Apple Pie Filling Cake, you’ll need the following ingredients, which not only create a scrumptious dessert but also ensure ease in preparation:
- 1 can apple pie filling: Look for quality fillings without preservatives—I’d recommend the Duncan Hines brand for a consistently good taste.
- 1 box yellow cake mix: Choose a natural mix if possible. Betty Crocker or Pillsbury are both solid choices.
- 1 cup water: Use room-temperature water for a smoother batter.
- 1/3 cup vegetable oil: Can be substituted with melted coconut oil or unsweetened applesauce for a healthier twist.
- 3 large eggs: Ensure your eggs are at room temperature for better mixing.
- 1 tsp cinnamon: A warm spice that complements the apples perfectly–look for fresh ground for maximum flavor.
- 1/2 tsp nutmeg: Adds a lovely depth; freshly grated nutmeg works wonders.
- 1/4 tsp salt: Balances the sweetness and enhances flavor.
Step-by-Step Instructions
Preheat your oven: Preheat your oven to 350°F (175°C). This is crucial as your cake needs a hot environment to rise properly.
Mix the base: In a large mixing bowl, combine the cake mix, water, vegetable oil, and eggs. Mix until smooth, ensuring no lumps remain. This should take about 2 minutes of blending. (Pro Tip: Using an electric mixer yields the best results!)
Fold in the apple pie filling: Gently fold in the apple pie filling, cinnamon, nutmeg, and salt. Be careful not to overmix; we want those lovely chunks of apples to stay intact.
Prepare the baking dish: Pour the batter into a greased 9×13-inch baking dish. Make sure it’s evenly spread to ensure even baking.
Bake: Place in the oven and bake for 30-35 minutes or until a toothpick inserted in the center comes out clean. Keep an eye on it during the last few minutes—don’t under-bake it!
Let it cool: Once done, remove from the oven and let it cool for at least 10 minutes before serving. The cake will continue to firm up while cooling.
Expert Tips & Tricks
Storage Recommendations: Store any leftovers in an airtight container in the fridge for up to 4 days. If you want to keep it longer, try freezing slices—just wrap tightly in plastic wrap!
Make-ahead Instructions: You can mix the batter a day ahead and keep it in the fridge until you’re ready to bake. Just remember to let it come to room temperature before pouring into the dish!
Troubleshooting: If your cake doesn’t rise, double-check your baking powder’s freshness in the cake mix. A common mistake is mistakenly using expired ingredients.
Add a Glaze: For a little extra sweetness, drizzle some vanilla glaze over the cooled cake, made from powdered sugar and milk!
Serving Temperature: This cake is delicious warm, but I also love it chilled. It pairs perfectly with a scoop of vanilla ice cream!
Serving Suggestions
For a delightful dessert experience, consider pairing your Apple Pie Filling Cake with one of the following:
- Vanilla Ice Cream: A scoop melting into the warm cake is pure bliss.
- Whipped Cream: Light and fluffy toppings elevate the flavors even more.
- Caramel Sauce: Drizzle a little over the top for extra indulgence.
This cake is perfect for family gatherings, potlucks, or cozy evenings on the couch with loved ones. It’s a versatile dessert that will become a staple in your home!
Variations & Substitutions
Don’t hesitate to switch things up! Here are a few ideas to keep your Apple Pie Filling Cake fresh and exciting:
- Different Fillings: Try substituting with cherry, peach, or mixed berry pie filling. Seasonal fruit fillings work great, too!
- Dairy-free: Replace eggs with flax eggs (1 tablespoon flaxseed meal + 2.5 tablespoons water for each egg) and use coconut milk in place of water.
- Gluten-free: Use a gluten-free cake mix to easily adjust the recipe without losing any of its deliciousness!
Nutrition & Storage Info
- Prep Time: 15 minutes
- Cook Time: 30-35 minutes
- Total Time: 45-50 minutes
- Yield: 12 servings
- Estimated Calories: 220 calories per slice
- Storage Instructions: Keep in an airtight container at room temperature for 1-2 days or in the fridge for up to 4 days. Frozen slices can last up to 3 months.
FAQ Section
Can I use homemade apple pie filling instead?
- Absolutely! Just ensure it’s not overly runny.
Is it necessary to add spices?
- Not mandatory, but they do enhance the flavor profile greatly!
Can I make it ahead of time?
- Yes! You can prepare the batter a day in advance.
What can I substitute for vegetable oil?
- Melted coconut oil or applesauce for a lighter option.
Can I double the recipe?
- Yes! Just bake it in a larger pan and you may need a few extra minutes in the oven.
What’s the best way to store leftovers?
- Keep in an airtight container in the fridge for maximum freshness.
Can I freeze this cake?
- Yes! Wrap individual slices in plastic and freeze for later enjoyment.
What should I do if my cake is too dry?
- It could be overbaked—make sure to check for doneness a few minutes early next time.
Can I add nuts or chocolate chips?
- Absolutely! Feel free to mix in chopped nuts or chocolate chips for added texture.
Does this cake need to be frosted?
- Not at all! It’s delicious on its own but feel free to top with whipped cream or glaze if you prefer.
Conclusion
This Apple Pie Filling Cake is not just a recipe; it’s a piece of comfort wrapped in a warm, delicious bite. It’s easy to make and perfect for sharing—a wonderful way to evoke fond family memories and create new ones. I encourage you to give it a try and let me know how it turns out!
If you love this recipe, be sure to check out my other delightful cake recipes on the blog, like homemade Carrot Cake or My Very Best Chocolate Cake. Happy baking!
PrintIrresistibly Easy Apple Pie Filling Cake

A comforting mashup of classic apple pie and fluffy yellow cake, this Apple Pie Filling Cake is easy to make and fills your home with delightful aromas.
- Prep Time: 15 minutes
- Cook Time: 35 minutes
- Total Time: 50 minutes
- Yield: 12 servings 1x
- Category: Dessert
- Method: Baking
- Cuisine: American
- Diet: Vegetarian
Ingredients
- 1 can apple pie filling
- 1 box yellow cake mix
- 1 cup water
- 1/3 cup vegetable oil
- 3 large eggs
- 1 tsp cinnamon
- 1/2 tsp nutmeg
- 1/4 tsp salt
Instructions
- Preheat your oven to 350°F (175°C).
- In a large mixing bowl, combine the cake mix, water, vegetable oil, and eggs. Mix until smooth.
- Gently fold in the apple pie filling, cinnamon, nutmeg, and salt.
- Pour the batter into a greased 9×13-inch baking dish.
- Bake for 30-35 minutes or until a toothpick inserted comes out clean.
- Let it cool for at least 10 minutes before serving.
Notes
This cake can be stored in an airtight container for up to 4 days. It can also be frozen for up to 3 months.
Nutrition
- Serving Size: 1 slice
- Calories: 220
- Sugar: 18g
- Sodium: 200mg
- Fat: 8g
- Saturated Fat: 1g
- Unsaturated Fat: 5g
- Trans Fat: 0g
- Carbohydrates: 34g
- Fiber: 1g
- Protein: 3g
- Cholesterol: 55mg


