
Table of Contents
Table of Contents
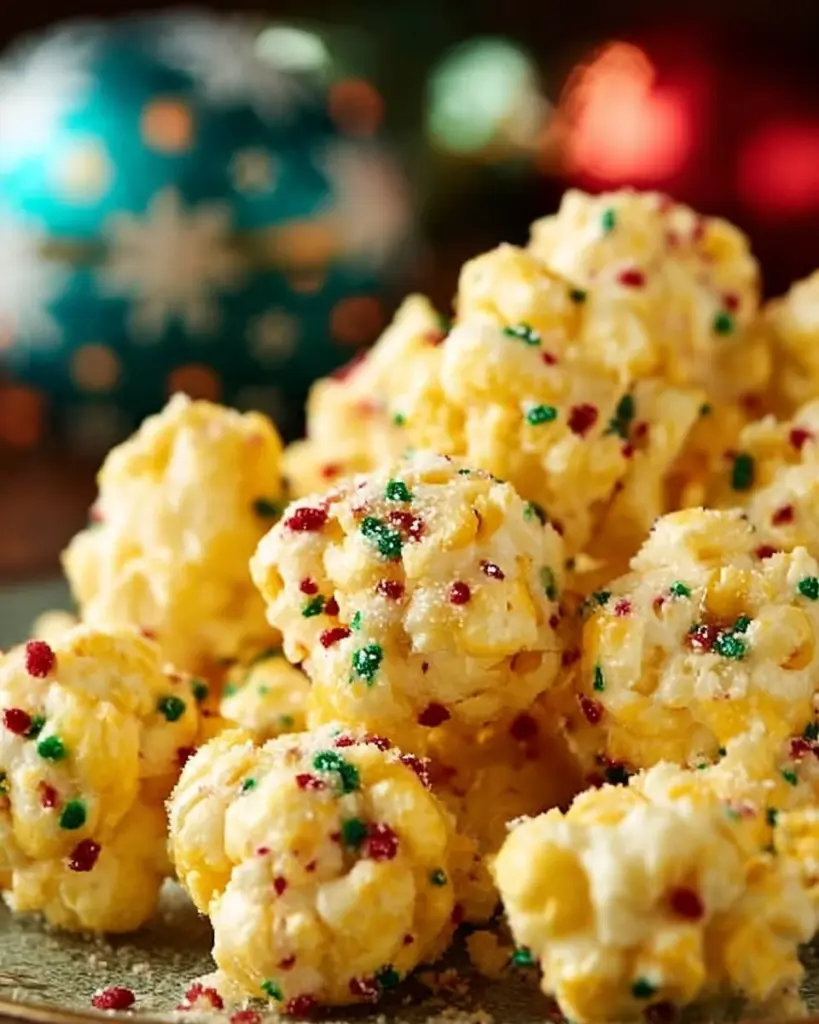
Irresistibly Sweet Candied Puff Corn: An Easy Sweet Treat for All Occasions
Let me take you back to my childhood, where movie nights at home came with the enticing aroma of something sweet and crunchy wafting from the kitchen. My mom had a special treat up her sleeve—Candied Puff Corn. With its delightful crunch and sugary-sweet coating, it became a familial staple that brought us together, giggling over a classic film while munching on this addictive snack. What makes my version of Candied Puff Corn extra special is how we’ve refined it over the years, omitting artificial flavors and preservatives, so you can indulge guilt-free.
Unlike store-bought varieties, which often leave you with a cloyingly sweet aftertaste, my recipe allows the buttery richness of the corn to shine through, balanced perfectly with the sweetness of brown sugar. Beyond just a snack, these little gems are draped in nostalgia and happiness, making them a comforting reminder of days spent with family.
In this post, I’m excited to share my tried-and-true recipe for Candied Puff Corn, filled with tips and tricks to ensure your puff corn turns out perfectly every time. Get ready to create a batch that will have your loved ones begging for more!
What Are Candied Puff Corn?
Candied Puff Corn, sometimes affectionately referred to as “sweet puffed corn,” is a whimsical treat that marries the light, airy texture of puff corn with a lush, buttery coating. Originating from the gourmet snack trend in the U.S., this delightful concoction has taken on many forms but has remained a beloved favorite thanks to its crunchy exterior and melt-in-your-mouth sweetness.
The magic lies in its contrasting textures—from the crispness of the puff corn itself to the rich glaze that coats each piece. When baked, it turns a beautiful, golden brown, creating a tempting sheen you won’t be able to resist!
You’ll want to whip up a batch for movie nights, road trips, or just to snack on during the day. Trust me; once you taste this sweet delicacy, you’ll understand exactly why it’s a staple at countless gatherings.
Why You’ll Love This Recipe
Let me tell you why my Candied Puff Corn will become your go-to treat for every occasion:
Easy to Make: Even if you’re a novice baker, you’ll find this recipe incredibly approachable. It requires minimal effort and can be completed in under an hour!
Cost-Effective: Forget blowing your budget on store-bought snacks! This recipe is not only delicious but also budget-friendly, allowing you to whip up a large batch for a fraction of the cost.
Customizable: Do you prefer a hint of salt? Or maybe you want to add your favorite flavors like crushed nuts or chocolate chips? The possibilities are endless!
Healthier Ingredients: Unlike some store-bought versions loaded with preservatives and coloring, my recipe uses pantry staples you probably already have, like real butter and brown sugar, to create a homemade snack you’ll feel good about.
Perfect for Gifting: Candied Puff Corn packages beautifully! I love to put mine in clear treat bags tied with colorful ribbons as gifts. They’re always a hit, and friends love special, homemade touches.
With just a few simple steps, you’ll create something sensational that’s sure to delight everyone in your life. Trust me, your taste buds are in for a treat!
Ingredients Section
Here’s what you’ll need to create your own scrumptious Candied Puff Corn:
- 10 cups puff corn (I recommend using cheese puff corn for an extra layer of flavor)
- 1 cup brown sugar (light or dark, depending on your preference)
- 1/2 cup corn syrup (light or dark; I love using light for a subtler taste)
- 1/2 cup butter (make sure it’s room temperature for easy mixing)
- 1/2 teaspoon baking soda
- 1 teaspoon vanilla extract (pure, if possible, for maximum flavor)
- Salt to taste (to contrast the sweetness)
Preparation Notes:
- Butter: Take your butter out beforehand and let it soften. Room temperature butter blends better into your sugar mixture.
- Puff Corn: You can find puff corn at most grocery stores; brands like Jolly Time or Snappy are fantastic.
Step-by-Step Instructions
Let’s get cooking! Follow these detailed steps to make your Candied Puff Corn:
Preheat your oven to 250°F (120°C). This low and slow cooking method ensures your puff corn becomes perfectly crispy.
Combine ingredients: In a medium saucepan, mix together 1 cup of brown sugar, 1/2 cup of corn syrup, and 1/2 cup of butter. Bring this mixture to a boil over medium heat while stirring constantly. Once boiling, let it cook for 2 minutes without stirring.
Remove from heat: After 2 minutes, lift your saucepan off the heat and stir in the 1/2 teaspoon of baking soda and 1 teaspoon of vanilla extract. The baking soda will create a bubbly reaction that adds a unique texture to your coating, making it light and fluffy.
Coat the puff corn: Pour this gooey mixture over 10 cups of puff corn in a large bowl, ensuring you coat all pieces evenly. Use a spatula to gently toss until they’re thoroughly covered.
Prepare to bake: Line a baking sheet with parchment paper. Spread the coated puff corn evenly on the sheet, ensuring no pieces are clumped together—this helps with even baking.
Bake: Place your baking sheet in the preheated oven and bake for 45 minutes, stirring every 15 minutes for that perfect gold coating.
Cool down: Once baked, remove from the oven and let it cool completely. This allows it to harden and become incredibly crunchy.
Break apart: Once cool, break the Candied Puff Corn into pieces and enjoy or package it up for gifts.
Chef’s Tips
- Don’t skip the baking step: This is crucial for achieving the right crunch!
- Watch your timing: Ovens can vary; keep an eye on your puff corn during the last few minutes to prevent burning.
Expert Tips & Tricks
To ensure you achieve the best results, here are some expert tips:
Storage: Store your Candied Puff Corn in an airtight container at room temperature. It’ll stay fresh for up to a week.
Make-ahead Instructions: Feel free to prepare a large batch for holidays or events. It can be made days in advance and still taste delicious!
Troubleshooting: If your puff corn turns out too sticky, you may not have allowed it enough baking time. If too dry, consider adding a touch more butter during cooking next time to keep it moist.
Flavor Variations: Try tweaking the recipe by adding 1 teaspoon of cinnamon for a touch of warmth, or fold in mini chocolate chips for a sweet twist.
Serving: Serve this Candied Puff Corn in a large bowl to share! For a fun party idea, pack individual portions in small bags for guests to take home.
Serving Suggestions
Perfect as a standalone snack, Candied Puff Corn also pairs wonderfully with other snacks. Here are some serving suggestions:
- Serve it alongside salty popcorn for a sweet-and-salty experience.
- Try it with a selection of your favorite candies at a party.
- For presentation, fill a clear glass jar with your puff corn to showcase its beautiful color and texture.
Occasion-wise, it’s ideal for movie nights, birthdays, or even as an unexpected dessert at picnics. Your guests will be raving about it!
Variations & Substitutions
Let’s take your Candied Puff Corn to the next level with these fun variations:
Flavor Combinations:
- Try chocolate drizzled puff corn by adding melted chocolate once cooled.
- For a seasonal spin, add pumpkin spice or peppermint extract for a cozy holiday snack.
Dietary Adaptations:
- Swap regular butter for a dairy-free alternative if you’re vegan.
- Use honey for those avoiding corn syrup; just note that it will slightly change the flavor.
Seasonal Touches:
- During Halloween, sprinkle a little cinnamon on top for a festive twist.
- For summer, toss in some dried fruit or nuts to add texture and flavor.
Nutrition & Storage Info
- Prep Time: 10 minutes
- Cook Time: 45 minutes
- Total Time: 55 minutes
- Yield: Approximately 12 servings
- Estimated Calories: 150 calories per serving
Storage Instructions:
- Store your Candied Puff Corn in an airtight container at room temperature for up to one week. Avoid refrigerating, as that moisture can ruin the crunchy texture.
FAQ Section
Can I use regular popcorn instead of puff corn?
- Puff corn is recommended due to its light and airy texture, but you can use regular popped popcorn—just adjust cooking times since it’s already cooked.
Why is my puff corn sticky?
- This could be due to not baking long enough; ensure you bake it for the full time to let it dry out and harden.
Can I double the recipe?
- Absolutely! Just ensure you have a large enough baking sheet for even cooking.
Can I freeze Candied Puff Corn?
- Yes, but it’s best enjoyed fresh. If freezing, store in an airtight container and consume within a month for the best taste.
What’s the best way to package it as gifts?
- I love using clear cellophane bags tied with colorful ribbons; it adds a lovely touch!
Why use baking soda in the recipe?
- Baking soda lightens the coating, giving it a beautiful crunch after baking.
Can I add spices to the mixture?
- Absolutely! A pinch of cinnamon or nutmeg can enhance the flavor.
What if I don’t have corn syrup?
- You could substitute with maple syrup, but it may result in slightly different flavors.
How do I ensure an even coating?
- Toss the puff corn with the sugar mixture gently yet thoroughly to ensure every piece is covered.
What occasions are best for serving Candied Puff Corn?
- It’s perfect for movie nights, parties, and as a sweet gift!
Conclusion
Candied Puff Corn holds a special place in my heart, reminiscent of cozy nights filled with laughter and love. I hope this recipe inspires you to create your own batch and share these sweet memories with your family and friends! Don’t forget to drop your feedback and let me know how yours turned out. And if you loved this sweet treat, check out my other delightful recipes on the blog for more inspiration! Get ready to keep the popcorn popping!
PrintIrresistibly Sweet Candied Puff Corn

A sweet and crunchy treat made from puff corn coated in a buttery brown sugar glaze, perfect for movie nights and gatherings.
- Prep Time: 10 minutes
- Cook Time: 45 minutes
- Total Time: 55 minutes
- Yield: 12 servings 1x
- Category: Snack
- Method: Baking
- Cuisine: American
- Diet: Vegetarian
Ingredients
- 10 cups puff corn
- 1 cup brown sugar
- 1/2 cup corn syrup
- 1/2 cup butter, room temperature
- 1/2 teaspoon baking soda
- 1 teaspoon vanilla extract
- Salt to taste
Instructions
- Preheat your oven to 250°F (120°C).
- In a medium saucepan, mix together brown sugar, corn syrup, and butter. Bring to a boil over medium heat while stirring constantly. Cook for 2 minutes without stirring.
- Remove from heat and stir in baking soda and vanilla extract.
- Pour the sugary mixture over puff corn in a large bowl and coat evenly using a spatula.
- Line a baking sheet with parchment paper and spread the coated puff corn evenly.
- Bake for 45 minutes, stirring every 15 minutes.
- Allow to cool completely before breaking into pieces.
Notes
Store in an airtight container at room temperature for up to a week. For an even crunch, don’t skip the baking step.
Nutrition
- Serving Size: 1 serving
- Calories: 150
- Sugar: 12g
- Sodium: 150mg
- Fat: 6g
- Saturated Fat: 4g
- Unsaturated Fat: 2g
- Trans Fat: 0g
- Carbohydrates: 22g
- Fiber: 1g
- Protein: 1g
- Cholesterol: 15mg


