
Festive Christmas Dessert Lasagna: A Layered Delight You’ll Love!
Ah, the holidays! Each year, I look forward to that magical time when twinkling lights adorn every corner, and the smell of cookies baking fills the air. But beyond those familiar scents, there’s a particular dessert that has become synonymous with Christmas in my home: Christmas Dessert Lasagna. Picture the scene: my family gathered around the table, laughter ringing through the house, as we indulge in a creamy, chocolatey, festive delight—layer after layer of deliciousness that brings everyone a little closer together.
This Christmas Dessert Lasagna is not just another sweet treat; it’s a masterpiece of flavors and textures that will have your taste buds dancing. Unlike traditional lasagna, this dessert version skips the savory layers and dives headfirst into a festive explosion that’s creamy, crunchy, and decadently sweet. With each bite, you’ll taste the nostalgia of family gatherings as it becomes a comforting symbol of the season. I promise, after you try this recipe, it’ll undoubtedly find a honeyed spot in your holiday traditions, just like it did in mine. So grab your mixing bowls, because you’re about to learn how to create this delicious layered dessert that will wow your family and friends!
What Are Christmas Dessert Lasagna?
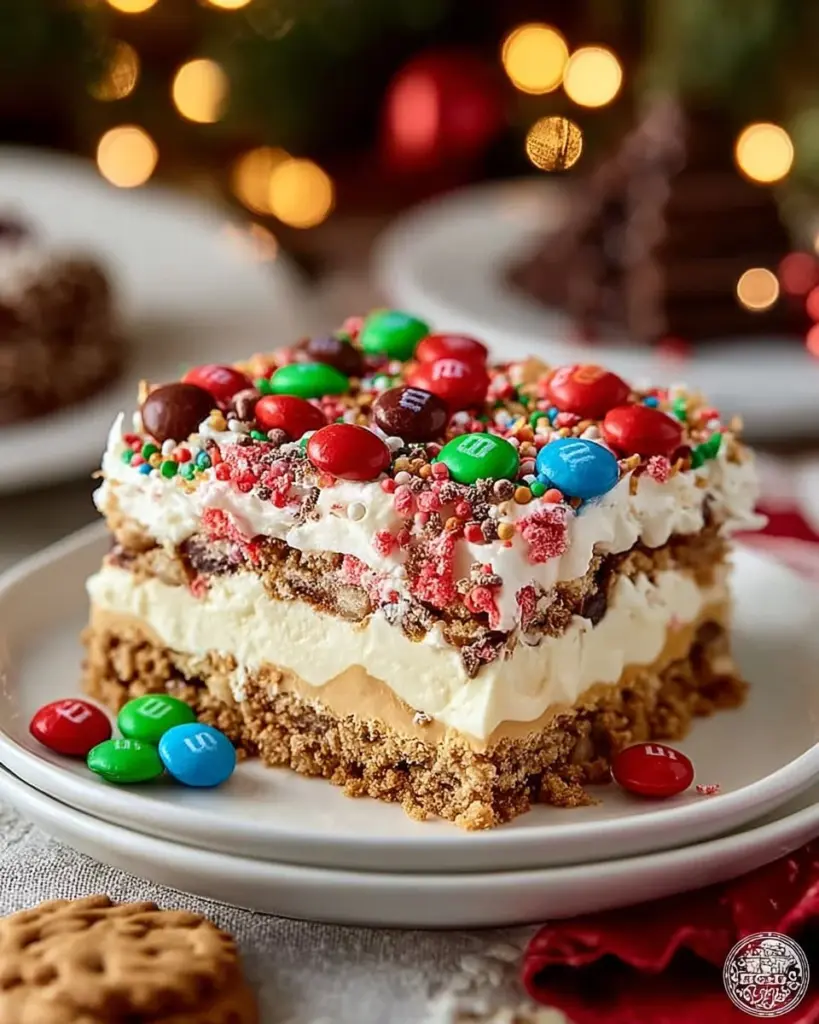
Originating from a delightful fusion of traditional layered desserts and no-bake recipes, Christmas Dessert Lasagna takes the best of both worlds to create a festive masterpiece ideal for the holiday season. Imagine a lush, creamy filling sandwiched between layers of a perfectly crushed Oreo crust, vanilla, and chocolate pudding—it’s every bit as good as it sounds!
The true beauty of Christmas Dessert Lasagna lies not just in its divine flavor but its charming layers that add both visual appeal and textural contrast. Each layer harmonizes perfectly; the sweetness of the fillings does a little dance with the crunch of the Oreo base while the whipped topping adds that cloud-like finish. It’s rich yet refreshing, making it perfect for festive gatherings or cozy nights in with your loved ones.
Whether you’re hosting a Christmas dinner, attending a potluck, or preparing a holiday treat for family game night, this dessert marvel makes the perfect centerpiece. Its simplicity allows you to whip it up quickly, leaving you with time to focus on what really matters—making memories with those who mean the most.
Why You’ll Love This Recipe
Effortlessly Delightful: This Christmas Dessert Lasagna is incredibly simple to make! Aside from a bit of mixing and layering, there’s no complicated baking involved. You can impress your guests without feeling overwhelmed, allowing you to enjoy the festive season fully.
Cost-Effective Indulgence: Want to treat your loved ones without breaking the bank? This recipe is wallet-friendly! With just a few essential ingredients, you can create an impressive dessert that rivals anything you’d find at a fancy bakery—all while keeping your budget in check.
Endless Customization: Want to swap out flavors or adapt it for dietary restrictions? You can easily tailor this dessert to cater to your guests’ tastes. Swap the Oreos for graham crackers, introduce seasonal spices like peppermint, or make it dairy-free with clever substitutions—the only limit is your imagination!
The Joy of Sharing: This recipe yields generous portions, making it perfect for sharing at holiday get-togethers. It’s a crowd-pleaser that brings smiles to faces and allows everyone to partake in this delightful indulgence.
Made-ahead Marvel: One of the best things about this Christmas Dessert Lasagna? It can be prepped in advance! Make it the night before and let it chill in the fridge. That way, when the festivities begin, you won’t be stressed out in the kitchen. You can enjoy quality time with your family instead!
Ingredients
To make your very own Christmas Dessert Lasagna, gather the following ingredients:
- 36 Oreo cookies, crushed: A classic choice! You can also use other sandwich cookies like vanilla wafers or gluten-free versions.
- 1/2 cup unsalted butter, melted: Ensure it’s at room temperature to mix easily.
- 8 oz cream cheese, softened: Bringing this to room temperature ensures a creamy and lump-free filling.
- 1/4 cup granulated sugar: A little sweetness to enhance the cream cheese.
- 2 tablespoons milk: Helps thin out the cream cheese mixture for easy spreading.
- 1 teaspoon vanilla extract: Adds that rich, aromatic flavor.
- 1 1/2 cups whipped topping: Choose a good quality brand, or you can make your own homemade whipped cream!
- 1 box instant vanilla pudding (3.4 oz): Provides a delightful contrast to the chocolate layer.
- 1 box instant chocolate pudding (3.4 oz): For the chocolate lovers in your life!
- 3 cups cold milk: Ensure it’s chilly for the puddings to set correctly.
- 1 1/2 cups whipped topping: For the decadent final layer.
- Christmas sprinkles: Use festive colors to add a pop of cheer.
- Mini M&Ms or holiday candies: For that extra holiday touch of color and sweetness.
Chef’s Tip: When grating the butter, melt it gently until bubbly and golden. This helps your crust hold together better!
Step-by-Step Instructions
Prepare the Crust:
- Use a food processor or a zip-top bag and a rolling pin to finely crush the Oreos.
- Combine them with the melted butter in a bowl, mixing well until it’s slightly damp.
- Press this mixture firmly into the bottom of a 9×13-inch baking dish. Chill it in the refrigerator for 15-20 minutes while you prepare the filling.
Make the Cream Cheese Layer:
- In a medium bowl, beat together the softened cream cheese, granulated sugar, milk, and vanilla extract until smooth and creamy.
- Gently fold in 1 1/2 cups of whipped topping until blended.
- Spread this layer evenly over the chilled Oreo crust, giving it a light tap to set.
Prepare the Pudding Layers:
- In separate bowls, whisk together the instant vanilla and chocolate puddings with the 3 cups of cold milk. Allow them to set briefly until thickened (about 5 minutes).
- Spread the chocolate pudding layer over the cream cheese layer first, smoothing it gently. Follow it with the vanilla pudding layer, ensuring both are evenly distributed.
Whip Up the Final Touch:
- Add the remaining 1 1/2 cups whipped topping on top of the layered puddings for a creamy finish.
- Decorate your dessert with Christmas sprinkles and scatter mini M&Ms or holiday candies on top for a joyful touch.
Chill and Serve:
- Cover the dish with plastic wrap and refrigerate for at least 4 hours or overnight, allowing the layers to set. This is vital for achieving that perfect slice!
- Serve chilled and enjoy the delighted faces around your festive table!
Chef’s Tip: When slicing, use a sharp knife dipped in hot water for clean cuts and stunning presentation.
Expert Tips & Tricks
Storage Recommendations: Store any leftovers in an airtight container in the refrigerator. It should stay fresh for up to 3-4 days.
Make-ahead Instructions: You can assemble the dessert up to two days in advance; the flavors become even better as they mingle in the fridge!
Troubleshooting: If your layers aren’t setting, ensure your pudding is fully whisked with the correct amount of cold milk and chilled adequately. Mix thoroughly to avoid clumping.
Perfect Whipping: If making homemade whipped cream, ensure your mixing bowl and beaters are chilled beforehand for the best results.
Flavor Variations: Want a peppermint twist? Add crushed candy canes to the whipped topping!
Custom serving idea: Serve each portion with a sprig of mint or a chocolate drizzle for added elegance!
Serving Suggestions
This dessert is a stand-alone delight but pairs beautifully with a hot cup of cocoa or spiced cider. You can also serve Christmas Dessert Lasagna surrounded by colorful fruit platters or candied nuts for a balance of flavors and textures. For great presentation, use a clear trifle dish, allowing those gorgeous layers to shine through.
Variations & Substitutions
Flavor Combinations: Swap in butterscotch pudding for the vanilla layer or try a raspberry mousse for a fruity twist!
Dietary Restrictions: For a gluten-free version, ensure your cookies and pudding mixes are certified gluten-free. If you need a dairy-free alternative, substitute with dairy-free cream cheese and whipped products.
Seasonal Variations: Use strawberries for a refreshing summer version or pumpkin spice pudding for fall festivities!
Nutrition & Storage Info
- Prep time: 30 minutes
- Chill time: 4 hours
- Total time: Approximately 4 hours 30 minutes
- Yield: About 12 generous servings
- Estimated calories per serving: Approximately 300 calories
- Storage: Keep refrigerated in an airtight container for up to 4 days, or freeze for up to a month (though texture may vary upon thawing).
FAQ Section
Can I use homemade whipped cream instead of store-bought?
Absolutely! Homemade whipping cream will enhance the flavor and texture of the dessert.How long does it need to chill?
For best results, chill for at least 4 hours but overnight is even better!Can I make a smaller batch?
Yes! Halve the ingredients and use an 8×8-inch pan for a delightful smaller version.What if I don’t have Oreos?
Substitute with graham crackers or any chocolate-flavored sandwich cookie.Can I add fruit to the layers?
Definitely! Sliced strawberries or other berries work well for a fresh layer.How do I make it gluten-free?
You can use gluten-free cookies and ensure your pudding is starch-based.What can I use instead of cream cheese?
Try mascarpone cheese or a vegan cream cheese substitute for a different taste.Can I freeze the dessert?
While it can be frozen, the texture may change once thawed. It’s best enjoyed freshly made.How do I cut clean slices?
Dip a knife in hot water, wipe it dry, and cut through the layers with care.What’s the best way to serve it?
Serve directly from the fridge using a spatula for clean layers. Adorn with festive sprinkles on individual servings!
Conclusion
Christmas Dessert Lasagna isn’t just a recipe; it’s a celebration of flavors, family, and holiday spirit wrapped in delightful layers! I hope you give this tasty treat a try and bring it into your festive traditions. I can’t wait to hear how your version turns out—please leave a comment with your thoughts or any tweaks you made! And if you’re looking for more holiday inspiration, check out my other festive recipes on the blog. Happy baking and merry feasting, friends!
PrintFestive Christmas Dessert Lasagna
A creamy, chocolatey dessert lasagna layered with Oreo crust, pudding, and whipped topping, perfect for the holidays.
- Prep Time: 30 minutes
- Cook Time: 0 minutes
- Total Time: 270 minutes
- Yield: 12 servings 1x
- Category: Dessert
- Method: No-Bake
- Cuisine: American
- Diet: Vegetarian
Ingredients
- 36 Oreo cookies, crushed
- 1/2 cup unsalted butter, melted
- 8 oz cream cheese, softened
- 1/4 cup granulated sugar
- 2 tablespoons milk
- 1 teaspoon vanilla extract
- 1 1/2 cups whipped topping
- 1 box instant vanilla pudding (3.4 oz)
- 1 box instant chocolate pudding (3.4 oz)
- 3 cups cold milk
- 1 1/2 cups whipped topping (for the final layer)
- Christmas sprinkles
- Mini M&Ms or holiday candies
Instructions
- Prepare the crust by crushing Oreos and mixing with melted butter. Press into a 9×13-inch baking dish and chill for 15-20 minutes.
- Make the cream cheese layer by beating together cream cheese, sugar, milk, and vanilla until smooth. Fold in 1 1/2 cups whipped topping and spread over the crust.
- Prepare the pudding layers by whisking both instant pudding mixes with cold milk until thickened. Spread chocolate pudding over the cream cheese layer, then vanilla pudding.
- Add remaining whipped topping on top and decorate with sprinkles and candies.
- Cover and refrigerate for at least 4 hours or overnight before serving.
Notes
Store leftovers in an airtight container for up to 4 days. For best results, chill overnight.
Nutrition
- Serving Size: 1 serving
- Calories: 300
- Sugar: 20g
- Sodium: 200mg
- Fat: 16g
- Saturated Fat: 8g
- Unsaturated Fat: 6g
- Trans Fat: 0g
- Carbohydrates: 40g
- Fiber: 1g
- Protein: 4g
- Cholesterol: 25mg


