
The Ultimate Legit Squishy-Soft White Gluten Free Bread Recipe That Will Blow Your Mind!
Introduction
Growing up, nothing brought my family together quite like the warm aroma of freshly baked bread wafting through the kitchen. Those days were filled with laughter, stories, and the unbeatable comfort of soft, fluffy bread slathered with butter. But when I transitioned to a gluten-free lifestyle, I feared those cherished moments might become a distant memory. Enter the Legit Squishy-Soft White Gluten Free Bread Recipe—a game changer! This recipe isn’t just gluten-free; it promises that same soft, delightful texture that we all crave and often miss.
What sets this recipe apart from the store-bought versions is the incredible flavor and sheer joy of knowing exactly what’s in your food. No more mystery ingredients or hard, crumbly slices! Here, you can achieve bread that looks and feels like it came straight from a bakery. You’ll learn how easy it is to whip up your own gluten-free bread from scratch, filling your home with a nostalgic smell that’s bound to stir a few happy heartstrings. Let’s dive into the world of baking magic, shall we?
What Are Legit Squishy-Soft White Gluten Free Bread?
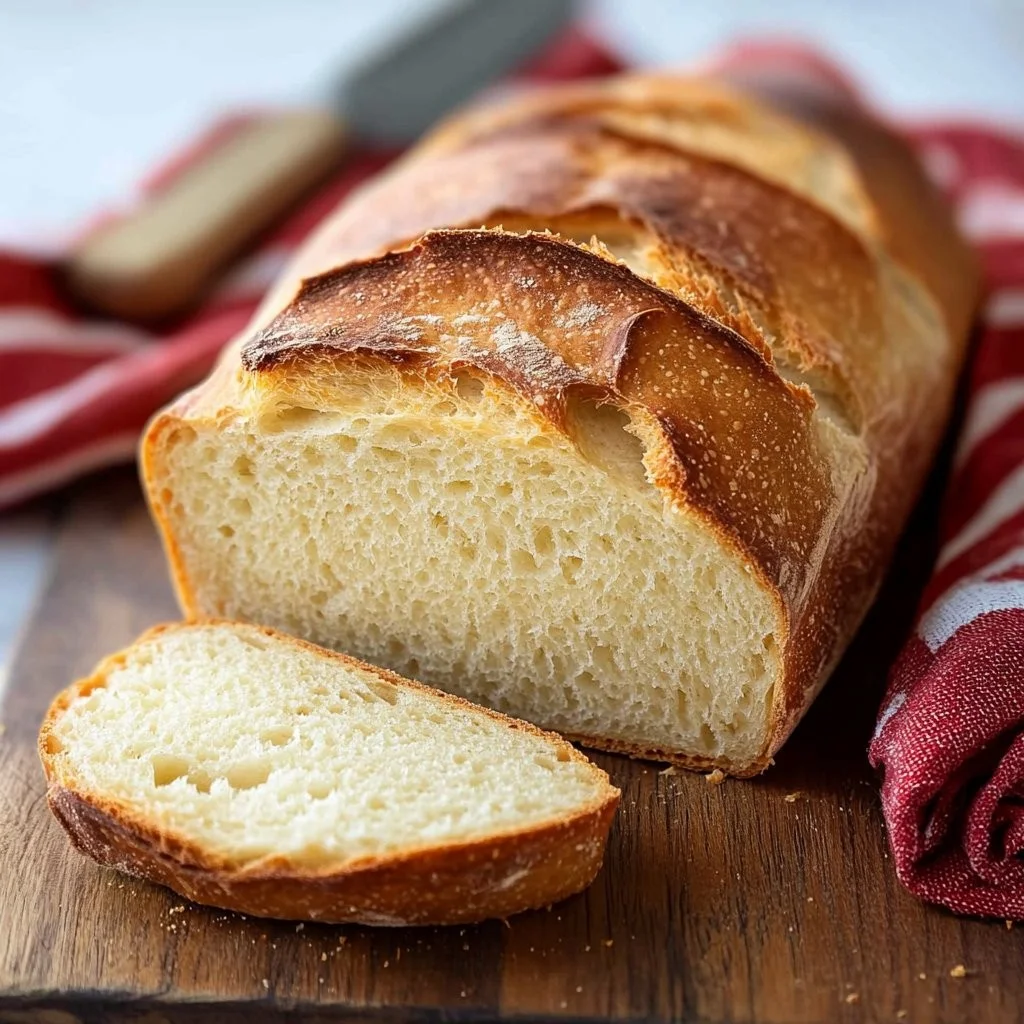
The Legit Squishy-Soft White Gluten Free Bread is not just any recipe; it’s a staple that embraces the warm, comforting feeling of home. Originating from the need to cater to those with gluten sensitivities, this bread’s flavor profile is mild yet satisfying, offering a soft, squishy texture that effortlessly holds its shape.
What makes this gluten-free bread unique is its blend of ingredients designed to provide moisture and fluffiness that rival traditional bread. The combination of psyllium husk powder, warm water, and the right kind of gluten-free flour creates a dough that rises beautifully. It’s perfect for everything—sandwiches, toast, or simply enjoying with a smear of jam!
Whenever you want a taste of nostalgia or need a quick, wholesome fix, this recipe is the answer. Whether it’s a Sunday brunch or a simple after-school snack, making this bread is a delightful way to reconnect with your culinary roots.
Why You’ll Love This Recipe
Incomparable Softness: Unlike most gluten-free breads that tend to be dense or crumbly, this recipe offers a soft, pillowy texture that makes every bite as satisfying as that childhood bread you remember.
Cost-Effective: You won’t believe how much cheaper it is to make your own gluten-free bread at home. Given the rising prices of specialty flour and bread loaves at stores, crafting your own means saving money while still enjoying quality ingredients.
Customization Galore: Want to add a hint of sweetness? Toss in some herbs or spices? The options are endless! You can modify this recipe to match your family’s taste—a feature that store-bought bread simply can’t compete with.
Easy to Make: One of the biggest advantages of this recipe is that it’s beginner-friendly. With just a few ingredients and simple steps, you’ll feel like a pro baker in no time!
Time Investment: With total hands-on time of under 20 minutes and a waiting period for rising and baking, this gluten-free bread comes together quite seamlessly.
When compared to what you might find at a bakery (or even your local grocery store), this recipe stands tall. It offers a better flavor, a superior texture, and the satisfaction of knowing exactly what’s in your bread!
Ingredients Section
Here’s what you’ll need for the Legit Squishy-Soft White Gluten Free Bread Recipe:
- 3 cups (438g) gluten-free all-purpose flour (I recommend Cup4Cup for the best texture!)
- 1 packet (2 ¼ tsp, 9g) instant rapid-rise yeast (no proofing needed—just pure magic!)
- 1 tbsp (11g) psyllium husk powder (optional but recommended for that soft, chewy texture)
- 1 tsp baking powder
- 1 tsp salt
- 1 ½ cups (360g) warm water (around 110°F—dissolve the yeast beautifully!)
- 2 eggs (room temperature) (these bring richness and moisture)
- ¼ cup (85g) honey (you can substitute with maple syrup for a vegan option)
- ¼ cup (55g) vegetable oil (avocado oil is great as a substitute)
Prep Notes:
- Eggs: Make sure they’re at room temperature for an even mixture.
- Honey: If you prefer, feel free to use agave nectar or another sweetener.
Step-by-Step Instructions
1️⃣ Prepare the Dough
In a stand mixer, combine the gluten-free flour, yeast, psyllium husk (if using), baking powder, and salt on low speed. Slowly add warm water, eggs, honey, and vegetable oil. Mix on low for 1 minute, then increase the speed to medium and beat for about 5 minutes. The dough will be thick and sticky—trust me, this is normal!
2️⃣ Shape & Rise
Grease your 9×4-inch loaf pan. Pour the dough into the pan and smooth the top with a spatula. Cover with greased plastic wrap and let it rise in a warm spot for about 30-45 minutes. The dough should rise to about two-thirds of the pan but not overflow—it’s a beautiful sight to see it rise!
3️⃣ Bake the Bread
Preheat your oven to 350°F (175°C). Once the bread has risen, remove the plastic wrap and bake on the middle rack for 40-50 minutes. If the top browns too quickly, tent it with foil midway through. The bread is ready when it reaches an internal temperature of 205°F—the sound of that timer hitting is pure joy!
4️⃣ Cool Completely
Remove the bread from the oven and let it cool in the pan for 5 minutes. Transfer it to a cooling rack and let it cool completely for at least 2 hours before slicing. This step is crucial to achieving the best texture; I know it’s tempting to slice it earlier, but patience is key!
Expert Tips & Tricks
- Ingredient Quality: Always opt for high-quality gluten-free flour; it makes a world of difference! If you’re feeling adventurous, try blending different types of gluten-free flour for a unique flavor (like almond or coconut flour).
- Storage Recommendations: Keep the bread in an airtight container at room temperature for up to 3 days. Refrigerate for a week or freeze for up to 3 months—just slice it before freezing for easy toast access!
- Make-Ahead Instructions: Prepare the dough in advance and refrigerate overnight for richer flavors.
- Common Mistakes to Avoid: Avoid overmixing the dough; that’s a sure way to end up with a dense loaf. Also, always use a kitchen thermometer for that perfect internal bake!
Serving Suggestions
This gluten-free bread is perfect for a cozy brunch served alongside scrambled eggs, crispy bacon, and fresh fruit. Consider slicing it up for sandwiches—imagine loaded turkey sandwiches or simply toasted with a touch of butter. For a special occasion, a beautiful bread board with spreads and cheeses pairs excellently—ensure a charming aesthetic that begs to be enjoyed!
Variations & Substitutions
- Flavors: Try adding herbs like rosemary or thyme for a fragrant twist. How about some cinnamon and nutmeg for a breakfast treat?
- Dietary Restrictions: If you need to make it dairy-free, substitute the oil with coconut oil or another dairy-free alternative.
- Seasonal Variations: Holiday season coming up? Try incorporating cranberries or pumpkin spice for a festive flair!
Nutrition & Storage Info
- Prep Time: 15 minutes
- Cook Time: 40-50 minutes
- Total Time: About 2-3 hours (including rising)
- Yield: 1 loaf (approximately 12 servings)
- Estimated Calories: Approximately 130 calories per slice
- Storage Instructions: Keep in an airtight container at room temperature for 3 days, in the fridge for up to a week, or freeze for up to 3 months.
FAQ Section
Can I use regular all-purpose flour instead of gluten-free flour?
No! This recipe is designed specifically for gluten-free flour.What is the best gluten-free flour to use?
I recommend Cup4Cup for the best texture, but Bob’s Red Mill works well too!How can I tell when the bread is fully baked?
Use a kitchen thermometer to check that the internal temperature is 205°F.Is the psyllium husk necessary?
While it’s not mandatory, it enhances the texture of the loaf, making it softer and more pliable.Can I make this recipe vegan?
Yes! Substitute the eggs with flax eggs (1 tbsp ground flaxseed + 2.5 tbsp water = one flax egg) and use maple syrup instead of honey.What should I do if my dough isn’t rising?
Ensure you’re using fresh yeast and that your warm water isn’t too hot or cold—temperature is key!Can I double this recipe?
Absolutely! Just make sure you have a large enough mixing bowl and a baking dish that can accommodate the larger batch.Why is my bread crumbly?
This could be due to overmixing or not using the right gluten-free flour. Ensure you’re measuring carefully and mixing gently.How long can I store the bread?
The bread lasts 3 days at room temperature and about a week in the fridge.Can I make mini loaves?
Yes! This batter can be divided into mini loaf pans—just keep an eye on the baking time.
Conclusion
Baking your own bread isn’t just about the final product; it’s about the experience, the memories, and the love that goes into it. The Legit Squishy-Soft White Gluten Free Bread Recipe reignites the joy of baking, bringing warmth and comfort back to the table. I can’t wait for you to try it and experience the magic for yourself! Please share your thoughts and any variations you create in the comments below. And if you love this recipe, check out my other gluten-free delights on the blog—you’re going to want to bake them all!
PrintLegit Squishy-Soft White Gluten Free Bread

A soft and fluffy gluten-free bread that mimics the taste and texture of traditional bread, perfect for sandwiches or toast.
- Prep Time: 15 minutes
- Cook Time: 50 minutes
- Total Time: 120 minutes
- Yield: 1 loaf (12 servings) 1x
- Category: Bread
- Method: Baking
- Cuisine: American
- Diet: Gluten-Free
Ingredients
- 3 cups (438g) gluten-free all-purpose flour
- 1 packet (2 ¼ tsp, 9g) instant rapid-rise yeast
- 1 tbsp (11g) psyllium husk powder (optional)
- 1 tsp baking powder
- 1 tsp salt
- 1 ½ cups (360g) warm water
- 2 eggs (room temperature)
- ¼ cup (85g) honey (or maple syrup for vegan)
- ¼ cup (55g) vegetable oil (or avocado oil)
Instructions
- In a stand mixer, combine the gluten-free flour, yeast, psyllium husk (if using), baking powder, and salt on low speed. Slowly add warm water, eggs, honey, and vegetable oil. Mix on low for 1 minute, then increase the speed to medium and beat for about 5 minutes.
- Grease a 9×4-inch loaf pan. Pour the dough into the pan and smooth the top with a spatula. Cover with greased plastic wrap and let it rise in a warm spot for about 30-45 minutes.
- Preheat your oven to 350°F (175°C). Remove the plastic wrap and bake for 40-50 minutes. Tent with foil if the top browns too quickly.
- Remove the bread from the oven and let it cool in the pan for 5 minutes. Transfer it to a cooling rack and let it cool completely for at least 2 hours before slicing.
Notes
For best results, use high-quality gluten-free flour. Store in an airtight container for up to 3 days or refrigerate for a week.
Nutrition
- Serving Size: 1 slice
- Calories: 130
- Sugar: 7g
- Sodium: 320mg
- Fat: 4g
- Saturated Fat: 1g
- Unsaturated Fat: 3g
- Trans Fat: 0g
- Carbohydrates: 23g
- Fiber: 3g
- Protein: 3g
- Cholesterol: 50mg


