
Table of Contents
Table of Contents
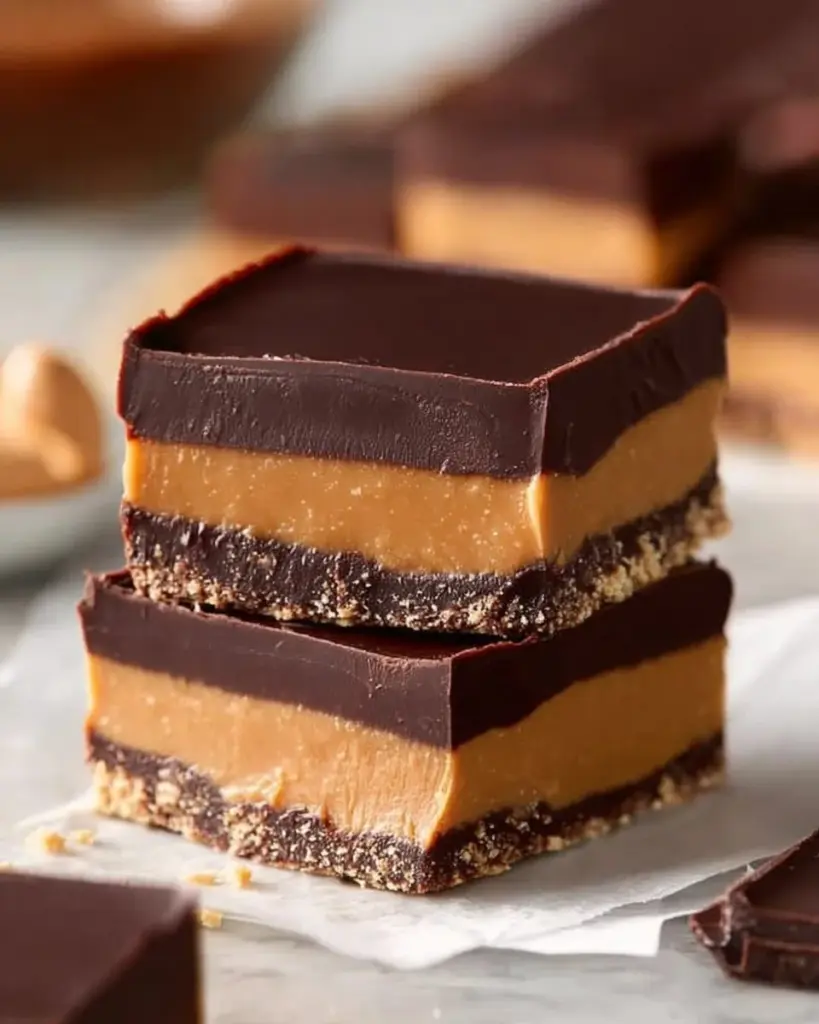
Irresistible No-Bake Peanut Butter Buckeye Bars: A Decadent Treat for Every Occasion
There’s something magical about no-bake desserts—especially when they’re as rich and delicious as No-Bake Peanut Butter Buckeye Bars. I remember the first time I made these decadent treats for a family gathering. The kitchen was filled with the warm, nutty scent of peanut butter, and I could hardly contain my excitement as my kids dashed in, drawn by the aroma. Instantly, they became a family favorite, and I can hardly make them without recalling those joyful moments.
What makes my version of No-Bake Peanut Butter Buckeye Bars stand out? It’s all about the ratio of creamy peanut butter to powdered sugar that creates a melt-in-your-mouth texture, combined with that luscious chocolate topping that adds a perfect balance of sweetness. Plus, there’s no baking involved, which means less mess and more smiles! Unlike store-bought snacks that can be overly processed, my bars allow you to experience the pure flavor of chocolate and peanut butter without the artificial additives.
In this post, I’m excited to share my tried-and-true recipe for these bars, including tips that ensure perfect results every time. Get ready for a treat that will bring joy to your loved ones and make you the star of your next gathering!
What Are No-Bake Peanut Butter Buckeye Bars?
Originating from Ohio, Buckeyes are often associated with the state’s beloved Buckeye tree and are a classic confection made of peanut butter balls dipped in chocolate. No-Bake Peanut Butter Buckeye Bars take that traditional treat and transform it into a convenient, shareable form that’s perfect for parties, picnics, or just family movie nights. These bars deliver a satisfyingly crunchy and creamy texture that balances beautifully with the smooth chocolate layer on top.
The enticing combination of peanut butter and chocolate is hard to resist. They’re rich, sweet, and oh-so-decadent—a sweet ending to any meal or a perfect snack to enjoy at any time of day! Trust me, these bars will become a staple in your home, especially when you’re craving that sweet comfort food that reminds you of childhood bliss.
Why You’ll Love This Recipe
No Baking Required: Let’s face it—who wants to heat up their kitchen, especially in the summer? With these bars, you can achieve a delicious dessert without turning on the oven.
Budget-Friendly: Compared to store-bought treats, making No-Bake Peanut Butter Buckeye Bars is a cost-effective way to indulge your sweet tooth. The ingredients are simple and affordable, allowing you to create something truly special without breaking the bank.
Customizable: You can easily modify this recipe to suit your taste. Want a bit of crunch? Add some chopped nuts! Prefer a different chocolate? Use dark chocolate or even white chocolate for a fun twist.
Quick and Simple: This recipe takes about 15 minutes to prepare, plus some chilling time. You’ll be able to whip these bars up in no time, allowing you to impress guests without spending hours in the kitchen.
Loved by All: I’ve made these bars for everything—from birthday parties to holiday gatherings—and they’ve always been a hit! I’ve lost count of how many requests I’ve had for the recipe.
Ingredients Section
- ½ cup (113g) butter, softened: Always use unsalted butter for better control over your dessert’s sweetness.
- 2 cups (480g) creamy peanut butter: Opt for high-quality peanut butter for the best flavor; I love Jif or Skippy! If you prefer natural, make sure it is stir-free.
- 3 ½ cups (420g) powdered sugar: Sift it if needed, as it will help achieve a smoother texture.
- 1 ½ teaspoons (7ml) vanilla extract: Use pure vanilla extract for that lovely aroma and flavor.
- 2 cups (360g) chocolate chips or chunks (12 ounces): Ghirardelli and Nestlé are my go-to brands for chocolate chips.
- 1 tablespoon (14g) butter or coconut oil: This helps to achieve that shiny chocolate layer.
Prep Notes: Ensure your butter is at room temperature for easy mixing.
Step-by-Step Instructions
Step 1: Make the Peanut Butter Base
In a large bowl, beat ½ cup (113g) softened butter, 2 cups (480g) creamy peanut butter, 3 ½ cups (420g) powdered sugar, and 1 ½ teaspoons (7ml) vanilla extract with an electric mixer. Mix on medium speed until the mixture is thick and slightly crumbly, about 2-3 minutes.
Step 2: Press into the Pan
Line a 9×13-inch baking pan with parchment paper, ensuring it overhangs slightly for easier removal later. Transfer the peanut butter mixture into the pan and press it firmly into an even layer. Use your hands or the back of a spatula to ensure it is packed tightly.
Step 3: Prepare the Chocolate Topping
In a microwave-safe bowl, combine 2 cups (360g) chocolate chips and 1 tablespoon (14g) butter. Microwave in 30-second intervals, stirring in between, until smooth—this will take about 1½ minutes depending on your microwave’s power.
Step 4: Assemble the Bars
Pour the melted chocolate over the peanut butter layer and quickly spread it evenly with a spatula. Ensure every corner is covered – you want that beautiful glossy sheen!
Step 5: Chill
Let the bars sit at room temperature for 30-60 minutes to set. Afterward, transfer them to the refrigerator for at least 1 hour until they are fully firm.
Step 6: Serve
Once the bars are set, lift them out of the pan using the parchment paper. Place on a cutting board, slice into squares, and serve. You’ll hear the joyful sighs as your family digs into this incredible treat!
Chef’s Tip: To ensure even cutting, warm your knife under hot water before slicing. Wipe it clean between cuts for flawless edges!
Expert Tips & Tricks
Using Clear Plastic Wrap: If your butter is too soft, chilling it briefly before mixing helps consolidate the mixture and makes it easier to work with.
Storage: These bars can be stored in an airtight container at room temperature for up to 3 days. They can also be refrigerated for up to a week or frozen for up to 2 months.
Make-Ahead: Prep these bars a day ahead; their flavors deepen overnight, making them even more delectable the next day!
Common Troubleshooting: If your chocolate topping cracks, it may have been set in the fridge too quickly, or your chocolate was overheated. Keep an eye on it while microwaving!
Add Fun Mix-Ins: Consider incorporating mini marshmallows, crushed pretzels, or even toffee bits into the peanut butter layer for added texture and flavor.
Serving Suggestions
These No-Bake Peanut Butter Buckeye Bars are delightful on their own, but they also pair beautifully with a tall glass of cold milk or a rich cup of coffee. Consider adding some sliced fruit on the side for a fresh contrast. For a festive touch, garnish with chopped nuts or sprinkle some sea salt on top right before serving. Perfect for birthday parties, holiday gatherings, or just a cozy movie night at home!
Variations & Substitutions
Feel free to mix it up with these variations:
- Flavor Combinations: Try almond butter or Nutella in place of the peanut butter for a unique spin.
- Dietary Adjustments: Use gluten-free powdered sugar for a gluten-free version or dairy-free chocolate chips for a vegan option!
- Seasonal Options: Add crushed peppermint candy during the holidays or a drizzle of caramel sauce for a summer barbecue.
Nutrition & Storage Info
- Prep Time: 15 minutes
- Chill Time: 1 hour
- Total Time: 1 hour 15 minutes
- Yield: 16 squares
- Estimated Calories: Approximately 280 calories per square
Storage Instructions: Keep these bars in an airtight container at room temperature for up to 3 days, or refrigerate for up to a week. They can also be frozen for up to 2 months.
FAQ Section
Can I use crunchy peanut butter?
Absolutely! Crunchy peanut butter will add a nice texture to your bars.What if I don’t have chocolate chips?
You can use chocolate bars cut into chunks or even chocolate melts.Can I make these bars ahead of time?
Yes! They actually taste better when allowed to sit in the fridge overnight.How do I store leftovers?
Place them in an airtight container in the fridge or at room temperature for a few days.Is it necessary to use parchment paper?
For easy lifting and cutting, parchment paper is highly recommended.Can I double this recipe?
Yes, just use a larger pan and increase the chilling time if needed.What’s the best way to cut these bars?
A hot knife works best! Run the knife under hot water, dry it, and slice through for clean edges.Can I add toppings?
Absolutely! Consider adding chopped nuts, crushed cookies, or even a drizzle of caramel or white chocolate.Why are my chocolate topping cracking?
This may be due to temperature changes; try letting them set more gradually at room temperature after pouring the chocolate.Can I use a different sweetener?
Sure! You can substitute powdered sugar with a sugar alternative for a healthier version, but results may vary.
Conclusion
In conclusion, my No-Bake Peanut Butter Buckeye Bars are not just a dessert; they’re a doorway to cherished memories and shared smiles. Their rich flavors and easy preparation make them a staple in my kitchen — and I can assure you they’ll find a special place in yours too. Whether you’re impressing guests or treating yourself, this recipe is a sure winner!
I encourage you to try this delightful concoction and let me know how it goes! Feel free to drop a comment with your experiences or any variations you’ve tried. And if you love this recipe, be sure to check out my other no-bake favorites on the blog!
Happy baking!
PrintNo-Bake Peanut Butter Buckeye Bars
Decadent no-bake bars made with creamy peanut butter and a luscious chocolate topping, perfect for every occasion.
- Prep Time: 15
- Total Time: 75
- Yield: 16 squares 1x
- Category: Dessert
- Method: No-Bake
- Cuisine: American
- Diet: Vegetarian
Ingredients
- ½ cup (113g) unsalted butter, softened
- 2 cups (480g) creamy peanut butter
- 3 ½ cups (420g) powdered sugar
- 1 ½ teaspoons (7ml) pure vanilla extract
- 2 cups (360g) chocolate chips or chunks
- 1 tablespoon (14g) butter or coconut oil
Instructions
- In a large bowl, beat the softened butter, creamy peanut butter, powdered sugar, and vanilla extract with an electric mixer until thick and slightly crumbly, about 2-3 minutes.
- Line a 9×13-inch baking pan with parchment paper and press the peanut butter mixture firmly into an even layer.
- In a microwave-safe bowl, combine chocolate chips and butter. Microwave in 30-second intervals, stirring until smooth.
- Pour the melted chocolate over the peanut butter layer and spread evenly with a spatula.
- Let the bars sit at room temperature for 30-60 minutes to set, then refrigerate for at least 1 hour until firm.
- Lift from the pan using the parchment paper, slice into squares, and serve.
Notes
Store these bars in an airtight container at room temperature for up to 3 days, or refrigerate for up to a week.
Nutrition
- Serving Size: 1 square
- Calories: 280
- Sugar: 24g
- Sodium: 150mg
- Fat: 16g
- Saturated Fat: 7g
- Unsaturated Fat: 7g
- Trans Fat: 0g
- Carbohydrates: 36g
- Fiber: 1g
- Protein: 6g
- Cholesterol: 15mg


